Administration Settings
Introduction
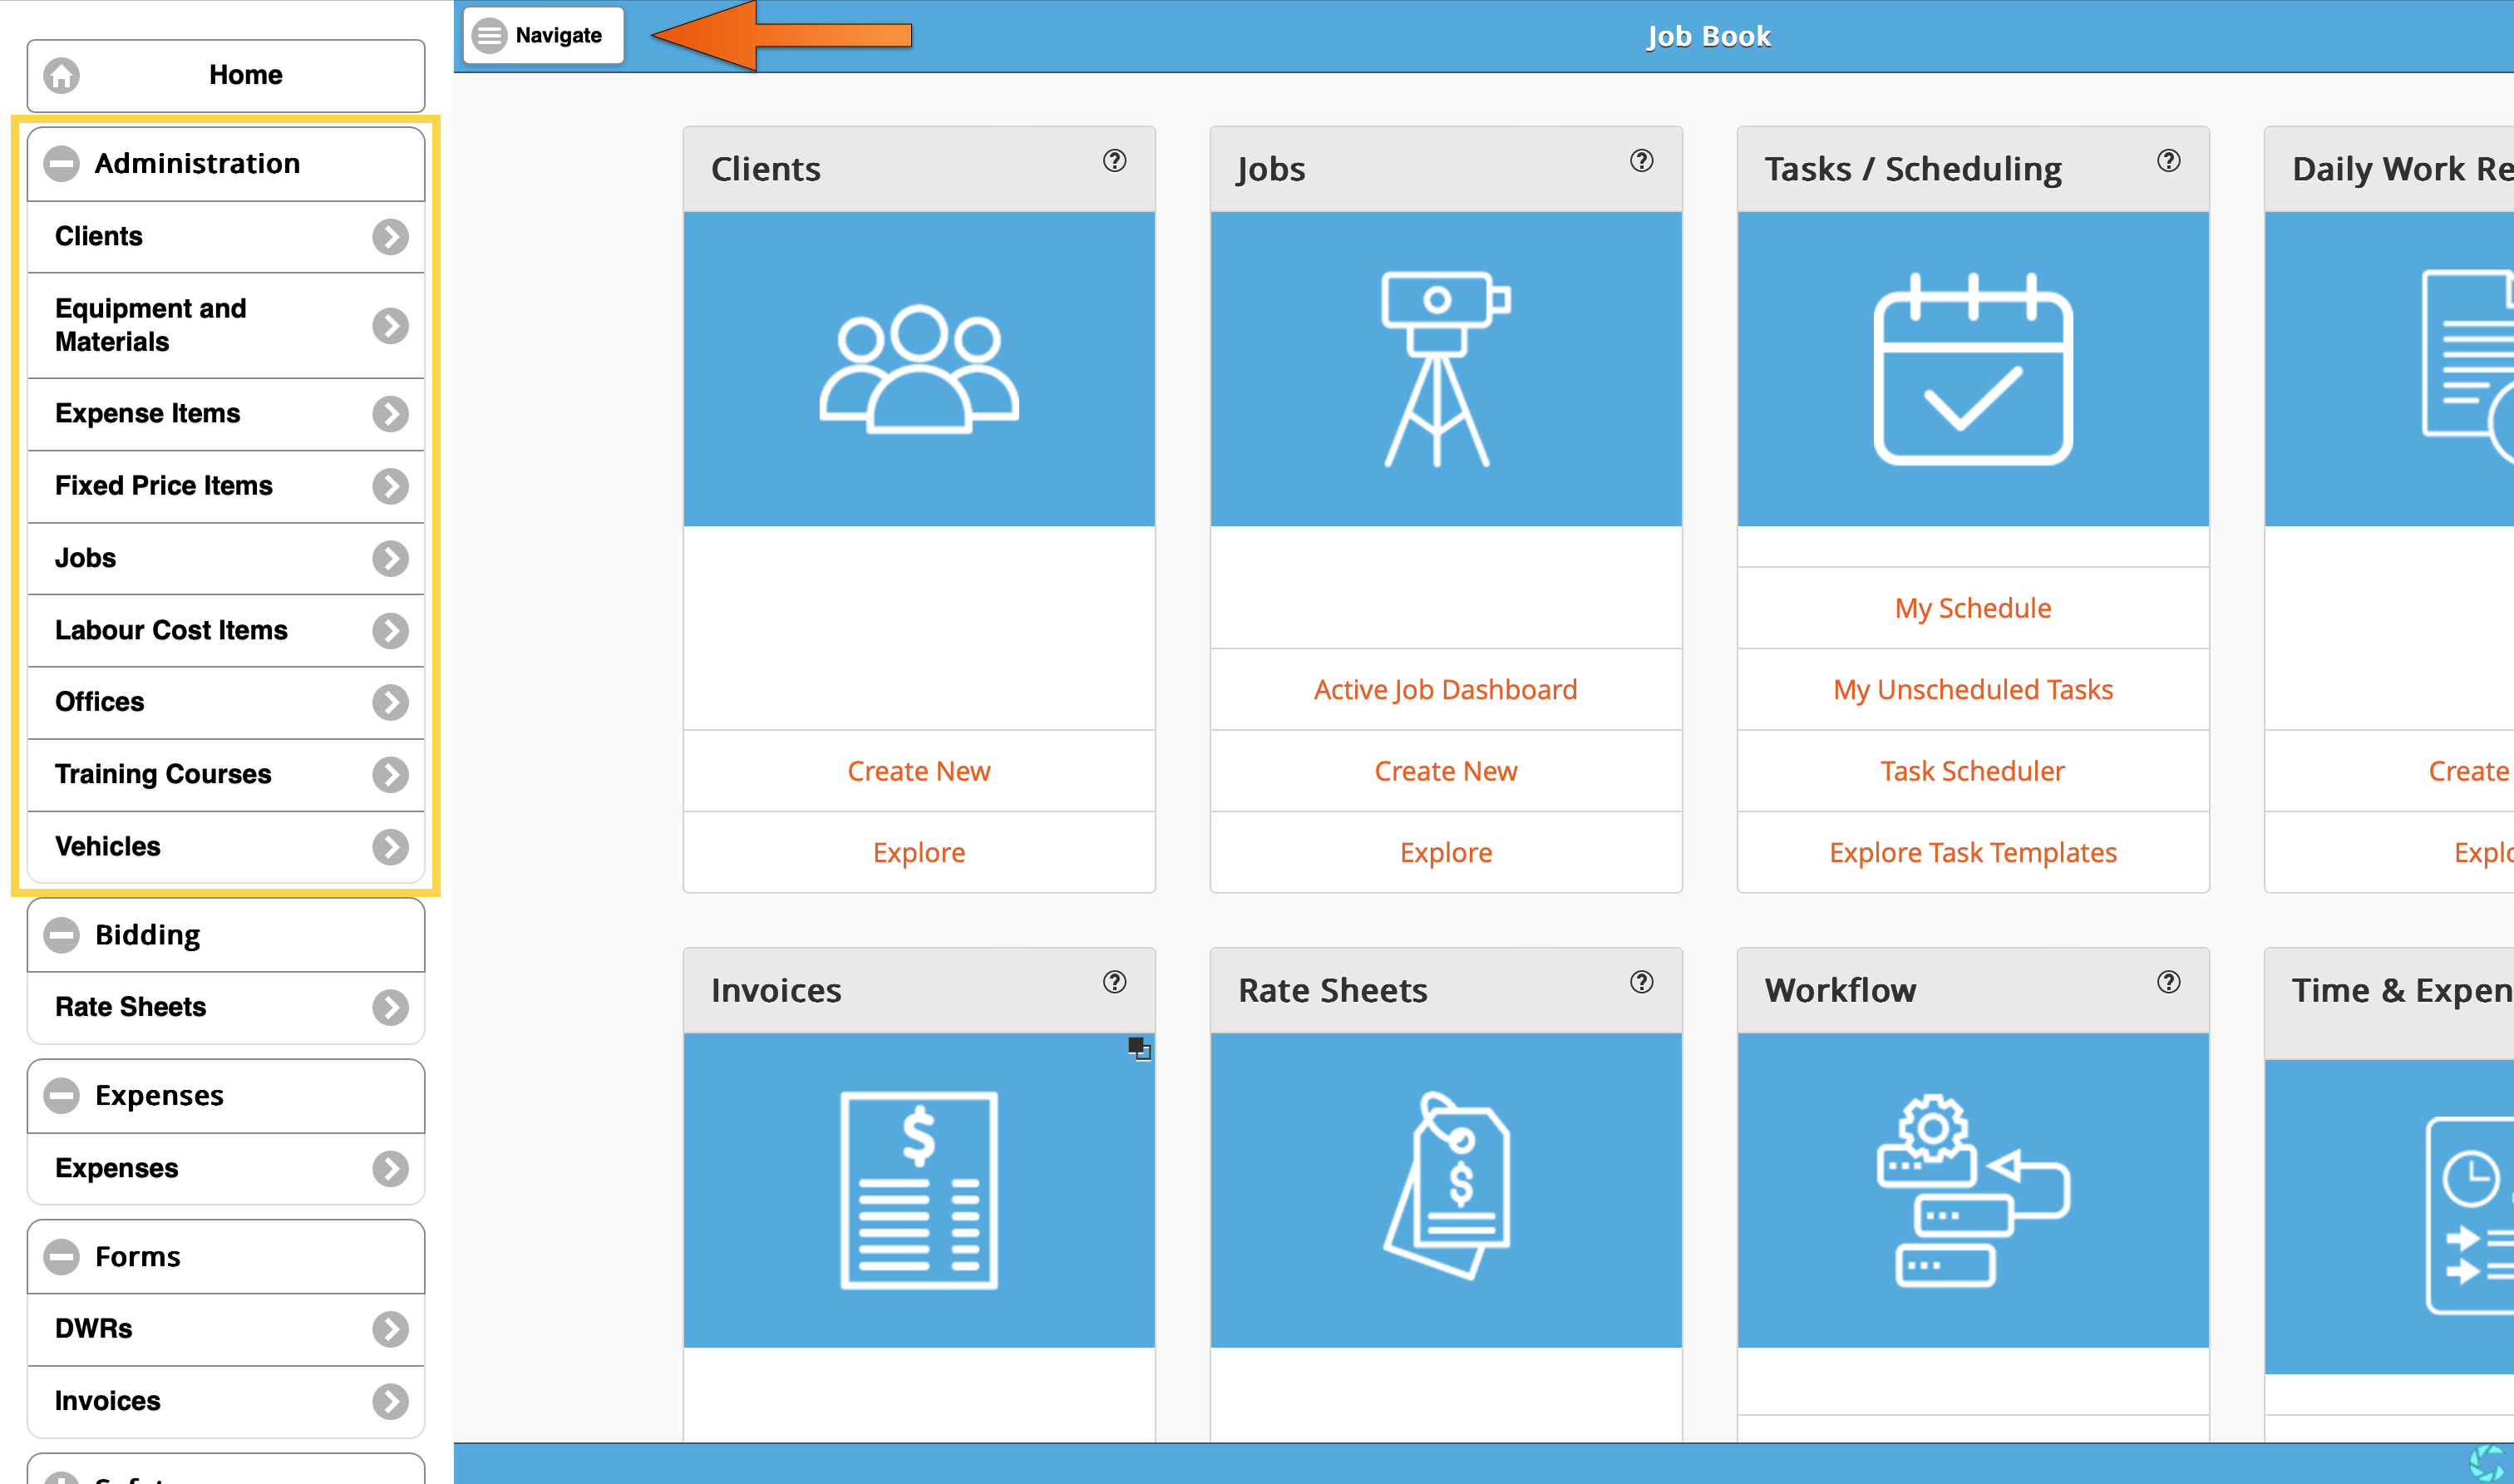
Job Book requires some configuration as part of the initial setup. This includes Offices, Labour Cost Items, Equipment and Materials, Fixed Price Items and Expense Items. The Administration toolbar is under the Navigate button that is visible on every page.
Offices
Setting up an office in Cyanic Job Book serves several important purposes, especially for businesses with multiple locations or those managing various projects across different regions. Here are some of the key reasons:
- Organizational Structure: Having defined offices within the system helps in organizing and segregating operations, staff, and resources according to location. This can simplify management and improve operational efficiency.
- Job Management: In regards to job assignments and project management, specifying an office for each job helps in tracking and managing the job based on its geographical location. It enables local teams to oversee projects effectively and ensure that resources are allocated properly.
- Customized Reporting: Offices serve as a basis for generating targeted reports. By setting up separate offices, a company can produce localized reports that provide insights into the performance, productivity, and financials of each specific office. This aids in making informed business decisions.
- Invoicing and Billing: Setting up offices in the system allows the correct office address to be shown on invoices, which is crucial for transparency and legal compliance.
Setting Up an Office
- Navigate to Office Settings:
- Click on the Navigate button located at the top left corner of the dashboard.
- Locate the Administration panel in the menu.
- Click Offices to proceed to office management.
- Create a New Office:
- Click the Create button to start setting up a new office.
- Name: Enter a name for your office. This could be ‘Head Office’ or the name of the town where the office is located. This name is used internally and will not be visible to customers.
- Address: Below the name field, you will find a multi-line text field for the address. Enter the office address here.

- Save Your Office Setup:
- After entering the office details, click Save to add the office to your system.
Line Items
Labour Cost Items, Equipment and Materials and Fixed Price Items are ways to capture costs and bill customers for work done on a job. They are the building blocks for making Rate Sheets and when added to a job, users can enter hours or quantities against those line items in their DWRs or Invoices.
Start by entering the various cost items that are commonly used in your organization. The rates you enter here will be used as defaults but can be customized from Rate Sheet to Rate Sheet, or from Job to Job.
Labour Cost Items
- Click Navigate, expand the Administration group, then click Labour Cost Items.

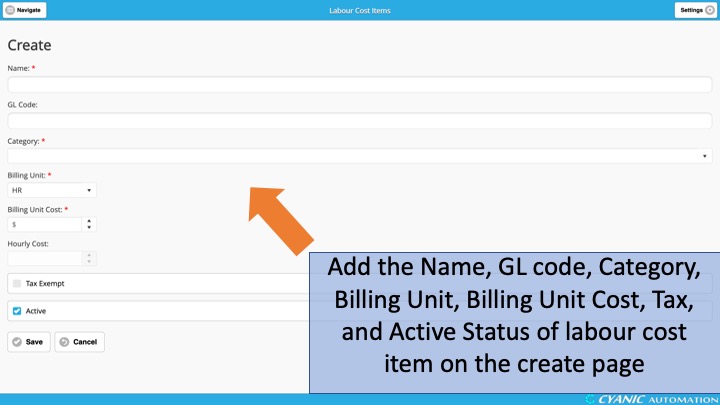
Create a new Labour Cost Item
Name
the name of the new labour cost item
GL Code
General Ledger Code is a unique shorthand code or number given to each account in the Chart of Accounts within your accounting system.
Category
A category to help organize the cost item (ex., Field Fees, Professional Fees, etc).
Billing Unit
The ‘unit of measure’ that is used for billing. HR (Hours) is the default option.
Billing Unit Cost
The rate (per unit) for this cost item.
Hourly Cost
Employees enter their time sheets in hours. When the Billing Unit is HR, the Billing Unit Cost and the Hourly Cost will be the same. If the Billing Unit is not HR, the Hourly Cost and Billing Unit Cost are used to convert hours to the unit used for billing.
Tax Exempt
If the labour cost item is free from tax at the federal, state, or local level.
Active
If Active is checked, this cost item can be selected when setting up Rate Sheets or Jobs.
Equipment and Materials
- Click Navigate, expand the Administration group and click Equipment and Materials.
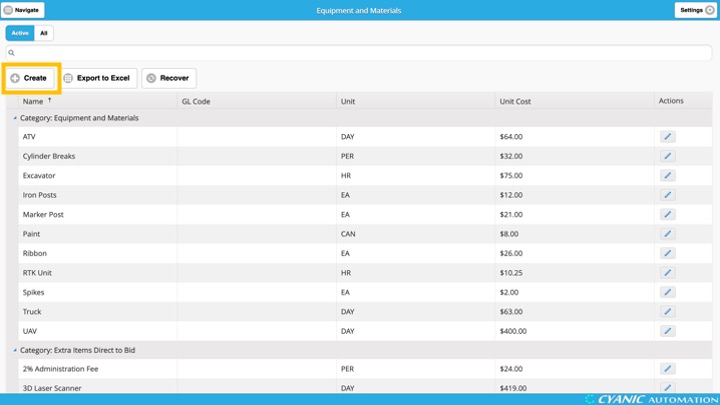
Create a new Equipment / Material item
Name
the name of the equipment or material
GL Code
General Ledger Code is a unique shorthand code or number given to each account in the Chart of Accounts within your accounting system.
Category
A category to help organize the cost item.
Unit
The ‘unit of measure’ that is used for billing.
Unit Cost
The rate (per unit) for this cost item.
Tax Exempt
If the labour cost item is free from tax at the federal, state, or local level.
Active
If Active is checked, this cost item can be selected when setting up Rate Sheets or Jobs.

Fixed Price Items
Fixed Price Items represent line items that can be added to Invoices, but are not recorded as work in a DWR.
- Click Navigate, expand the Administration group and click Fixed Price Item.
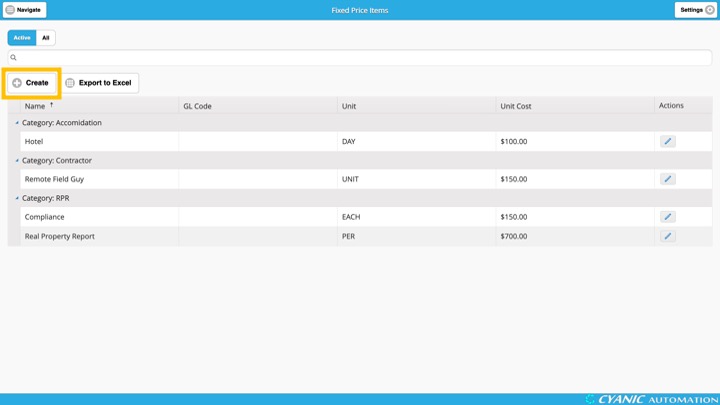
Create a new Fixed Price item
Name
the name of the fixed price item
GL Code
General Ledger Code is a unique shorthand code or number given to each account in the Chart of Accounts within your accounting system.
Category
A category to help organize the cost item.
Unit
The ‘unit of measure’ that is used for billing.
Unit Cost
The rate (per unit) for this cost item.
Tax Exempt
If the labour cost item is free from tax at the federal, state, or local level.
Active
If Active is checked, this cost item can be selected when setting up Rate Sheets or Jobs.

Expense Items
In Job Book, Users can submit expenses for reimbursement, using the Expense Items you configured.
- Click Navigate, expand the Administration group and click Expense Items.

- Create a new expense item and input the item’s name.
