

DWR Entry
How to find, read and create a Daily Work Record (DWR) in Job Book: the DWRs list and its saved views, the display view, and the create form from Date and Job through the labour, equipment and signature fields to Submitted.
Key Concepts
A Daily Work Record (DWR) replaces the paper timesheet. It keeps the day’s labour, equipment and materials tied to the job they belong to, and it is what the project manager approves and the Administrator invoices. Technicians create most DWRs each day, usually on a phone at the end of the shift; Managers and Administrators follow the same steps on the same form. If you work in the field, Site Staff DWR Entry walks through the same form from a technician’s account. What DWRs do for a surveying business is on the Time Sheets product page; this page is how to work them.
- One DWR per day per job: the Date should be the day the work happened, not the day you type it up. If you are logging multiple days, create one DWR per day per job.
- The life of a DWR: four stages, each one a checkbox on the record or a queue on the list:
- Draft: saved with the Submitted checkbox cleared. It waits in your own My Forms (Not Submitted) view and it is not yet in anyone’s approval queue.
- Submitted: you check Submitted and save. Submitted Date is filled in for you and the DWR joins the approval backlog for the job’s project manager.
- PM Approved: the job’s project manager approves the DWR, which is covered in DWR Approval.
- Invoiced: on a Time & Materials job, an approved DWR waits in the DWR Invoice Backlog until an Administrator bills it, which is covered in Invoicing a Time & Materials Job. A DWR on any other billing type stops at PM Approved.
- Saved views by role: a Technician or a Job Coordinator gets views of their own forms only; an Administrator or a Manager also gets the queues the whole company works from. They are listed under Finding a DWR.
- Locked after approval: an approved DWR is read-only to the Technician who submitted it. A Manager or an Administrator has to remove the approval first; Undoing an approval gives the steps.
- Your own hours: each labour line you enter shows up as a row on your My Time Cards report, with its job, DWR number and hours.
Performing Common Tasks
Finding a DWR
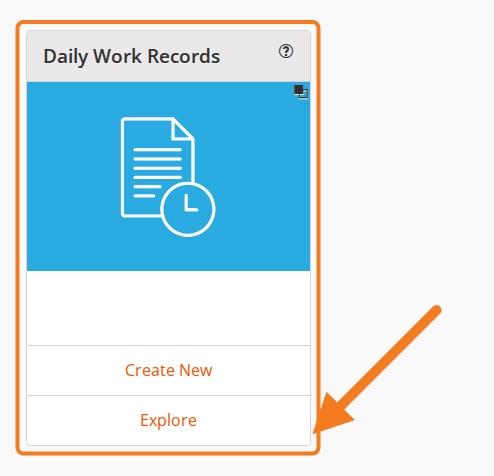
On the dashboard, in the Daily Work Records card, click Explore.
The DWRs list opens with a strip of saved views along the top, and the views you get depend on your role.
As an Administrator or a Manager the views are:
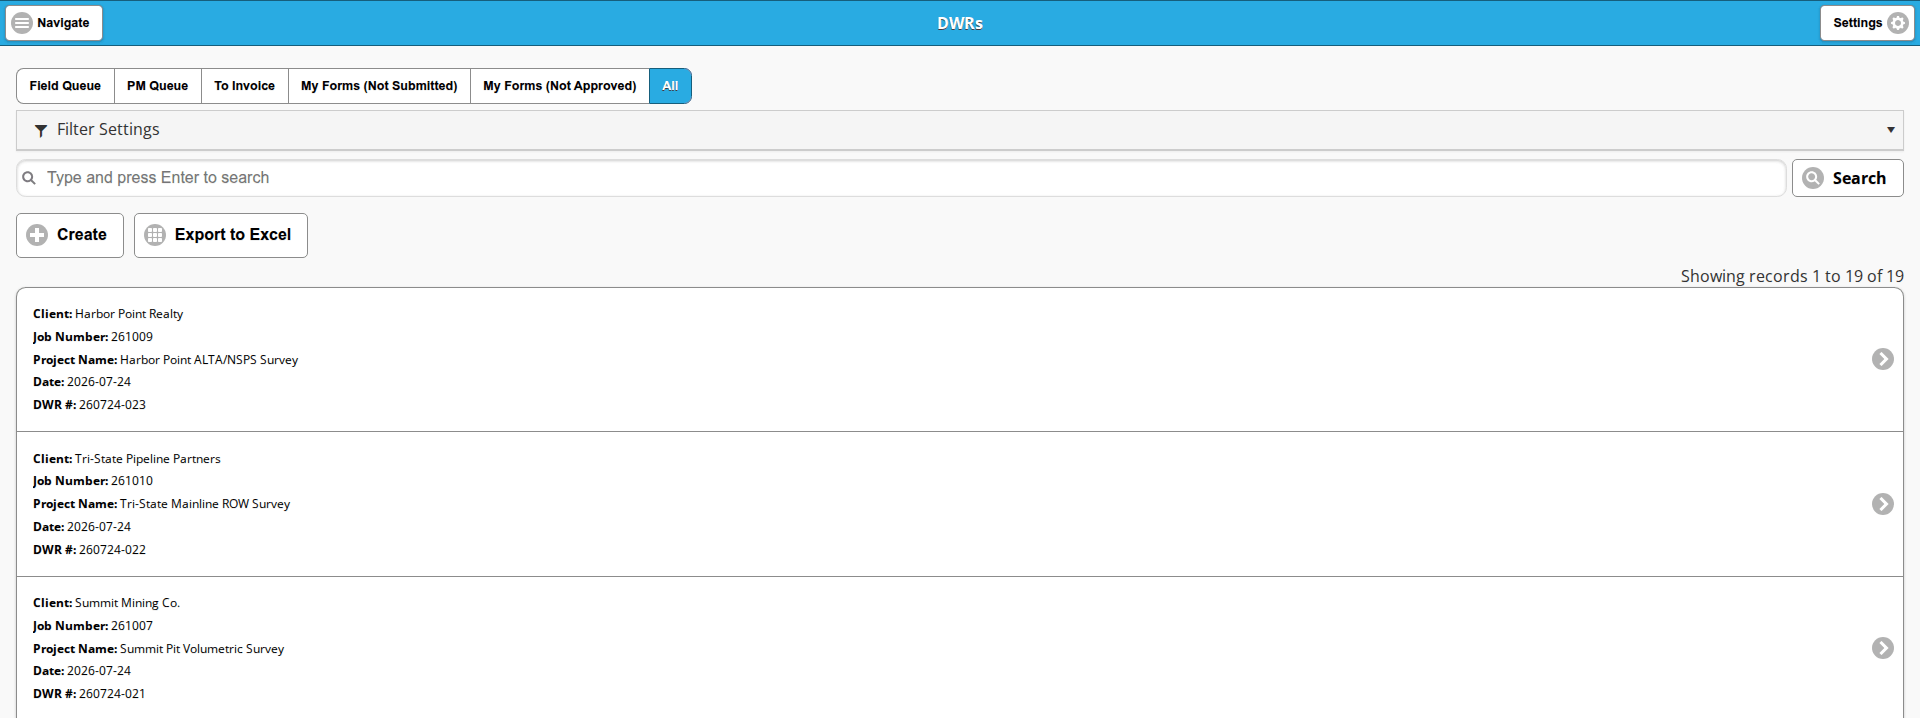
- Field Queue: every DWR that has not been submitted yet, for everyone, not just you.
- PM Queue: submitted and waiting for approval. These are the same records as the DWR Approval Backlog on the Workflow card, shown as cards instead of a grid.
- To Invoice: approved DWRs on Time & Materials jobs that have not been invoiced yet. These are the same records as the DWR Invoice Backlog. An approved DWR on any other billing type is in All only.
- My Forms (Not Submitted): your own drafts.
- My Forms (Not Approved): your own submitted DWRs that are still waiting on approval.
- All: every DWR you can see.
As a Technician or a Job Coordinator the views are My Forms (Not Submitted), My Forms (Not Approved) and All My Forms. The first two are named the same for everyone; the last is where the two lists differ, because a Technician’s All My Forms holds only their own DWRs while an Administrator’s All holds the company’s. All My Forms has no Create button, so start a DWR from one of the other two views or from the dashboard.
The rest of the screen is the same on every view:
- Filter Settings opens a panel of Office:, Project Manager: and Client: filters.
- The search box reads “Type and press Enter to search”. Type into it and press Enter, or click Search, to narrow the view.
- Create opens a blank DWR and Export to Excel downloads the view. Both buttons appear above and below the cards.
- A view with more records than fit on one page is paged, with a link to the next page beside the record counter.
- Each card reads Client:, Job Number:, Project Name:, Date: and DWR #:. Click the card to open that DWR.
Viewing a DWR
Clicking a card opens the DWR’s display view, which is read-only. The buttons above and below the record are Edit, Export to PDF, Delete and Back. Export to PDF creates a file you can print or email to a customer, and Back returns you to the list.
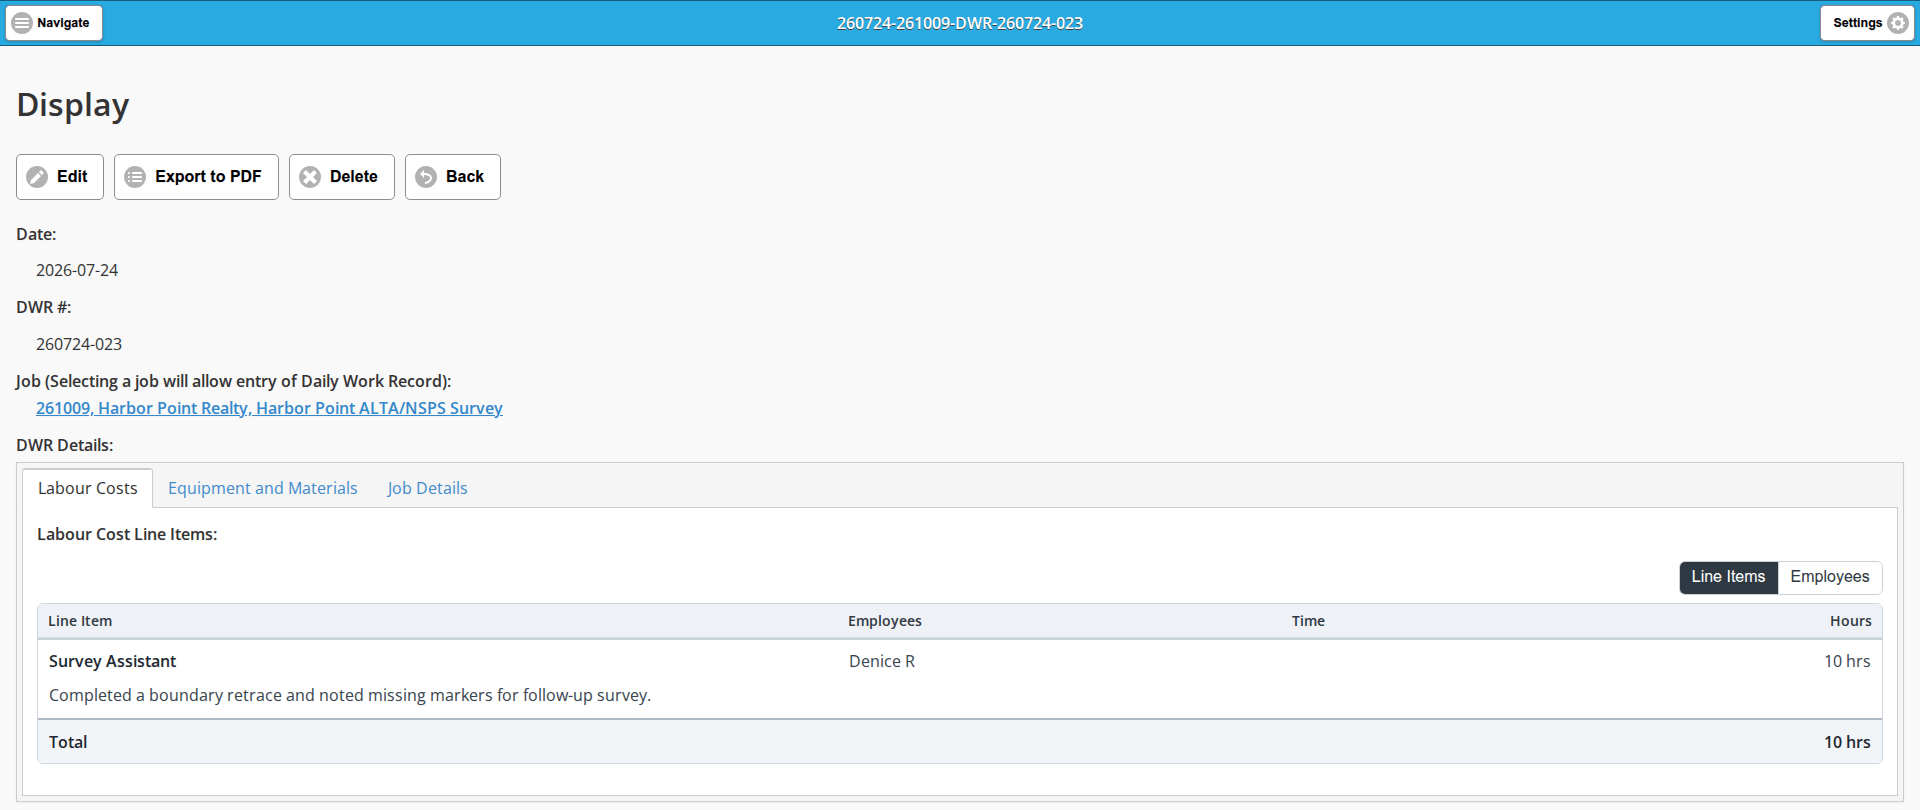
- Date: and DWR #: sit at the top. The DWR number is the system’s own and is not on the create form.
- The Job is a link that opens the job the day was booked to.
- DWR Details: carries the same tabs as the form: Labour Costs, Equipment and Materials and Job Details. On a saved DWR the Labour Costs tab is a table of Line Item, Employees, Time and Hours with a Total row. The Line Items / Employees switch above it regroups the table: Line Items shows one row per line item with the employees who worked it, and Employees puts each employee’s name on a header row with their hours, and the line items they worked underneath.
- Below the tabs, Representative Signature: has a View button when a signature has been applied, and Representative: names who signed.
- Submitted:, Submitted Date:, PM Approved:, PM Approved By: and PM Approved Date: tell you where the DWR has got to.
Creating a DWR
There are two ways in:
- On the dashboard, in the Daily Work Records card, click Create New.
- In the DWRs list, click Create.
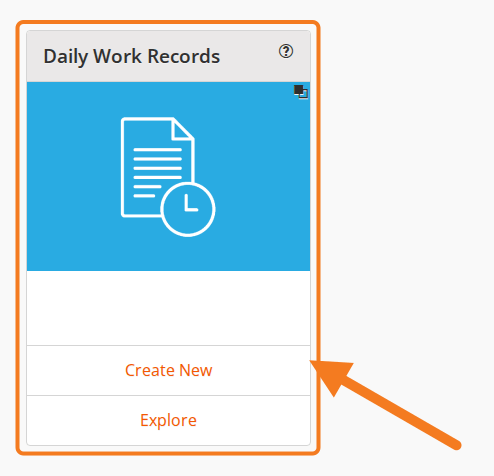
Either way you go straight into a new DWR form, titled Create. Any field with a red star is required, and the form starts with only two of them.

- Date: required. It defaults to today’s date. Set it to the day the work happened.
- Job (Selecting a job will allow entry of Daily Work Record): required. Click the field and pick the job you worked on. Until a job is chosen there is nothing else on the form.
Once you pick a job, DWR Details: appears below it with the tabs Labour Costs, Equipment and Materials and Job Details, in that order.
Filling in the Labour Costs tab
Under Labour Cost Line Items:, click Add to open a Labour Cost Line Item: row.
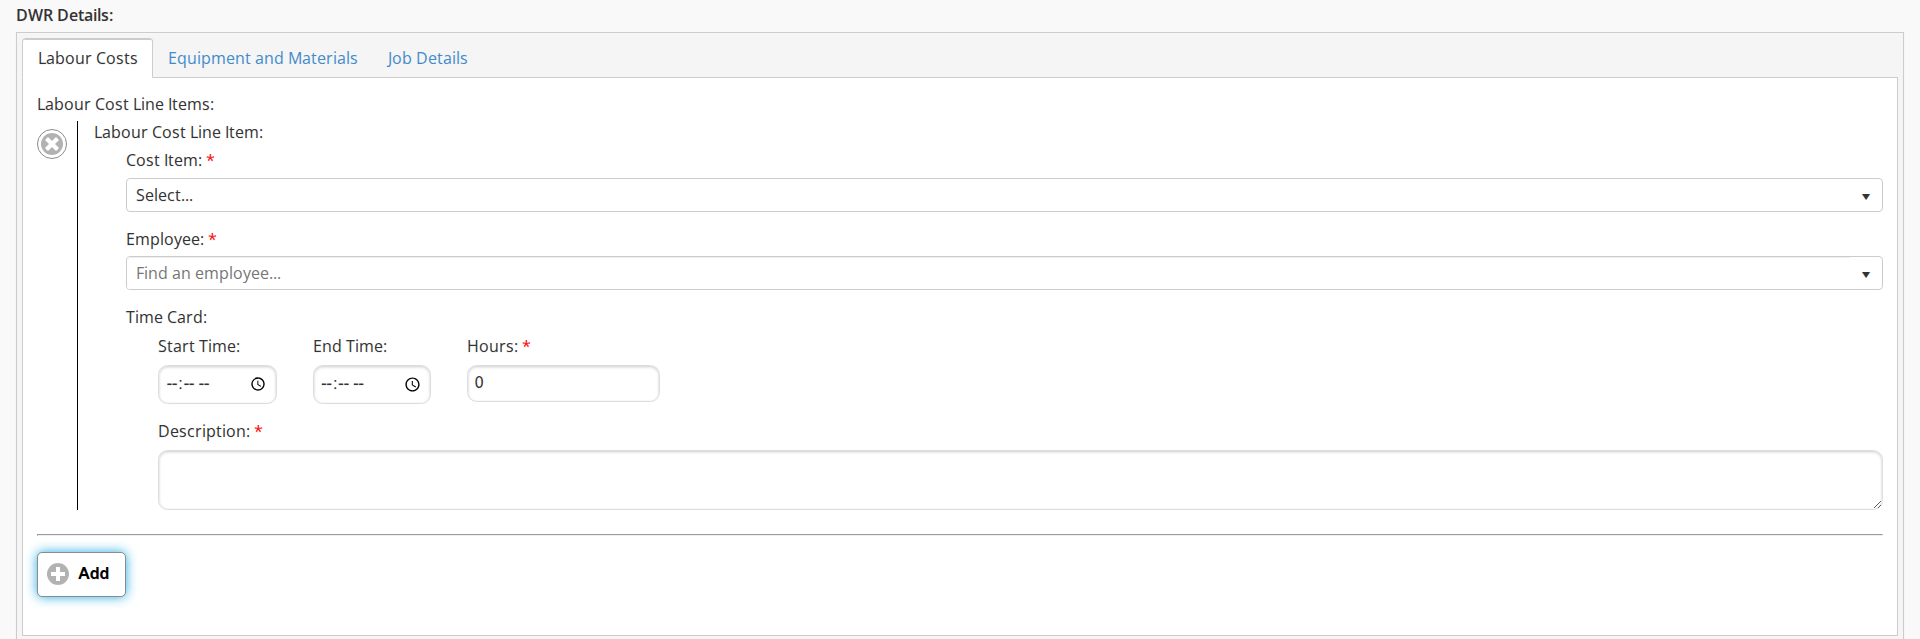
- Cost Item: required. The choices are the job’s own line items, set up when the job was created, so the list differs from job to job. Pick the labour line item that matches the work done. On a job split into phases, the list offers the line items of every phase whose dates cover the DWR’s Date:. When one phase covers it the items read as usual, such as Survey Party Chief; when two do, each item carries its phase’s prefix, such as 1000-Survey Party Chief and 2000-Survey Party Chief, so pick the one for the phase the work belongs to. See Splitting a job into phases. An item that is set up in Administration but missing from this list is not on the job, is archived on it, or belongs to a phase whose dates do not cover the DWR’s Date:; the fix is on the job’s line item grid, not here. See Adding line items.
- Employee: required. Pick the employee who did the work. Whoever creates the DWR can add rows for the rest of the crew; when you enter time for someone else, make sure the hours match what they worked.
- Time Card: a group holding Start Time:, End Time: and Hours:, of which Hours: is the required one. You can either select a start time and end time, and the hours are calculated for you, or enter the total hours worked.
- Description: required. A detailed note tells the project manager what happened that day without them having to call you.
Click Add again for each further row, whether you are breaking the shift into multiple activities or adding another crew member. The circled X beside a row removes it.
Filling in the Equipment and Materials tab
Click the Equipment and Materials tab to log any equipment you used, then click Add under Other Cost Line Items (Incidentals, Equipment, Materials):. Just like the labour line items, this section pulls line items from the job.
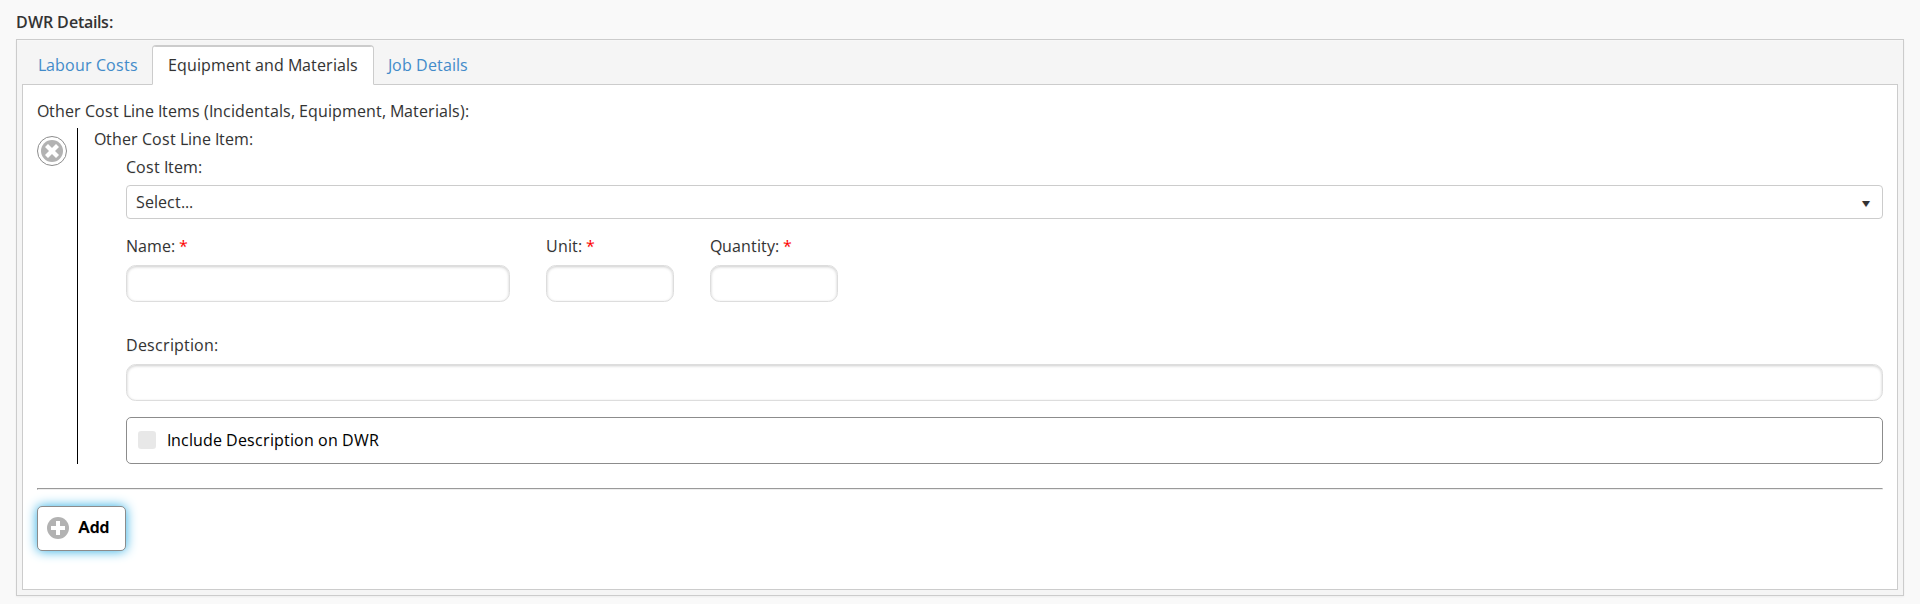
An Other Cost Line Item: row holds:
- Cost Item: the equipment, incidental or material line item from the job.
- Name: required.
- Unit: required.
- Quantity: required. For equipment this is usually the number of hours it was used; for materials it is the count.
- Description: optional here, unlike on a labour row.
- Include Description on DWR: tick it to carry that row’s description onto the DWR.
Add any consumables or materials as separate items, one row each.
Checking the Job Details tab
The third tab, Job Details, is read-only. It repeats the job’s client and billing details so you can check you are on the right job before you enter time; it does not show the job’s status or its job-site locations, and the only address on it is the client’s.
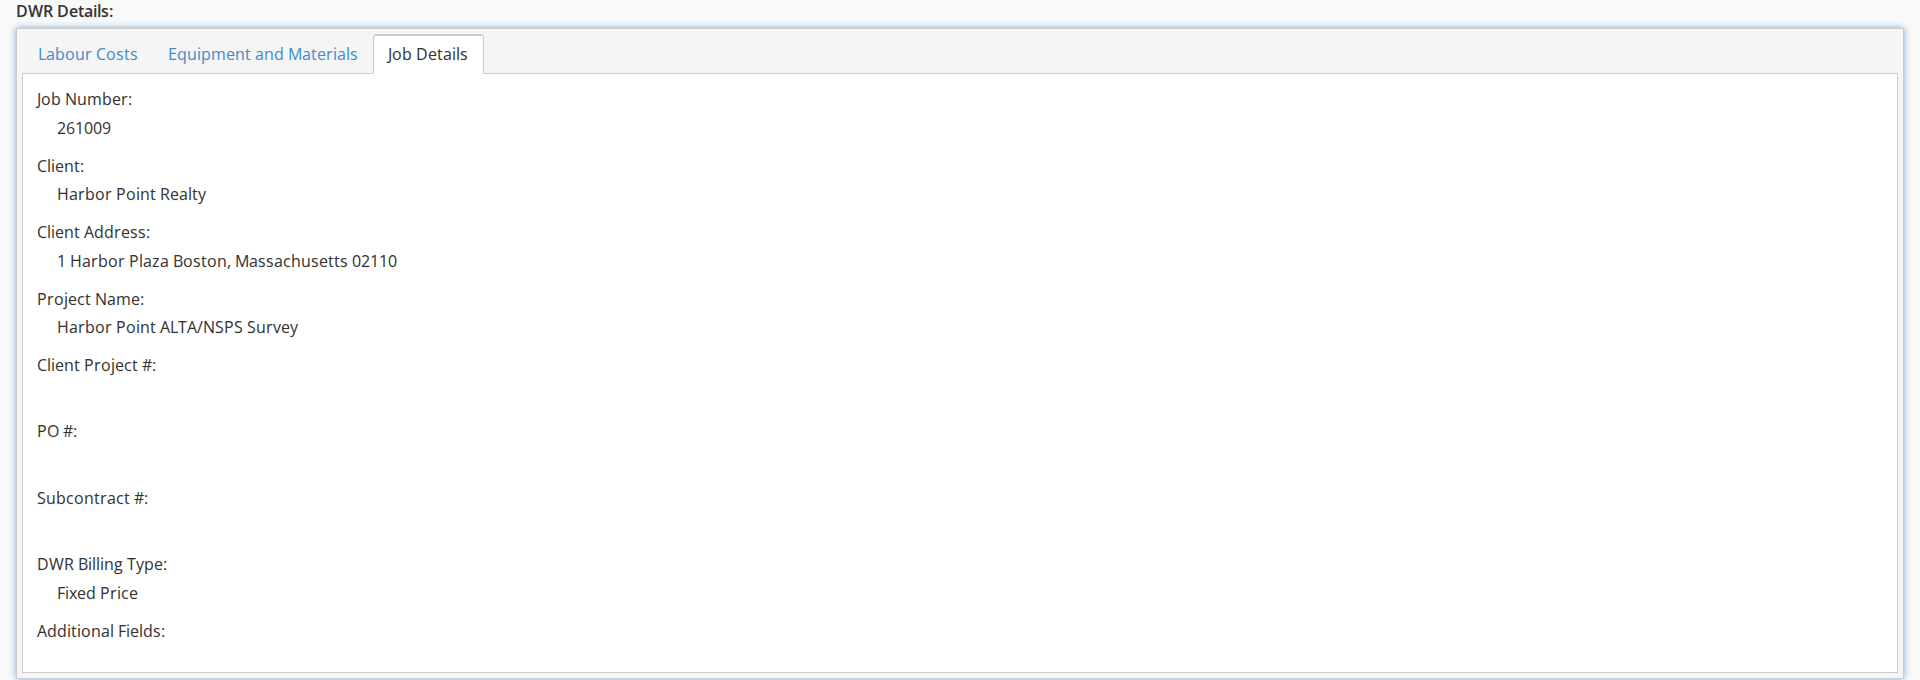
The fields are Job Number:, Client:, Client Address:, Project Name:, Client Project #:, PO #:, Subcontract #:, DWR Billing Type: and Additional Fields:. DWR Billing Type is the choice made on the job (see Job Setup), and it decides how the day’s costs are billed.
Signing and submitting
The fields below DWR Details: apply to the whole record.
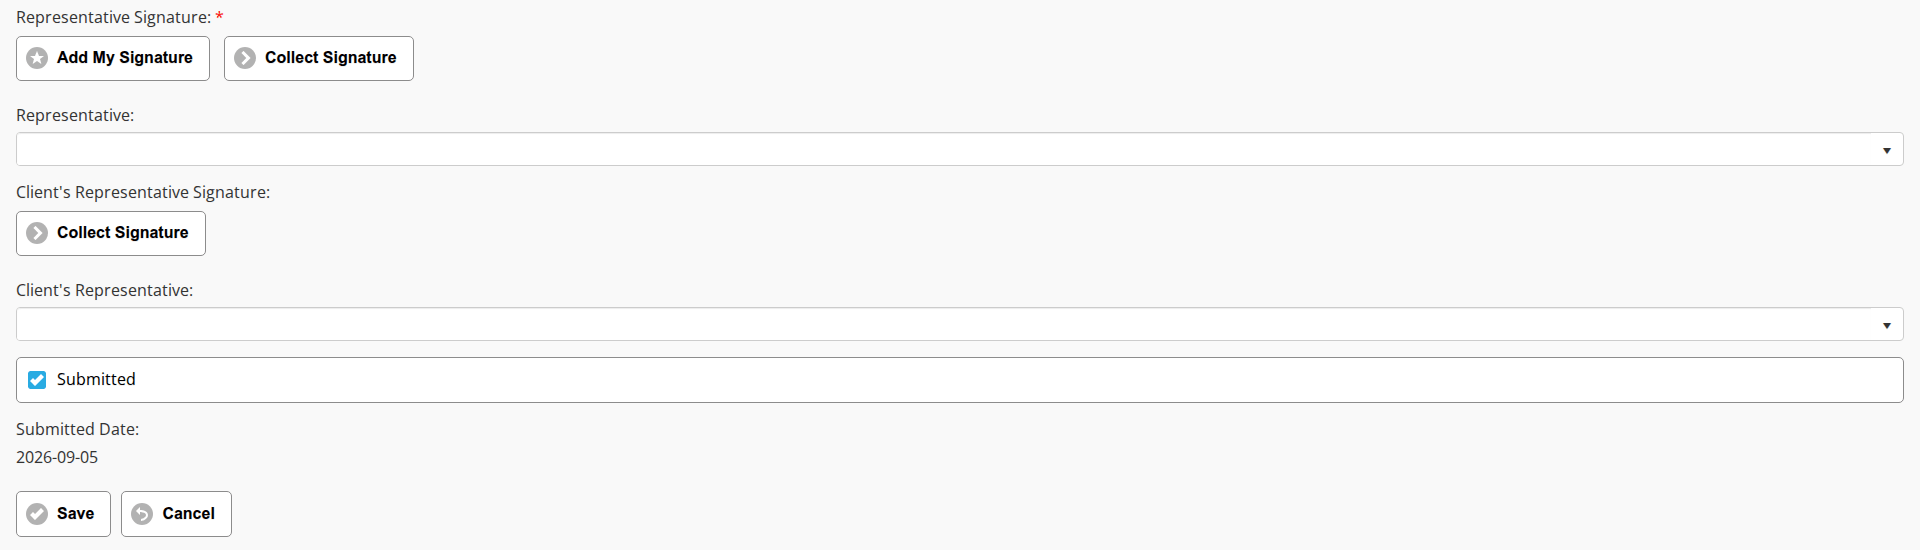
- Representative Signature: required. Because someone can create DWRs for other employees, the person creating the record needs to sign off on it. Assuming you have saved your signature on your employee profile, Add My Signature adds it and fills in the Representative: field for you. The second button, Collect Signature, takes a signature on the spot.
- Client’s Representative Signature: optional, used when technicians need to get a client’s signature on a DWR. Collect Signature takes the signature and Client’s Representative: names who gave it.
- Submitted: checked by default. If you are still working in the field and plan to come back later to add information, uncheck Submitted; the DWR then waits in your My Forms (Not Submitted) view.
- Submitted Date: filled in for you when you submit. You cannot type it.
Click Save. The system validates the DWR; click the Acknowledge and Close button on the dialog it shows, and you are taken back to the dashboard. Saving with Submitted checked adds the DWR to the approval backlog for the job’s project manager, and the DWR drops out of My Forms (Not Submitted) and into My Forms (Not Approved).
Editing a DWR after you submit it
A DWR in My Forms (Not Submitted) or My Forms (Not Approved) can still be edited: open it from one of those two views and click Edit. Opening the same record from All My Forms shows it read-only.
Once the DWR has been approved it can no longer be edited by a Technician. If you need to change an approved DWR, ask a Manager or an Administrator to unlock it by unchecking the PM Approved box.
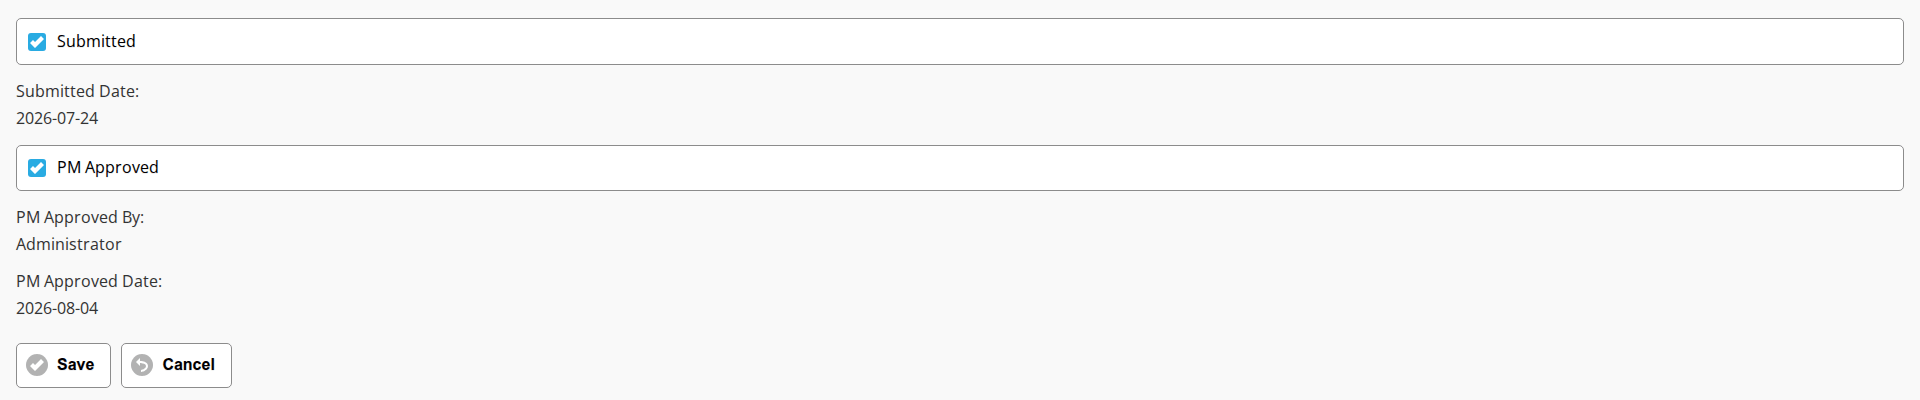
PM Approved is the approval flag, and PM Approved By: and PM Approved Date: record who approved the DWR and when. DWR Approval covers the approval itself from the approver’s side.
Best practices
- Submit DWRs every day. Waiting until the end of the week increases the risk of missing hours or losing track of equipment.
- Double-check the job and date before you submit, because correcting an approved DWR later takes time away from billing the job.
Video
Last updated