

Invoice Process Backlog
How an Administrator sends invoices from Job Book to QuickBooks Online, QuickBooks Desktop, Sage 50, Sage 300, Xero or Deltek, and marks them processed.
Key Concepts
The Invoice Process Backlog is where invoices are synced or exported to your accounting system and marked processed; it is the last check before they leave Job Book.
- Two names, one screen: the link on the dashboard reads Invoice Process Backlog, and the screen it opens is titled Invoice Processing Backlog. Both names mean this one screen.
- The same invoices as the Admin Queue: this grid holds exactly what the Admin Queue saved view of the Invoices list holds, as a grid you can tick, sync or export, and process in bulk instead of one card at a time. See Opening the Invoices list.
- Processing here equals ticking Processed: processing a batch does the same thing as checking the Processed checkbox on each of those invoices by hand. See Moving an invoice to the next stage.
- Whose screen it is: a Manager can sync, export and process invoices here as well as an Administrator, but the intended split is that the job’s project manager signs an invoice off and an Administrator does the rest: the sync or export, and the processing.
- Not the same as Invoice Export: Export Selected Invoices here produces the file your accounting system imports. Invoice Export, on the Invoices card, is a report of invoice lines over a date range; see Exporting invoice lines by date range.
Performing Common Tasks
Opening the backlog
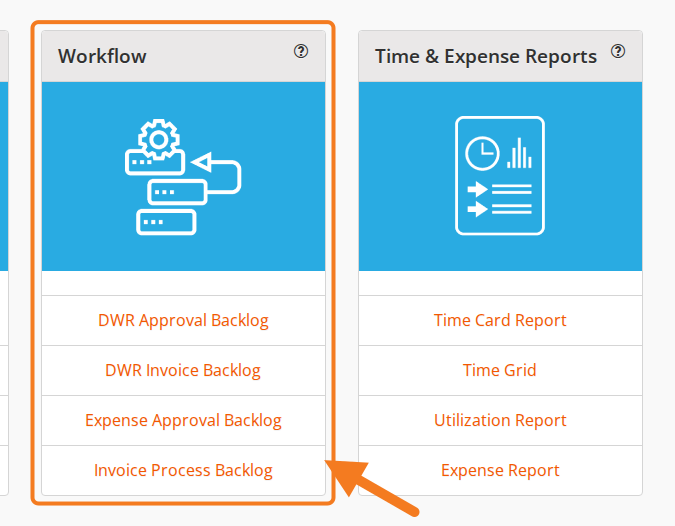
On the dashboard, in the Workflow card, click Invoice Process Backlog.
Reading the table
The grid is the one the backlogs share: ticking rows, sorting, grouping, the funnel filter, expanding rows and undo are all described on Backlog Grids.
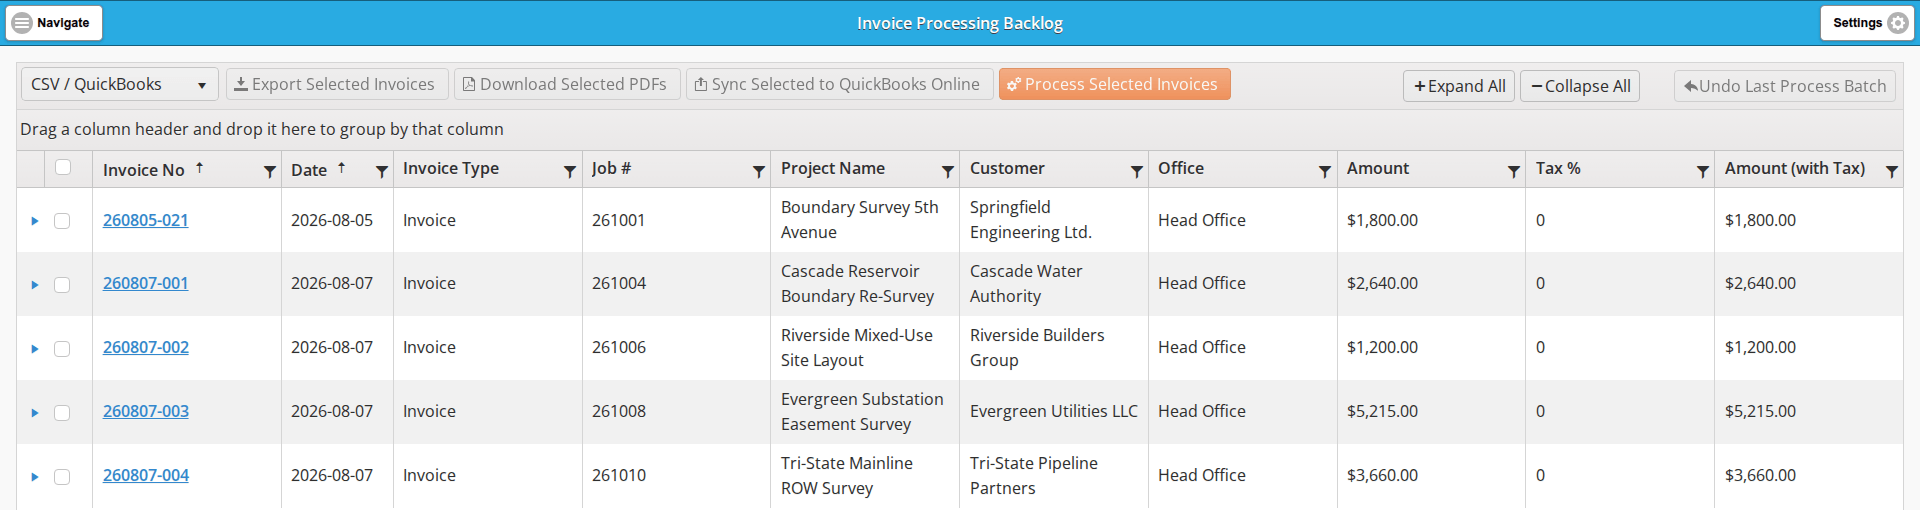
The toolbar runs, left to right: the format dropdown, then Export Selected Invoices, Download Selected PDFs, the sync button and Process Selected Invoices. The dropdown and the sync button are set up for your accounting system when Cyanic sets up your company; the company on this screen is on QuickBooks Online, so the dropdown opens on CSV / QuickBooks and the button reads Sync Selected to QuickBooks Online. At the top right are Expand All, Collapse All and Undo Last Process Batch. This backlog has four batch buttons rather than one: ticking an invoice lights the export, download and sync buttons as well as Process Selected Invoices.
The columns are the ones accounting needs: Invoice No, Date, Invoice Type, Job #, Project Name, Customer, Office, Amount, Tax % and Amount (with Tax).
- Invoice No opens the invoice.
- The client is labelled Customer on this screen, where the rest of Job Book says Client.
Expanding an invoice
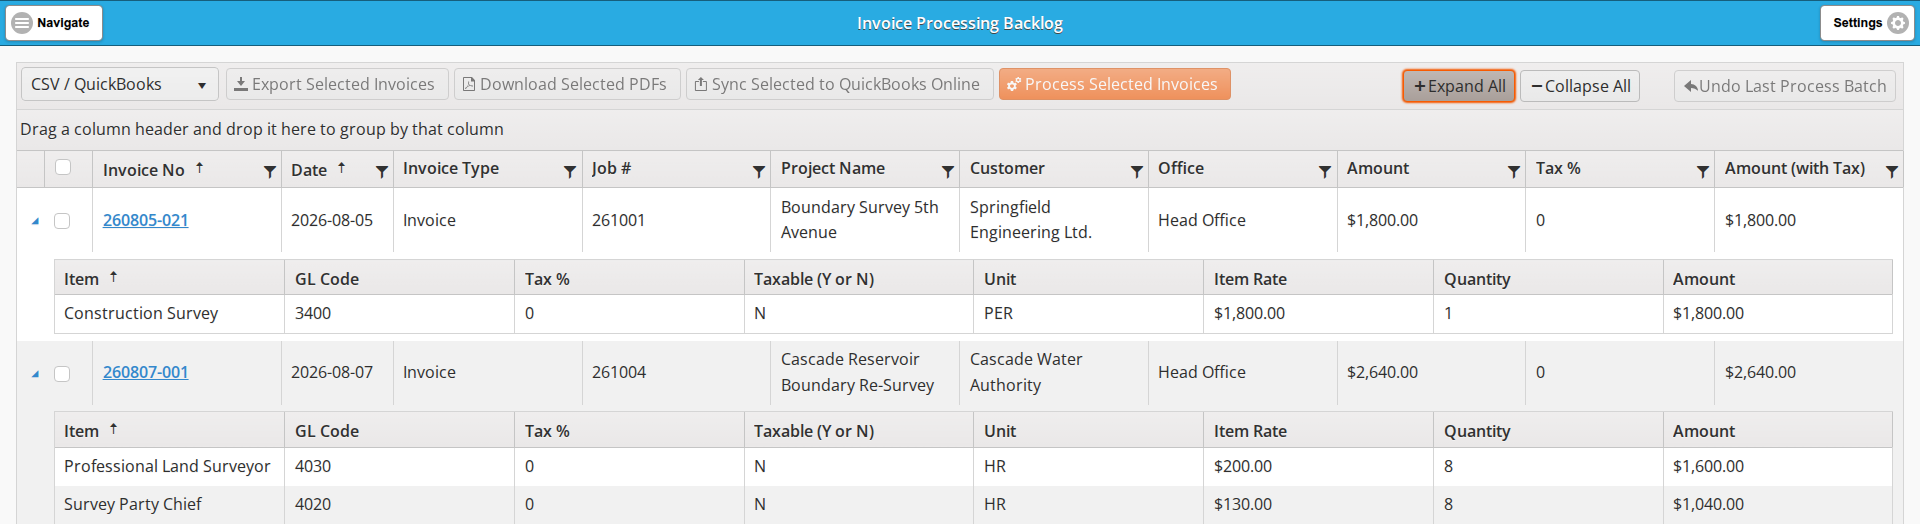
The expanded panel is aimed at accounting too: Item, GL Code, Tax %, Taxable (Y or N), Unit, Item Rate, Quantity and Amount. GL Code is the line item’s Accounting Code, set on the cost item under Administration Settings.
Syncing invoices to QuickBooks, Sage, Xero or Deltek
Job Book syncs invoices to QuickBooks Online, QuickBooks Desktop, Sage 50, Sage 300, Xero, Deltek and other accounting systems. Cyanic connects your company to its accounting system when Job Book is set up, and the sync button is named for that system; on this screen it reads Sync Selected to QuickBooks Online. Tick the invoices and click it, and they go straight into your accounting system, with nothing to download and import. Export Selected Invoices, below, is for a system that takes a file instead. Ask Cyanic about connecting the accounting system you use.
Exporting an invoice file for your accounting system
- Tick the invoices you want to send to accounting.
- Choose the format in the dropdown at the far left of the toolbar. The list depends on how your company was set up; on this screen it offers CSV / QuickBooks, QuickBooks Desktop and Sage.
- Click Export Selected Invoices. The file downloads in your browser.

The file is in the format you chose; CSV / QuickBooks is the generic one for a system without an entry of its own. The import itself happens in your accounting system. Check its totals against Amount (with Tax) here once it is done.
Downloading the invoice PDFs
To download the invoice PDFs in bulk, tick the invoices you want, then click Download Selected PDFs. A ZIP file downloads with one PDF per invoice, each named by its date, job number and invoice number.
Processing a batch
Once the invoices have reached your accounting system, by sync or by file, you can mark them processed in bulk:
- Tick the invoices you have finished with and click Process Selected Invoices.
- The confirmation names the number of invoices. Click OK.
Those invoices disappear from the backlog immediately and move to the Processed view of the Invoices list.
Processing changes the invoice’s stage and nothing else: the job’s Invoice $ on the Active Job Dashboard counted the invoice from the moment it was saved.
The accounting reference number is not part of the batch either. An Administrator types it into ACCT. PROGRAM REF: on each invoice, whether the invoice was synced or exported, so it can be matched to its entry in your accounting system.
Undoing the last batch
Undo Last Process Batch brings back the invoices from the batch you just processed.
If the undo button is greyed, open the invoice from the Processed view of the Invoices list, click Edit, untick Processed and save. The invoice returns to the Admin Queue and to this backlog.
Best practices
- Clear the Admin Queue on a regular schedule, so accounting receives predictable batches.
- Before sending a batch to accounting, spot-check that the expenses on those invoices are marked processed. Expenses are marked processed from the invoice itself; see The Expenses table.
- Use the grouping bar and the filters to stage batches by client or office, rather than sending everything at once.
Video
 Coming soon
 Last updated