

Invoicing a Fixed Price Job
How to create an invoice for a fixed price job in Job Book: finding the job on the Active Job Dashboard, opening a new invoice, adding a Fixed Price line item, and where the invoice goes next.
How a fixed price invoice is built
A fixed price invoice, sometimes called a lump sum invoice, charges the client a fixed amount for the service. A job billed for the time and materials actually used is covered on Invoicing a Time & Materials Job. Which one a job takes is set on the job itself as its DWR Billing Type; see Job Setup.
- Nothing is collected for you: a Time & Materials job is billed from its approved Daily Work Records (DWRs), which Job Book gathers into the DWR Invoice Backlog. A fixed price job has nothing to import, so an invoice started from the Invoices card is blank and you enter the charge yourself; started from the Active Job Dashboard, it opens with the job’s PO Amount already in Total:.
- Where the charge goes: on the Fixed Price tab of the invoice, as a fixed price line item. You can also type a bottom-line figure straight into Total:.
- What happens next: the saved invoice lands in the PM Queue, from where it lives the same life as any other invoice. That life, the Invoices list and the invoice form are all on Invoices.
Invoice Creation
Finding the job on the Active Job Dashboard
On the dashboard, in the Jobs card, click Active Job Dashboard. Two columns help you find the job you want to bill: Billing Type reads Fixed Price on the jobs this page is about, and Status reads Ready to Invoice on a job that is ready to be billed. Sort or filter on either one to bring the job to the top.
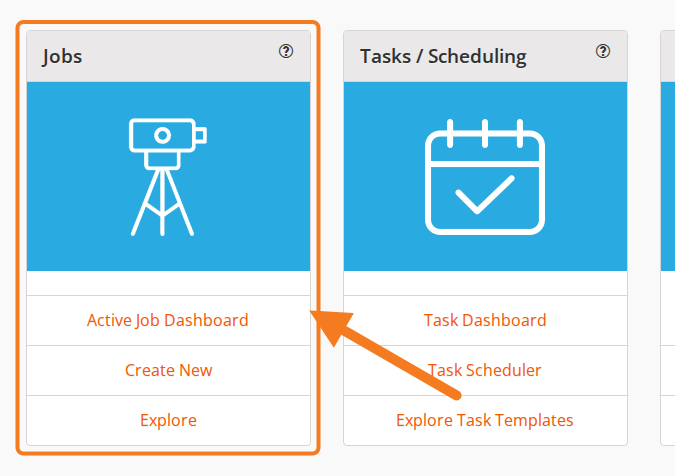

The rest of the grid (the columns, the money totals and the saved templates) is on Active Job Dashboard.
Opening a new invoice
There are two ways in from the dashboard:
- On the Active Job Dashboard, find the job in the grid and click the Create Invoice dollar icon in its Actions column. On a fixed price job it opens a new invoice for that job with the job’s PO Amount already in Total:. The buttons in that column are described in Job Reports.
- On the dashboard, in the Invoices card, click Create New, and select the job. This way the invoice starts empty.
Both routes end on the same invoice form, with the job on it.
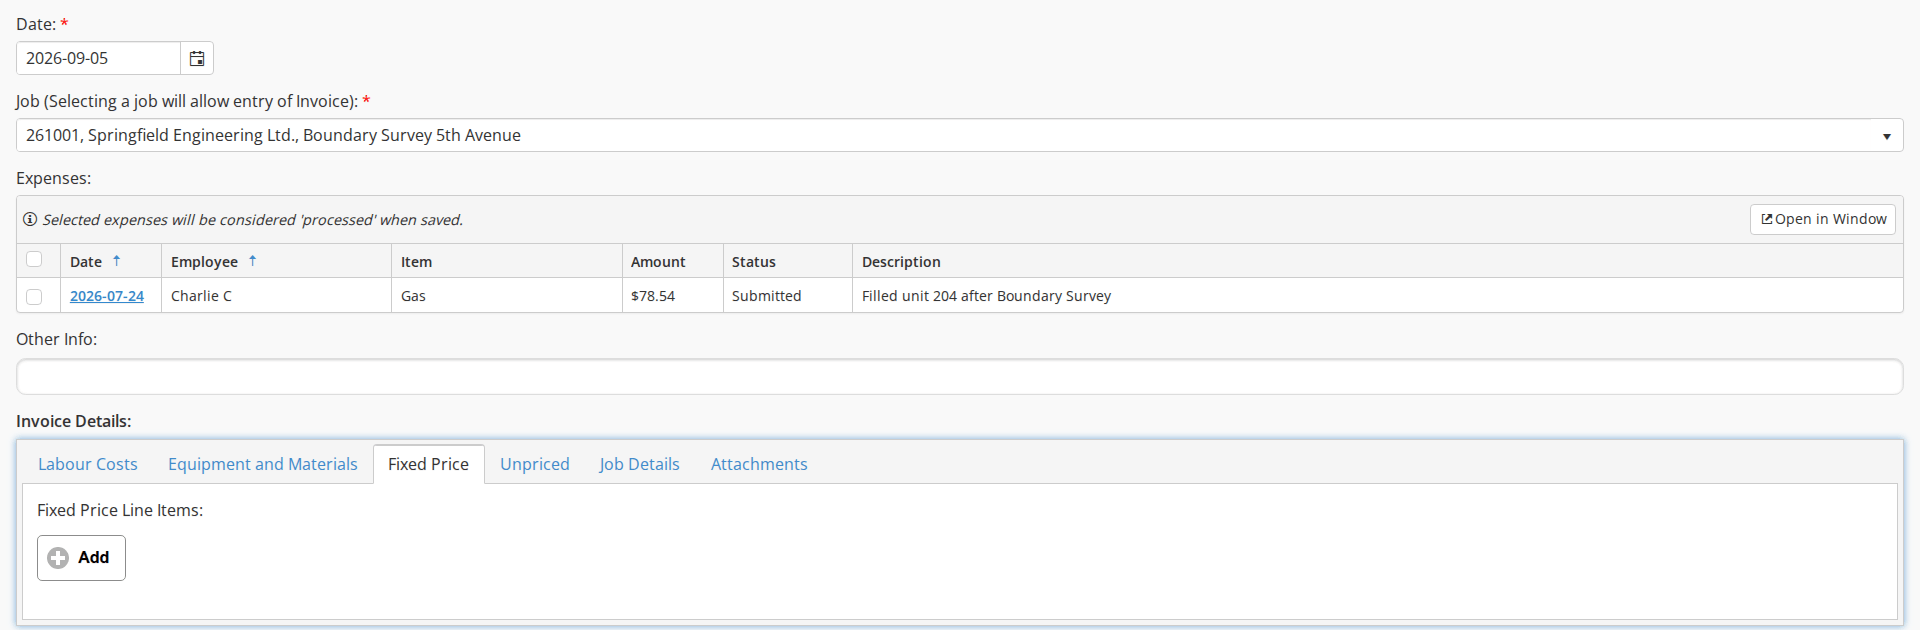
If the job has expenses of its own they are listed in the Expenses: table on the form, and ticking a row before you save marks that expense processed; see The Expenses table. Every other field is described under The invoice form.
Adding the fixed price charge
The charge goes on the Fixed Price tab of the invoice, which is the tab the form opens on for a fixed price job. An invoice started from the Active Job Dashboard already carries the job’s PO Amount in Total:; one started from the Invoices card has nothing yet. To itemise the charge:
- Under Fixed Price Line Items:, click Add to insert a row.
- Pick the Cost Item from the dropdown. The list is the job’s fixed price line items, so the item and its price are already there if the job was set up with them.
- Set the Unit Cost and the Quantity if the defaults are not right, and type a description for the item.
- Repeat for each charge on this invoice.
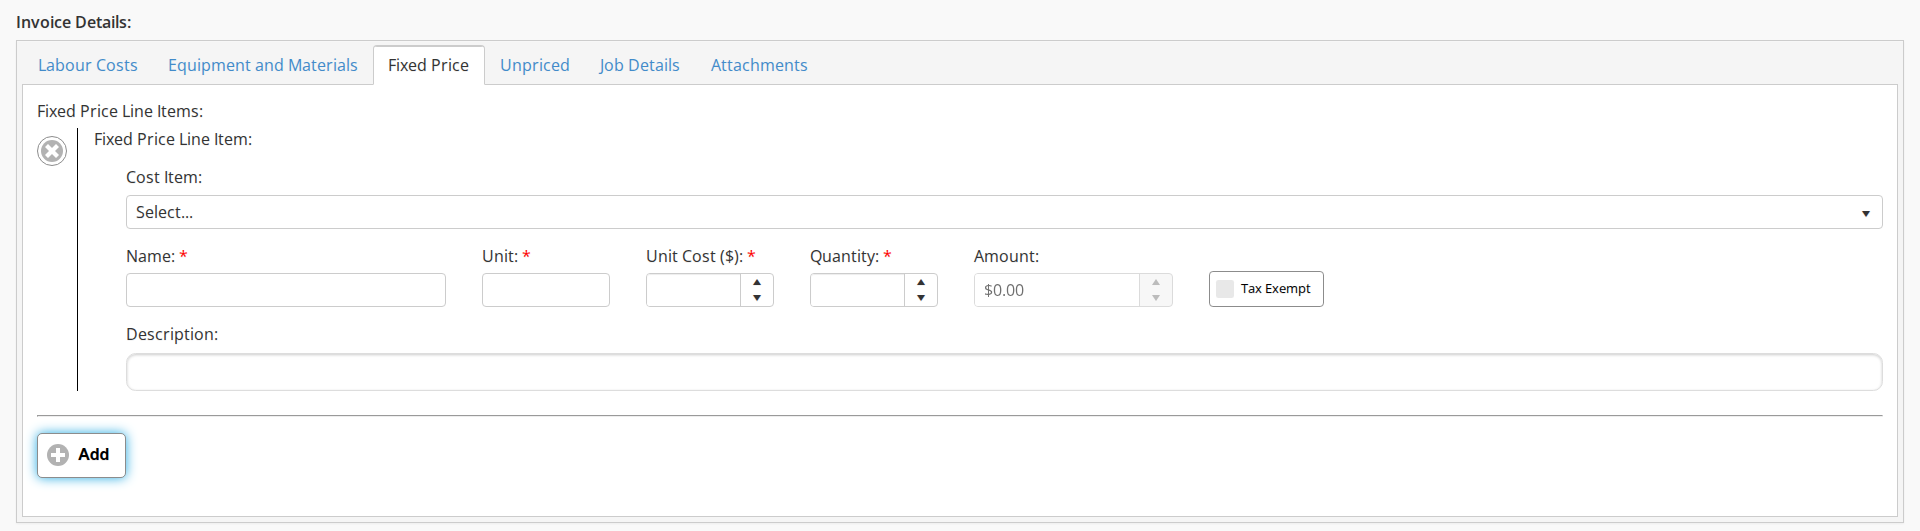
The row’s fields, and the other tabs, are described under The Fixed Price tab. If you would rather bill a single bottom-line figure, leave the tabs alone and enter the amount in Total: instead.
Saving the invoice
Scroll down and click Save to push the invoice into the invoice workflow. Job Book assigns the Invoice Number: as it saves. Two things change:
- The Active Job Dashboard’s Invoice $ column now shows the invoice amount for that job.
- The invoice appears in the PM Queue on the Invoices list.
Where the new invoice goes
The new invoice waits in the PM Queue for the job’s project manager to review it and add a Representative Signature. From there it follows the same path as every invoice, on Moving an invoice to the next stage.
Video
 Coming soon
 Last updated