Leave Request Report
Key Concepts
The Leave Request Report provides a comprehensive, company-wide view of all leave requests. It is a powerful tool for managers and administrators to track employee leave, monitor trends, and ensure that staffing levels are adequate. Unlike views that only show your own requests, this report shows all leave requests in the system, giving you a complete picture of employee availability.
Performing Common Tasks
Accessing the Report
The Leave Request Report is available to users with Administrator or Manager permissions.
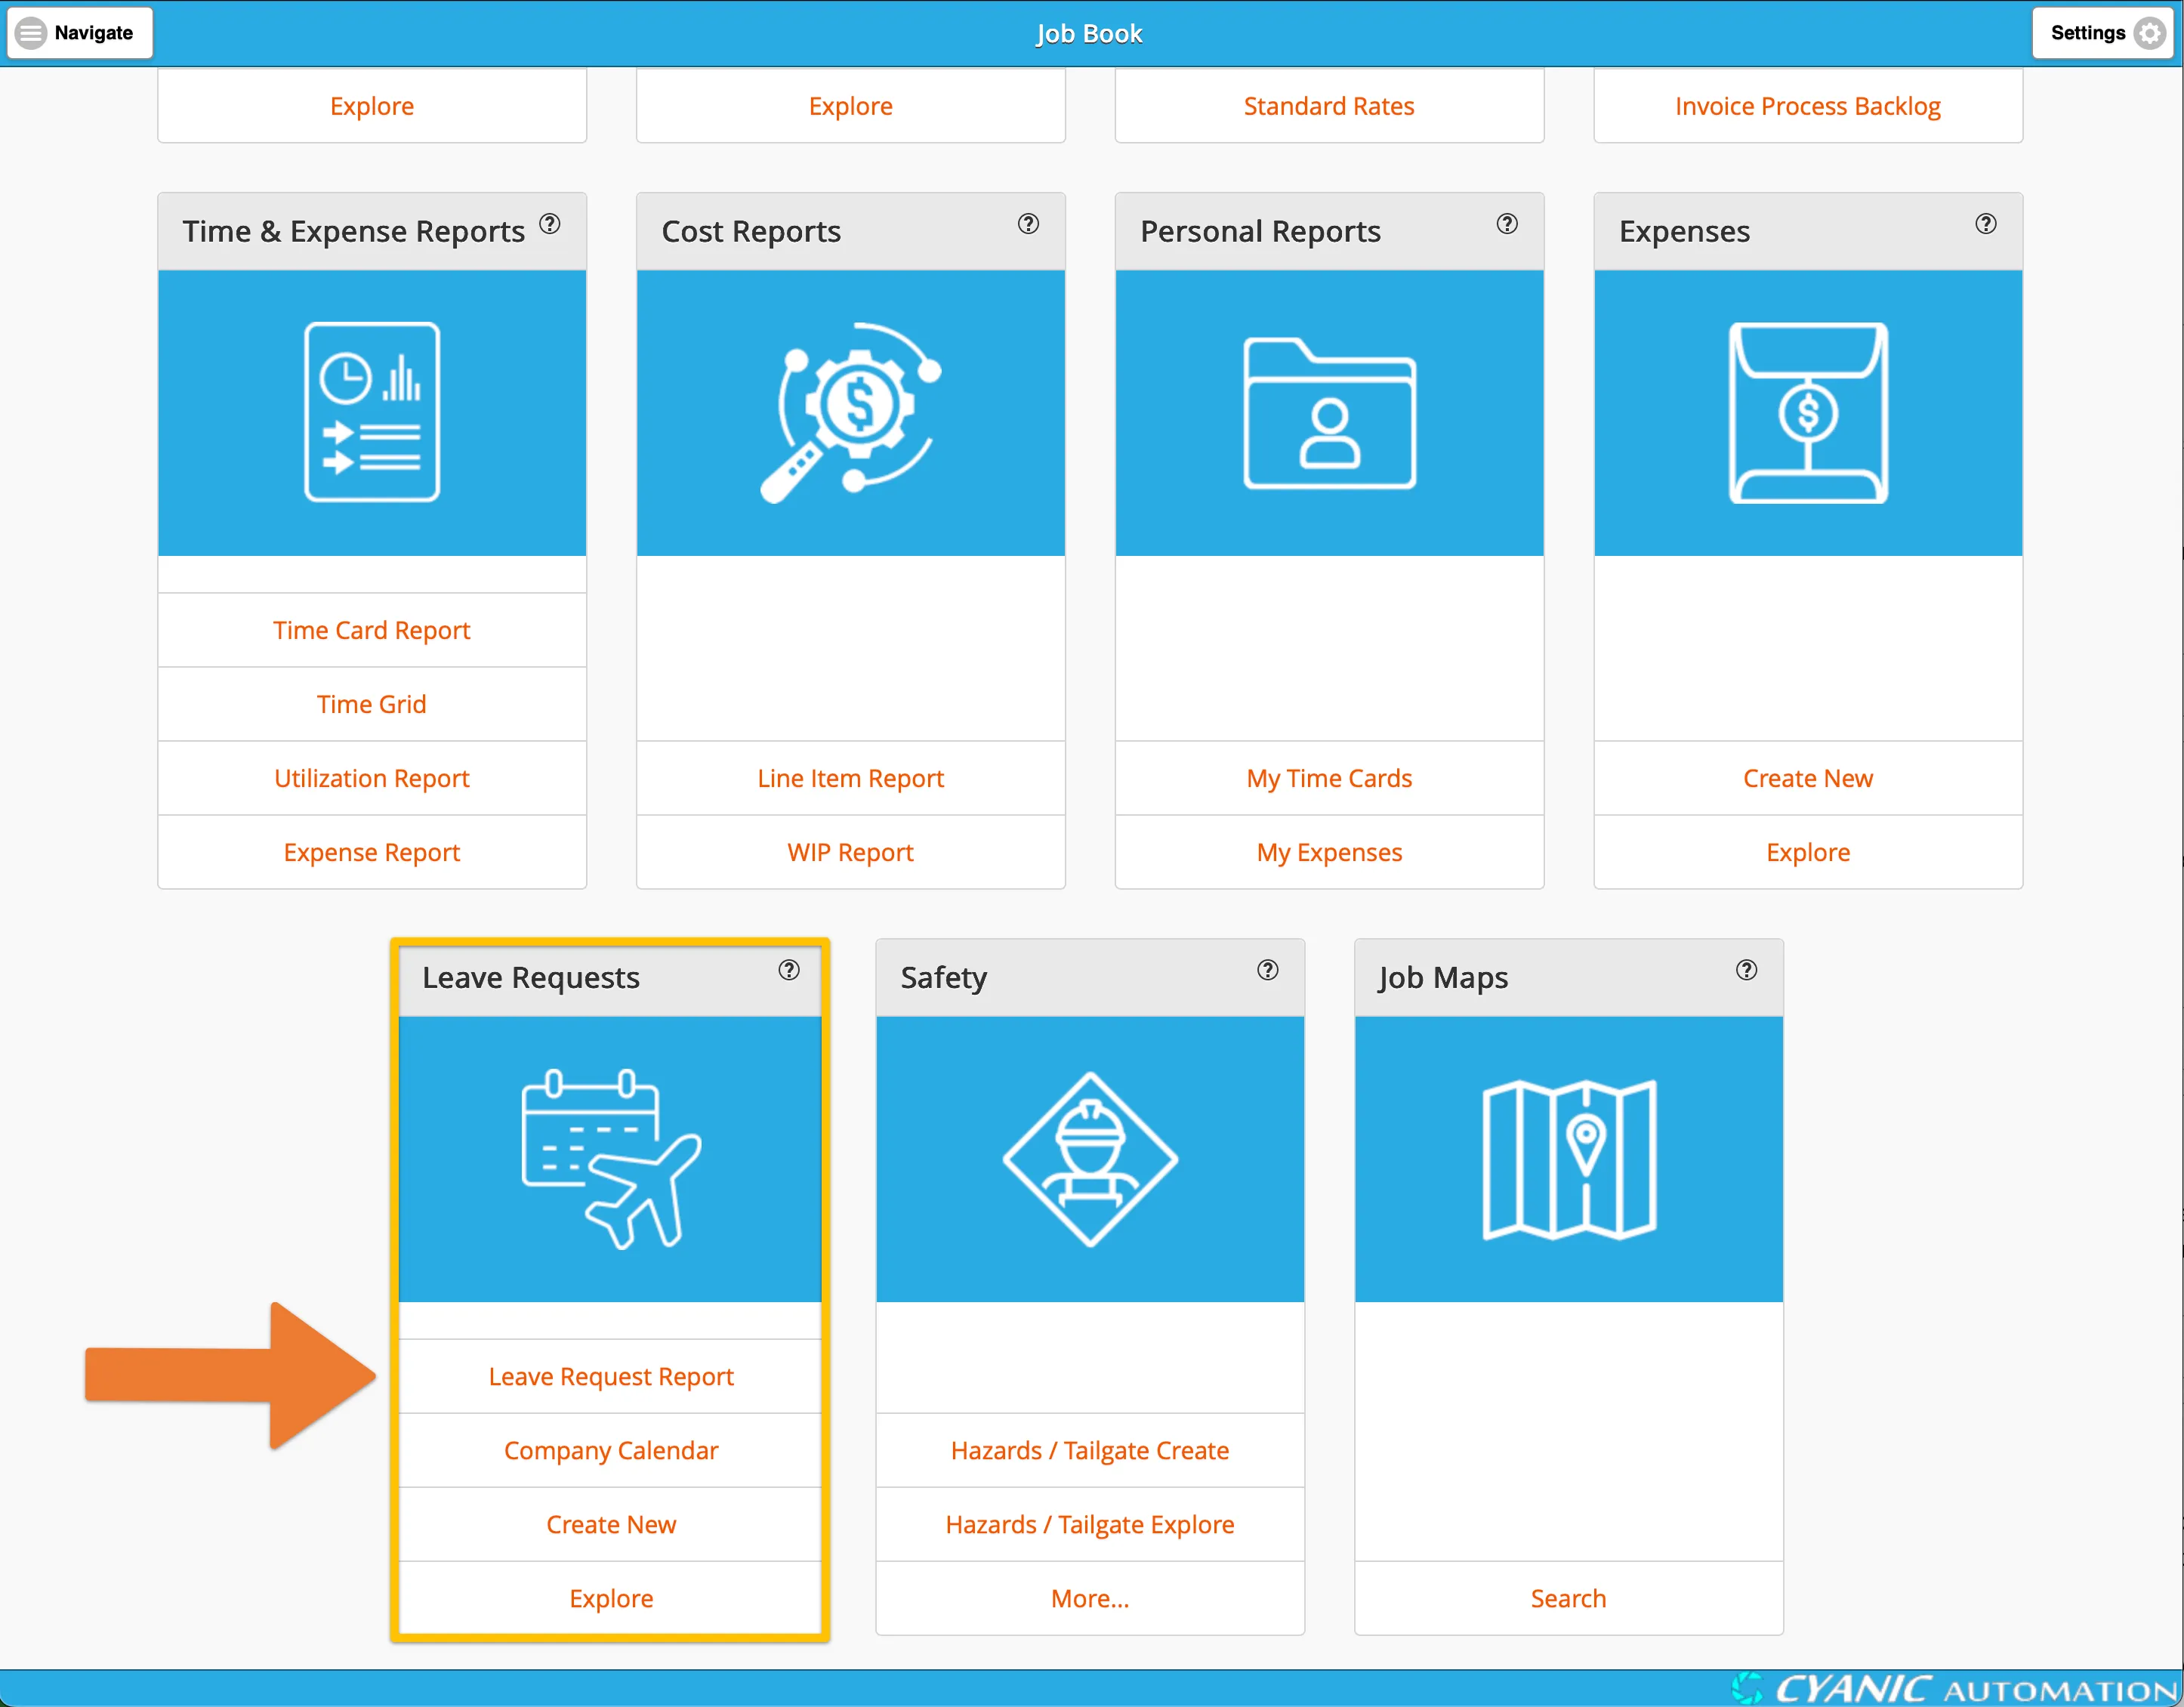
- From the main dashboard, locate the Leave Requests card.
- Click on the Leave Request Report link to open the report.
Understanding the Data
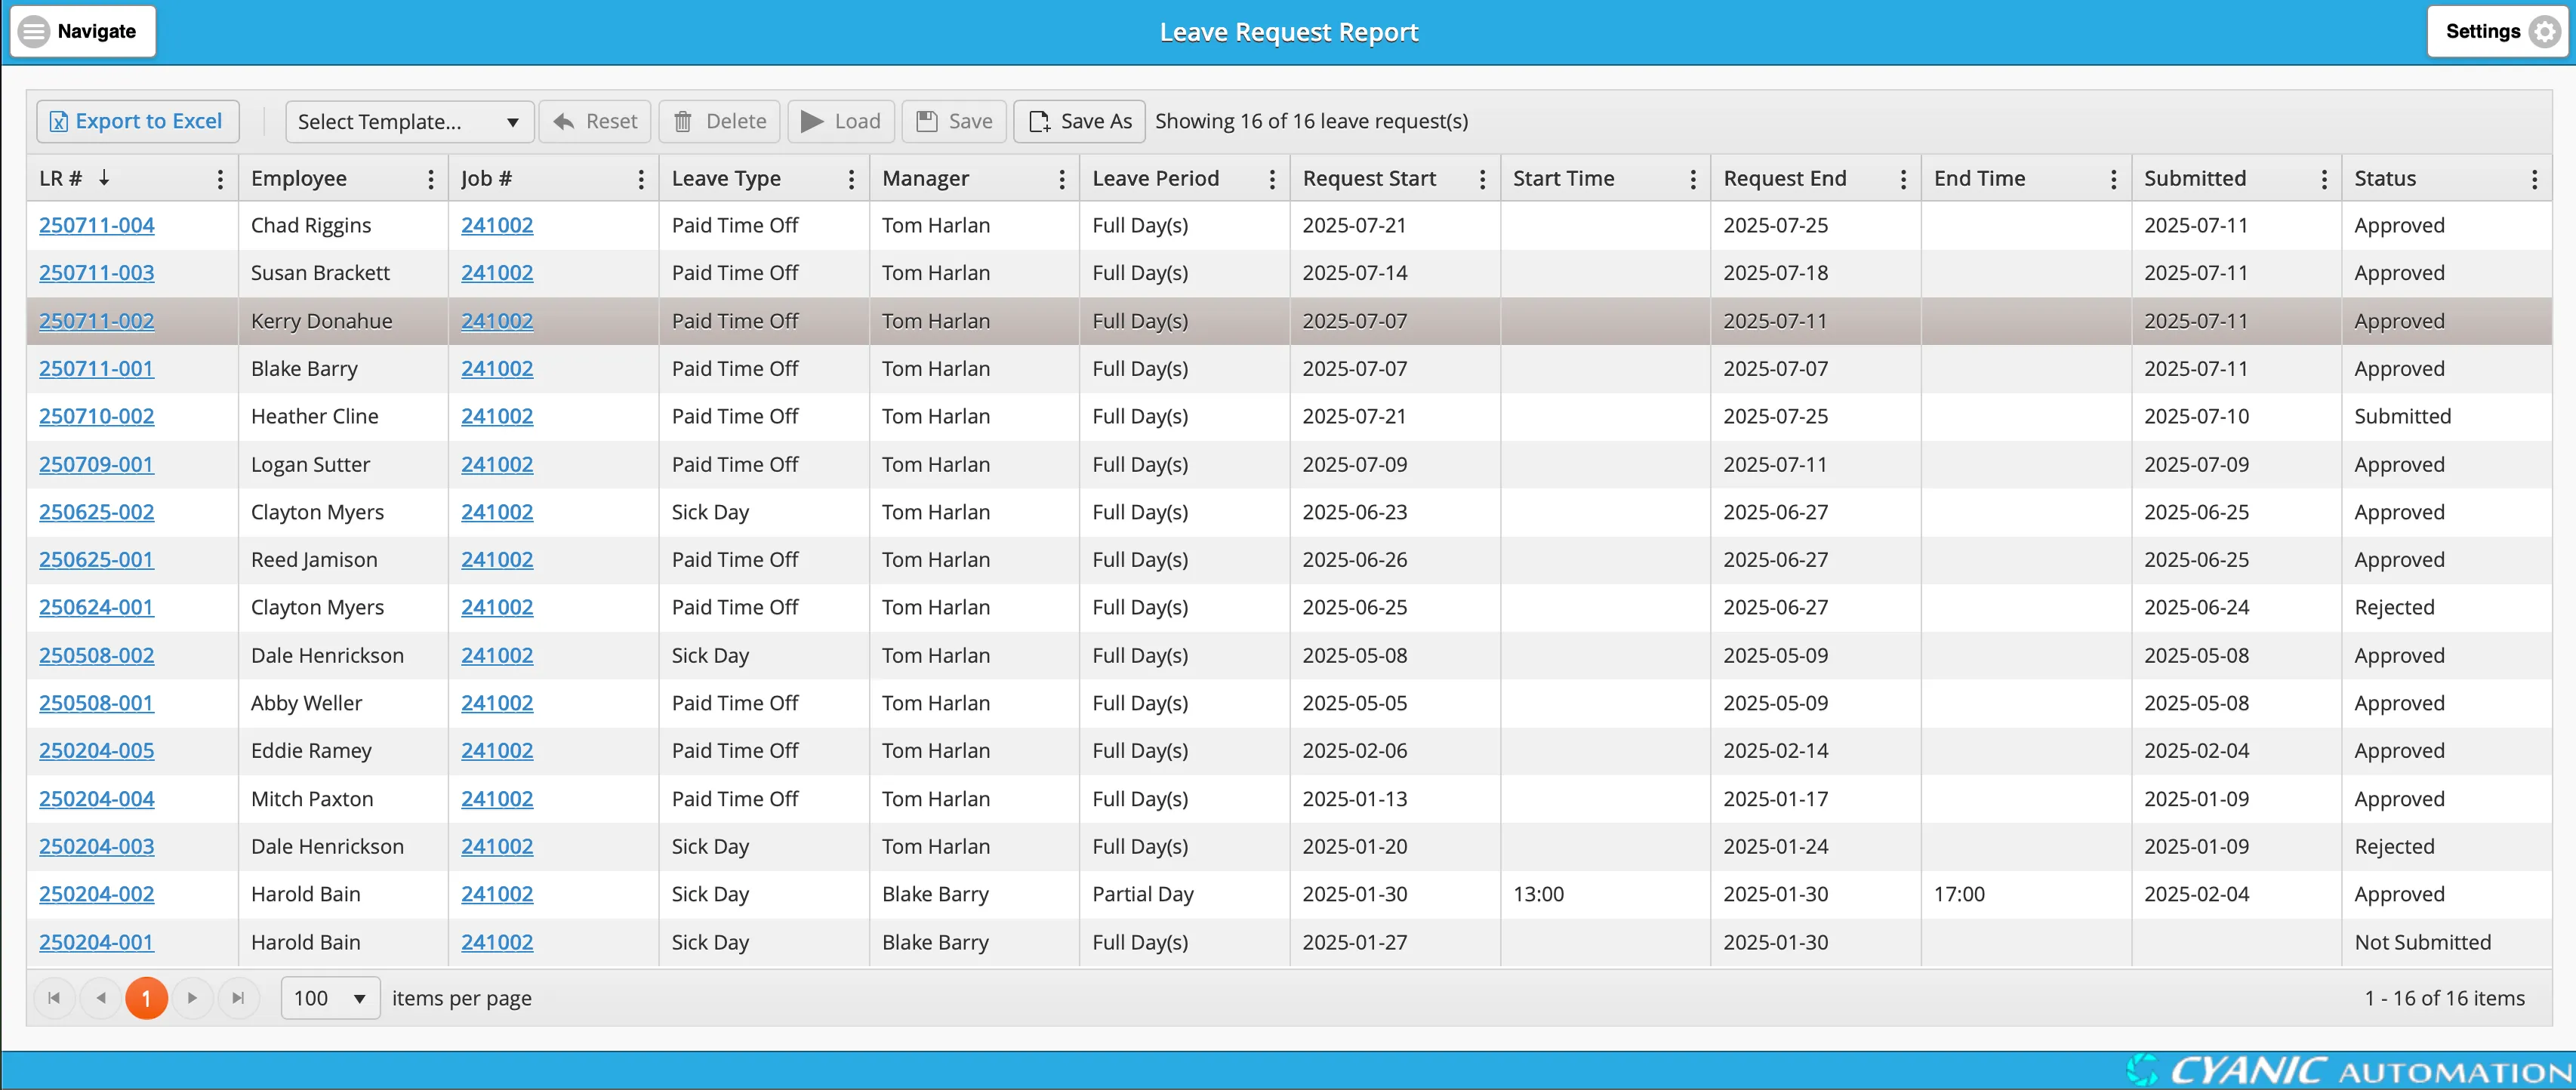
The report is organized into a grid that provides a comprehensive overview of all leave requests.
The grid contains the following columns:
- LR #: The unique identification number for the leave request. Clicking this number will take you directly to the details of that specific request.
- Employee: The name of the employee who submitted the request.
- Job #: The leave-related job associated with the request. Clicking this number will navigate you to the job details.
- Leave Type: The specific category of leave requested (e.g., Vacation, Sick Day).
- Manager: The manager responsible for approving the request.
- Leave Period: Indicates whether the request is for Full Day(s) or a Partial Day.
- Request Start / End: The start and end dates of the leave period.
- Start Time / End Time: The specific start and end times for partial-day requests.
- Submitted: The date the leave request was submitted by the employee.
- Status: The current status of the request, which can be Not Submitted, Approved, or Rejected.
Sorting and Filtering
You can easily organize and find the information you need using the built-in sorting and filtering tools.
Sorting: To sort the report by any column, simply click on the column header. For example, clicking the Employee header will sort the list alphabetically by employee name. Clicking it again will reverse the sort order.
Filtering: To apply a filter, hover over the header of the column you want to filter and click the column menu icon (three vertical dots). This opens the filter menu, which provides several options to narrow down your data.
For example, to find all approved leave requests for a specific employee:
- Go to the Employee column, click the column menu icon, and type the employee’s name into the search box.
- Next, go to the Status column, click the column menu icon, and select Approved from the list of options.
The filter menu also provides a list of operators to help you refine your search, such as “Contains,” “Starts with,” and “Is equal to.” You can clear a filter at any time by reopening the column menu and clicking the “Clear” button.
Navigating the Report
The report displays up to 100 leave requests per page. If there are more than 100 requests, you can use the paging controls at the bottom of the report to navigate forward and back between pages to see all entries.
Saving and Loading Custom Report Views
The report includes a powerful feature that allows you to save your customized views as templates. A template saves your current settings—including visible columns, column widths, filters, sorting, and grouping—so you can quickly re-apply them later. These templates are saved in your browser and are not shared with other users.
You can manage your templates using the toolbar at the top of the report grid.
To save a new template:
- Arrange the report exactly as you want it.
- Click the Save As button.
- Enter a descriptive name for your template and click OK.
To load a saved template:
- Select the template from the Select Template… dropdown list.
- Click the Load button.
To update a saved template with your current view:
- Select the template you want to overwrite from the dropdown list.
- Click the Save button and confirm your choice.
To delete a template:
- Select the template from the dropdown list.
- Click the Delete button and confirm.
To reset the report to its default view:
- Click the Reset button. This will remove any custom sorting, filtering, or grouping.
Exporting to Excel
In addition to saving custom views, you can export the report data directly to an Excel file. This is useful for offline analysis, sharing with others, or creating custom charts.
To export the report, look for an Export to Excel button or an export icon in the report’s toolbar. Clicking this will generate and download an .xlsx file containing the data currently displayed in the grid, including any filters or sorting you have applied.


