

Leave Request Initial Setup
Setting up leave tracking in Job Book: the Labour Cost Items, the Leave Job and the three employee profile fields it needs.
Key Concepts
Before you can use the Leave Request module, there are four things to know about.
Eligible Jobs
Only certain jobs are eligible for use in a Leave Request or to be set as a Leave Job in an employee’s profile. These jobs must have their DWR Billing Type (a DWR is a Daily Work Record) set to Overhead. See Job Setup for setting up jobs.
Leave Types
In Job Book, “Leave Types” are Labour Cost Items: the types of leave that employees can request, such as “Vacation,” “Sick Leave,” or “Personal Day.” Set them up with these settings:
- Billing Unit: Set to HR (for hours)
- Billing Unit Cost: Set to $0.00. The field is required, so it cannot be left blank; zero means the leave carries no charge
Best practice is to group all your leave-related Labour Cost Items under a single category, such as “Leave.” See Administration Settings for creating and managing Labour Cost Items.
Employee Profiles
An employee profile is the record Job Book knows a person by. It is created and edited from Settings, then Employee Profiles. See Users and Employee Profiles for the whole screen. Three of its fields matter to leave tracking:
- Leave Job: The default job used when the employee creates a leave request.
- Leave Manager: The employee’s manager, who approves or rejects their leave requests.
- Office: This is what the Company Calendar’s office filter works from, so an employee with no office set will not appear when you filter the calendar by office. See Company Calendar.
Set Leave Job and Leave Manager on the profile before anyone requests leave: the request form then opens with both filled in, and without them the employee has to find the right job and manager themselves. See Creating a Leave Request.
Weekend Configuration
The system can be set to include or exclude weekends when working out the duration of a leave request. You cannot change this setting yourself; contact Cyanic Automation to change it.
Performing Common Tasks
Setting up the Leave Request module for the first time takes three steps.
1. Create Labour Cost Items
Create a Labour Cost Item for each type of leave your employees can request.
- Click Navigate, expand the Administration group, then click Labour Cost Items.
- Click Create.
- Fill in the details for the new leave type. Remember to set the Billing Unit to HR and the Billing Unit Cost to $0.00.
- Repeat this process for all the leave types you need.
For more detail, see Administration Settings.
2. Create a Leave Job
Next, create one or more “Leave Jobs.” These are the jobs that leave requests are filed against; an approved request writes no time to the job. You might need more than one if your company has several offices or different tracking requirements.
- On the dashboard, in the Jobs card, click Create New.
- Give the job a name, such as “Internal - Leave Tracking.”
- Set the DWR Billing Type to Overhead. This is what makes the job eligible for leave tracking.
- In the Line Items section, add all the leave-related Labour Cost Items that you created in the previous step.
For the full guide to creating jobs, see Job Setup.
3. Update Employee Profiles
Finally, update each employee’s profile to link them to the Leave Request system. The list and its views are described on Users and Employee Profiles.
- Click Settings in the top right of the screen, then click Employee Profiles.
- Click an employee to view their profile. The list opens on Active; if the person is not there, try All.
- Click Edit.
- Set the Leave Job to the Leave Job you created in the previous step.
- Set the Leave Manager to the employee’s direct manager.
- Set the Office, if it is not already set, so the employee shows up when the Company Calendar is filtered by office.
- Save the changes.
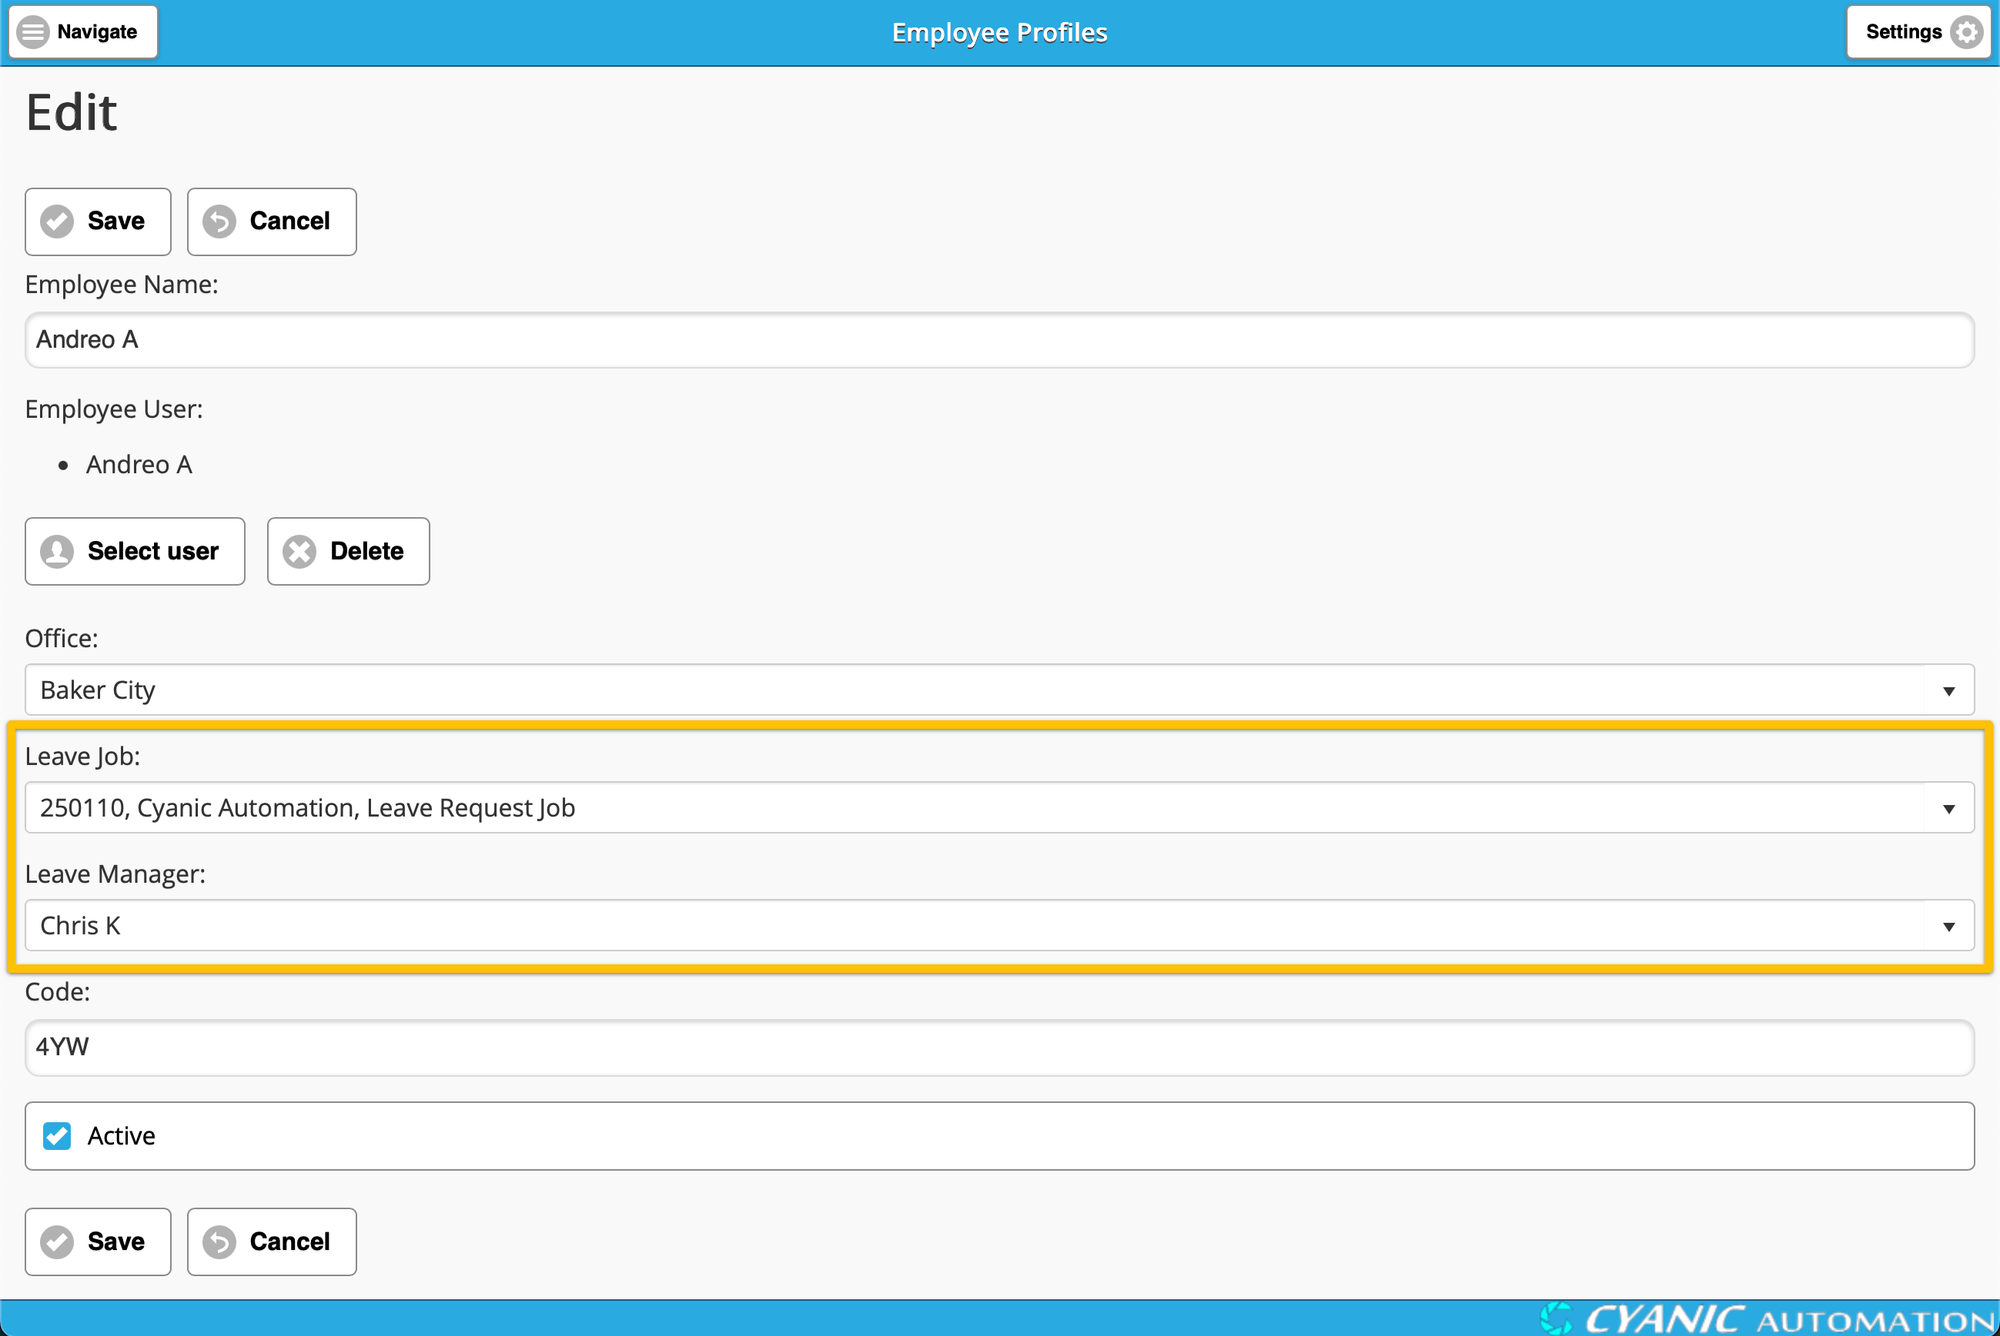
Repeat this process for all employees who will be using the Leave Request system.
Last updated