Task Plans
Key Concepts
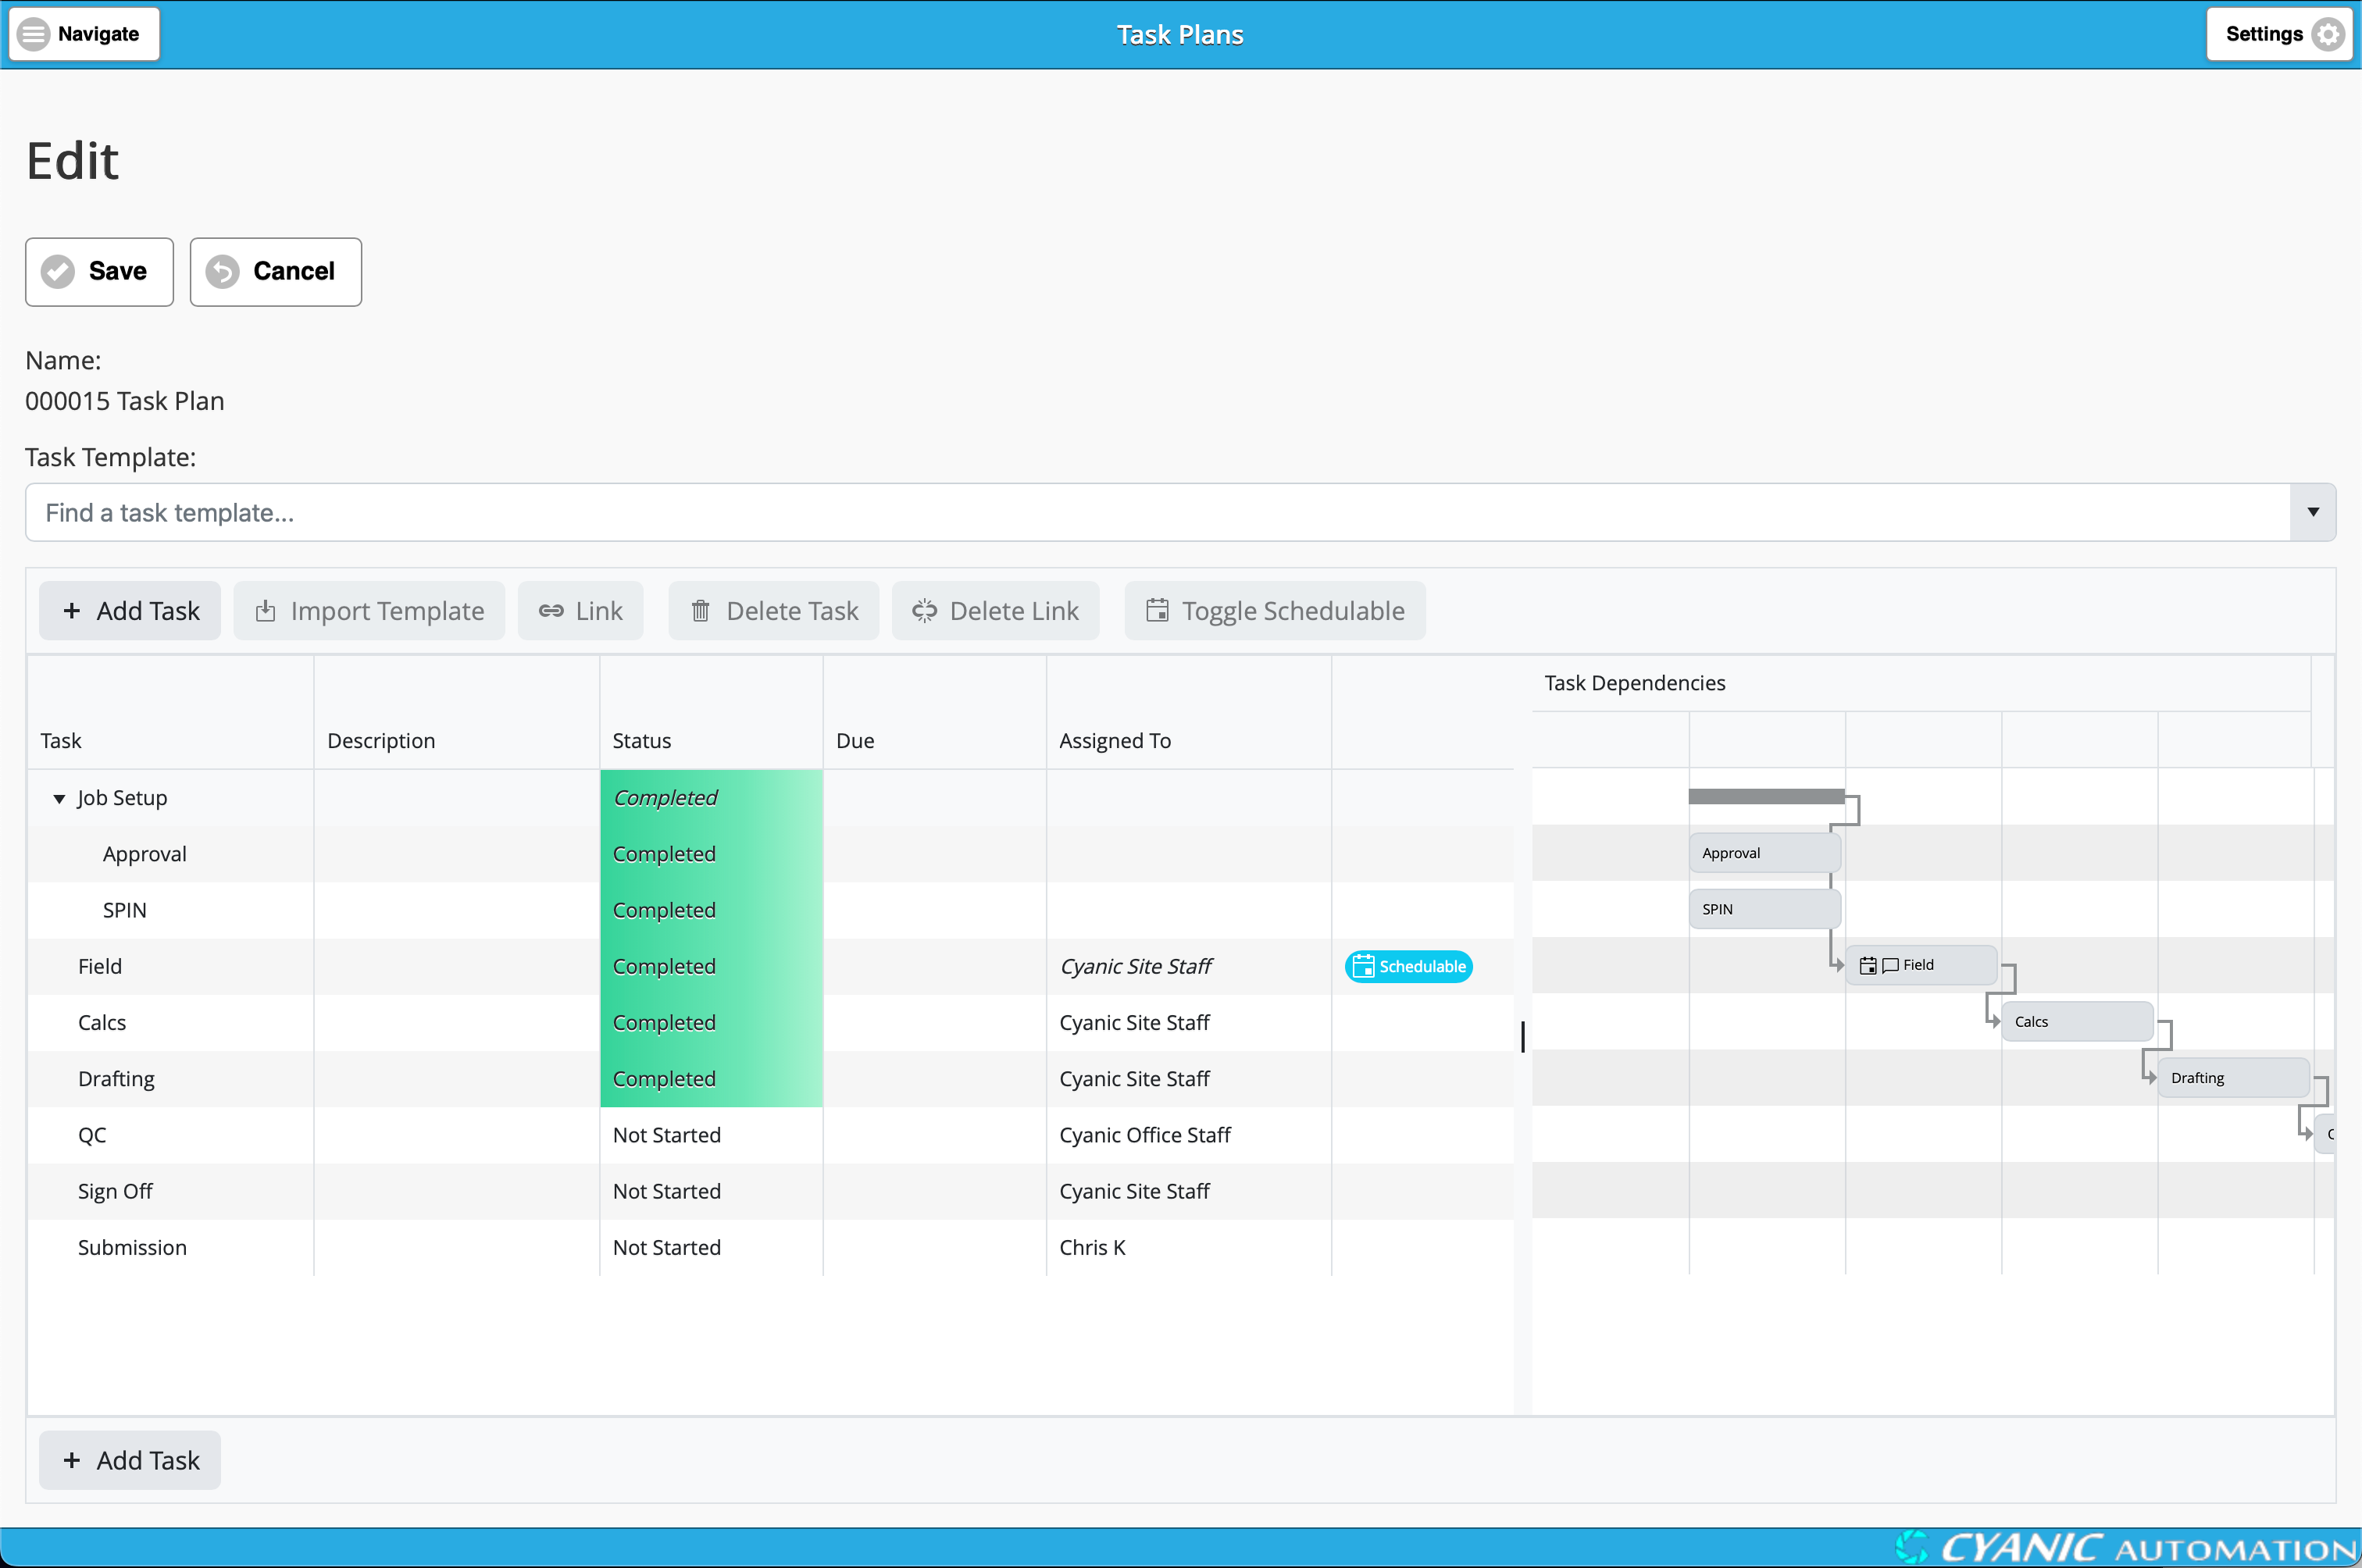
A Task Plan is a detailed, organized breakdown of all the work required to complete a specific Job. Think of it as a comprehensive to-do list for your project, allowing you to manage every step from start to finish.
Here are the core ideas behind a Task Plan:
- Job-Specific: Each Job has its own unique Task Plan, tailored to its specific requirements.
- Hierarchical Tasks: You can break down large tasks into smaller, more manageable sub-tasks. This helps you organize complex work into clear, actionable steps. For example, a main task like “Field Work” might have sub-tasks such as “Set Control Points” and “Collect Topo Data.”
- Dependencies: You can link tasks together to ensure work is completed in the correct order. For tasks that are not schedulable, the system will automatically make them available only after the tasks they depend on are finished. However, if a task is already scheduled to an employee, they can begin working on it regardless of its dependencies.
- Schedulable Tasks: When you mark a task as “schedulable,” you are bundling it and all of its sub-tasks together. This entire bundle can then be scheduled on the project calendar as a single, continuous block of work.
Navigating to a Job’s Task Plan
Every Job in the system can have its own unique Task Plan. To access it, first navigate to the desired Job. From the Job’s main display page, click on the Manage Task Plan button.

This will take you to the Task Plan Editor for that Job, where you can build and manage the job’s tasks.
Importing Task Templates
You can import one or more Task Templates into your Task Plan to quickly add pre-defined sets of tasks.
- Select a Task Template from the dropdown list.
- Optionally, select a task in the plan that will become the main task for the imported tasks.
- Click the Import Template button.
If you don’t select a main task, the template’s tasks will be added to the top level of your plan. If you do select a main task, the new tasks will be added as its sub-tasks. This is useful when a single job requires performing the same set of actions at multiple locations.
For example, imagine a job requires you to perform a topographic survey on two separate parcels of land. You could create two main tasks: “Topo for Parcel A” and “Topo for Parcel B”. Then, for each of these main tasks, you can import your standard “Topographic Survey” template. This ensures you follow the exact same procedure for both locations while keeping the work for each parcel neatly organized within the same job.
Task Status
The status of a task helps you track its progress. There are three possible statuses:
- Not Started: The task has not yet begun.
- In Progress: The task is currently being worked on.
- Completed: The task is finished.
You can change a task’s status by double-clicking the Status cell for that task in the editor.
Important Notes:
- You can only change the status of tasks that do not have any sub-tasks. The status of a main task, on the other hand, is determined by the status of its sub-tasks. Think of it like a summary: the main task is only complete when all of its sub-tasks are complete. If even one sub-task is still in progress, the main task will also show as in progress.
- Completed tasks are highlighted in green for easy identification.
Task Due Date
You can set a Due Date for any task. This date is for informational and planning purposes and does not affect the schedule. It is displayed in other parts of the system, like the Scheduler and Task Dashboard, to help with coordination.
To set or change a due date, double-click the Due cell for the task and choose a date from the calendar.
If a sub-task’s due date is set for after its main task’s due date, it will be highlighted in red to indicate a potential planning problem.
Assigning Tasks
To assign a task to one or more employees, simply double-click the Assigned To cell for that task. A list of available employees will appear, allowing you to select who is responsible.
Important Notes:
- You can only assign tasks that are not marked as “schedulable.” If a task is scheduled, its assignment is managed from the Scheduler, not the Task Plan.
- To ensure clarity on the field, only one task within a group of a main task and its sub-tasks can have a direct assignment. For example, if you assign the main task “Field Work” to a specific crew, all of its sub-tasks (like “Set Control Points” and “Locate Monuments”) will automatically be assigned to that same crew. You cannot assign a sub-task to a different crew than its main task.
Scheduled Tasks
When a task is scheduled in the Scheduler, a calendar icon will appear next to it in the Gantt chart view. If you hover over this icon, a dialog will appear showing details like the scheduled date and any notes.
If a task has Schedule Notes added from the Scheduler, a message icon will also appear. Hovering over this will show the notes.
Adding and Organizing Tasks
You have several tools to build and structure your Task Plan:
- Add a task:
- To add a new top-level task, simply click the + Add Task button when no other tasks are selected.
- If you have an existing task selected, clicking the + Add Task button will open a menu:
- Add Above: Adds a new task on the same level, directly above the selected task.
- Add Below: Adds a new task on the same level, directly below the selected task.
- Create a sub-task:
- Select the task that will be the main task.
- Click the + Add Task button.
- Select Add Sub-task from the menu. Alternatively, you can drag and drop an existing task onto another to make it a sub-task.
- Create dependencies between tasks:
- First, select the tasks you want to link. You can select multiple tasks in a few ways:
- Drag-select: Click and drag your mouse to draw a selection box around the tasks.
- Ctrl-click: Hold the
Ctrlkey and click on each individual task you want to select. - Shift-click: Click the first task in a sequence, then hold the
Shiftkey and click the last task to select all tasks in between.
- Click the Link button.
- If you selected two tasks, a dependency is created between them.
- If you selected more than two tasks, they are linked in sequence (Task 1 -> Task 2 -> Task 3).
- First, select the tasks you want to link. You can select multiple tasks in a few ways:
- Remove a dependency:
- Select the link between two tasks.
- Click the Delete Link button.
- Make a task schedulable:
- Select the task.
- Click the Toggle Schedulable button. This bundles the task and its sub-tasks to be scheduled as a single unit.
- Delete a task:
- Select the task.
- Click the Delete Task button. This will also delete all of its sub-tasks.
- Rename a task: Double-click the Task cell, edit the text, and press
Enter. - Add a description: Double-click the Description cell, add your text, and press
Enter.