Task Templates
Key Concepts
Task Templates are a powerful feature in Job Book that allow you to create reusable sets of tasks for your projects. This saves you time and ensures consistency across all of your jobs.
- Hierarchical Tasks: You can break down large tasks into smaller, more manageable sub-tasks. Think of this like a to-do list where a main item has several steps. For example, ‘Field Work’ is a main task, and all the items below it are its sub-tasks. This makes complex work easier to track. When all the sub-tasks are finished, the main task is considered complete.
- Dependencies: You can link tasks together to ensure work is completed in the correct order. For tasks that are not schedulable, the system will automatically make them available only after the tasks they depend on are finished. However, if a task is already scheduled to an employee, they can begin working on it regardless of its dependencies.
- Schedulable Tasks: When you mark a task as “schedulable,” you are bundling it and all of its sub-tasks together. This entire bundle can then be scheduled on the project calendar as a single, continuous block of work.
- Active Status: The “Active” checkbox determines whether the entire template is available for use in new projects.
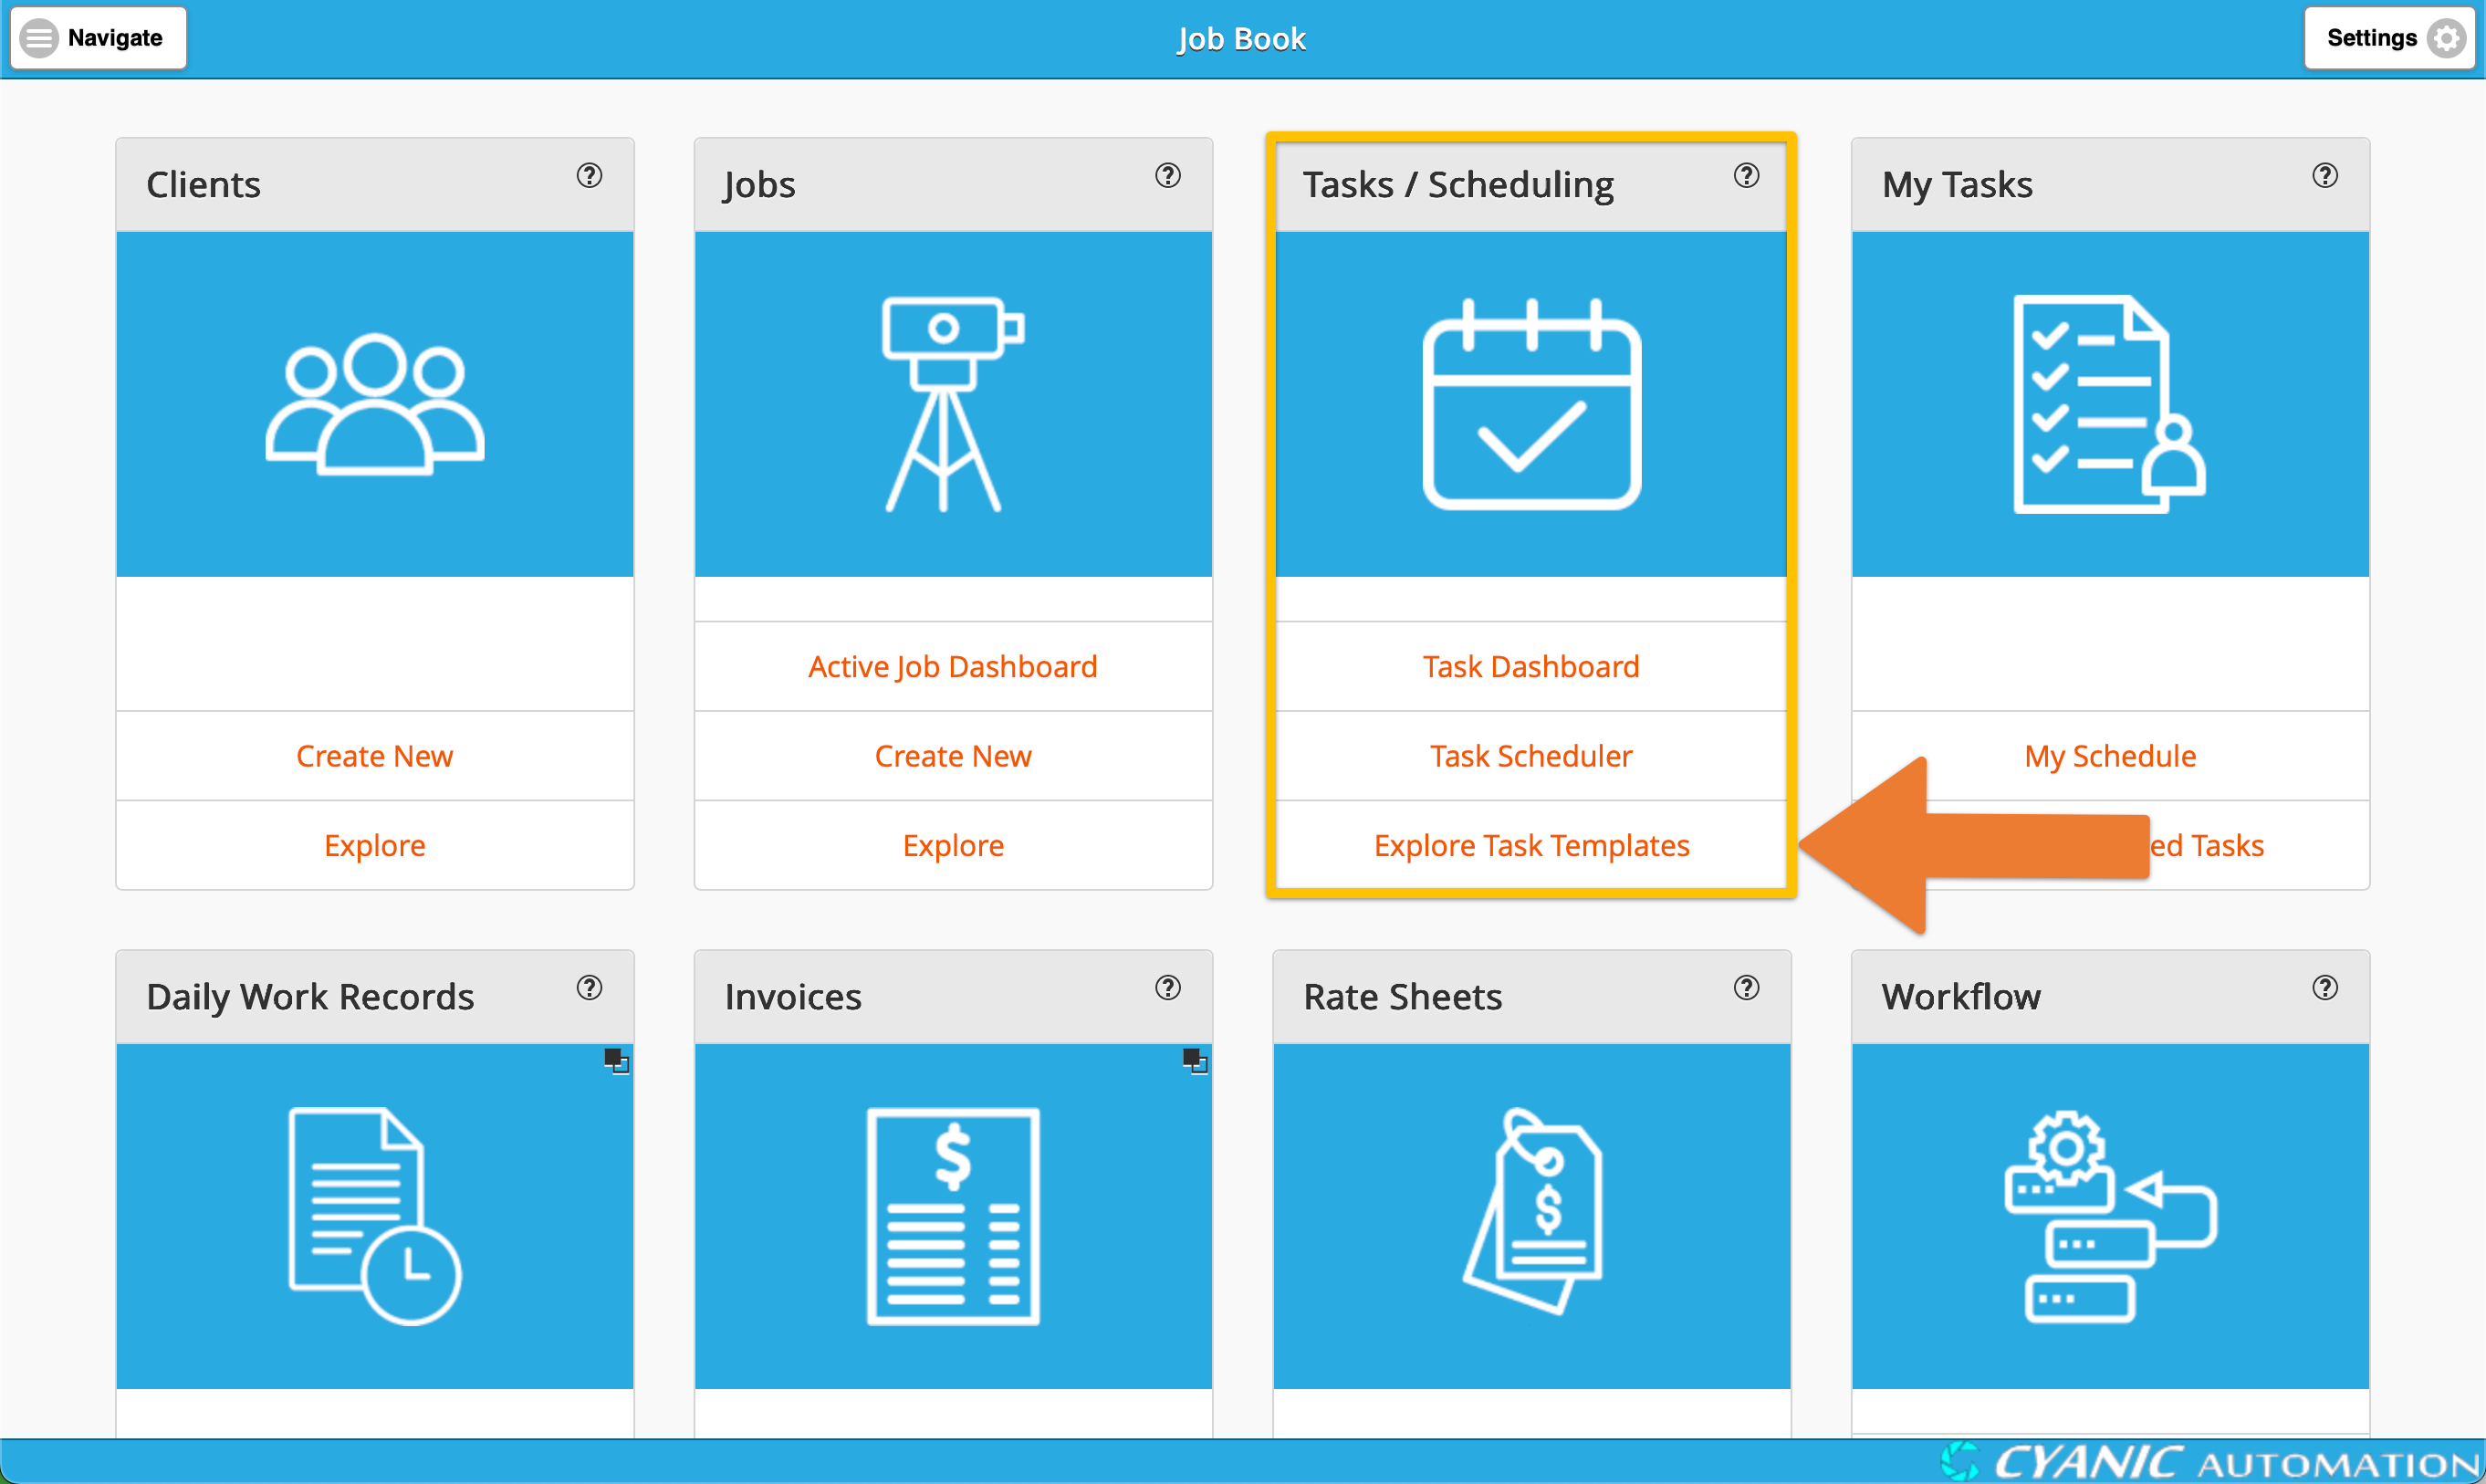
Exploring Task Templates
You can find your library of Task Templates by navigating to Tasks / Scheduling > Explore Task Templates from the main dashboard.
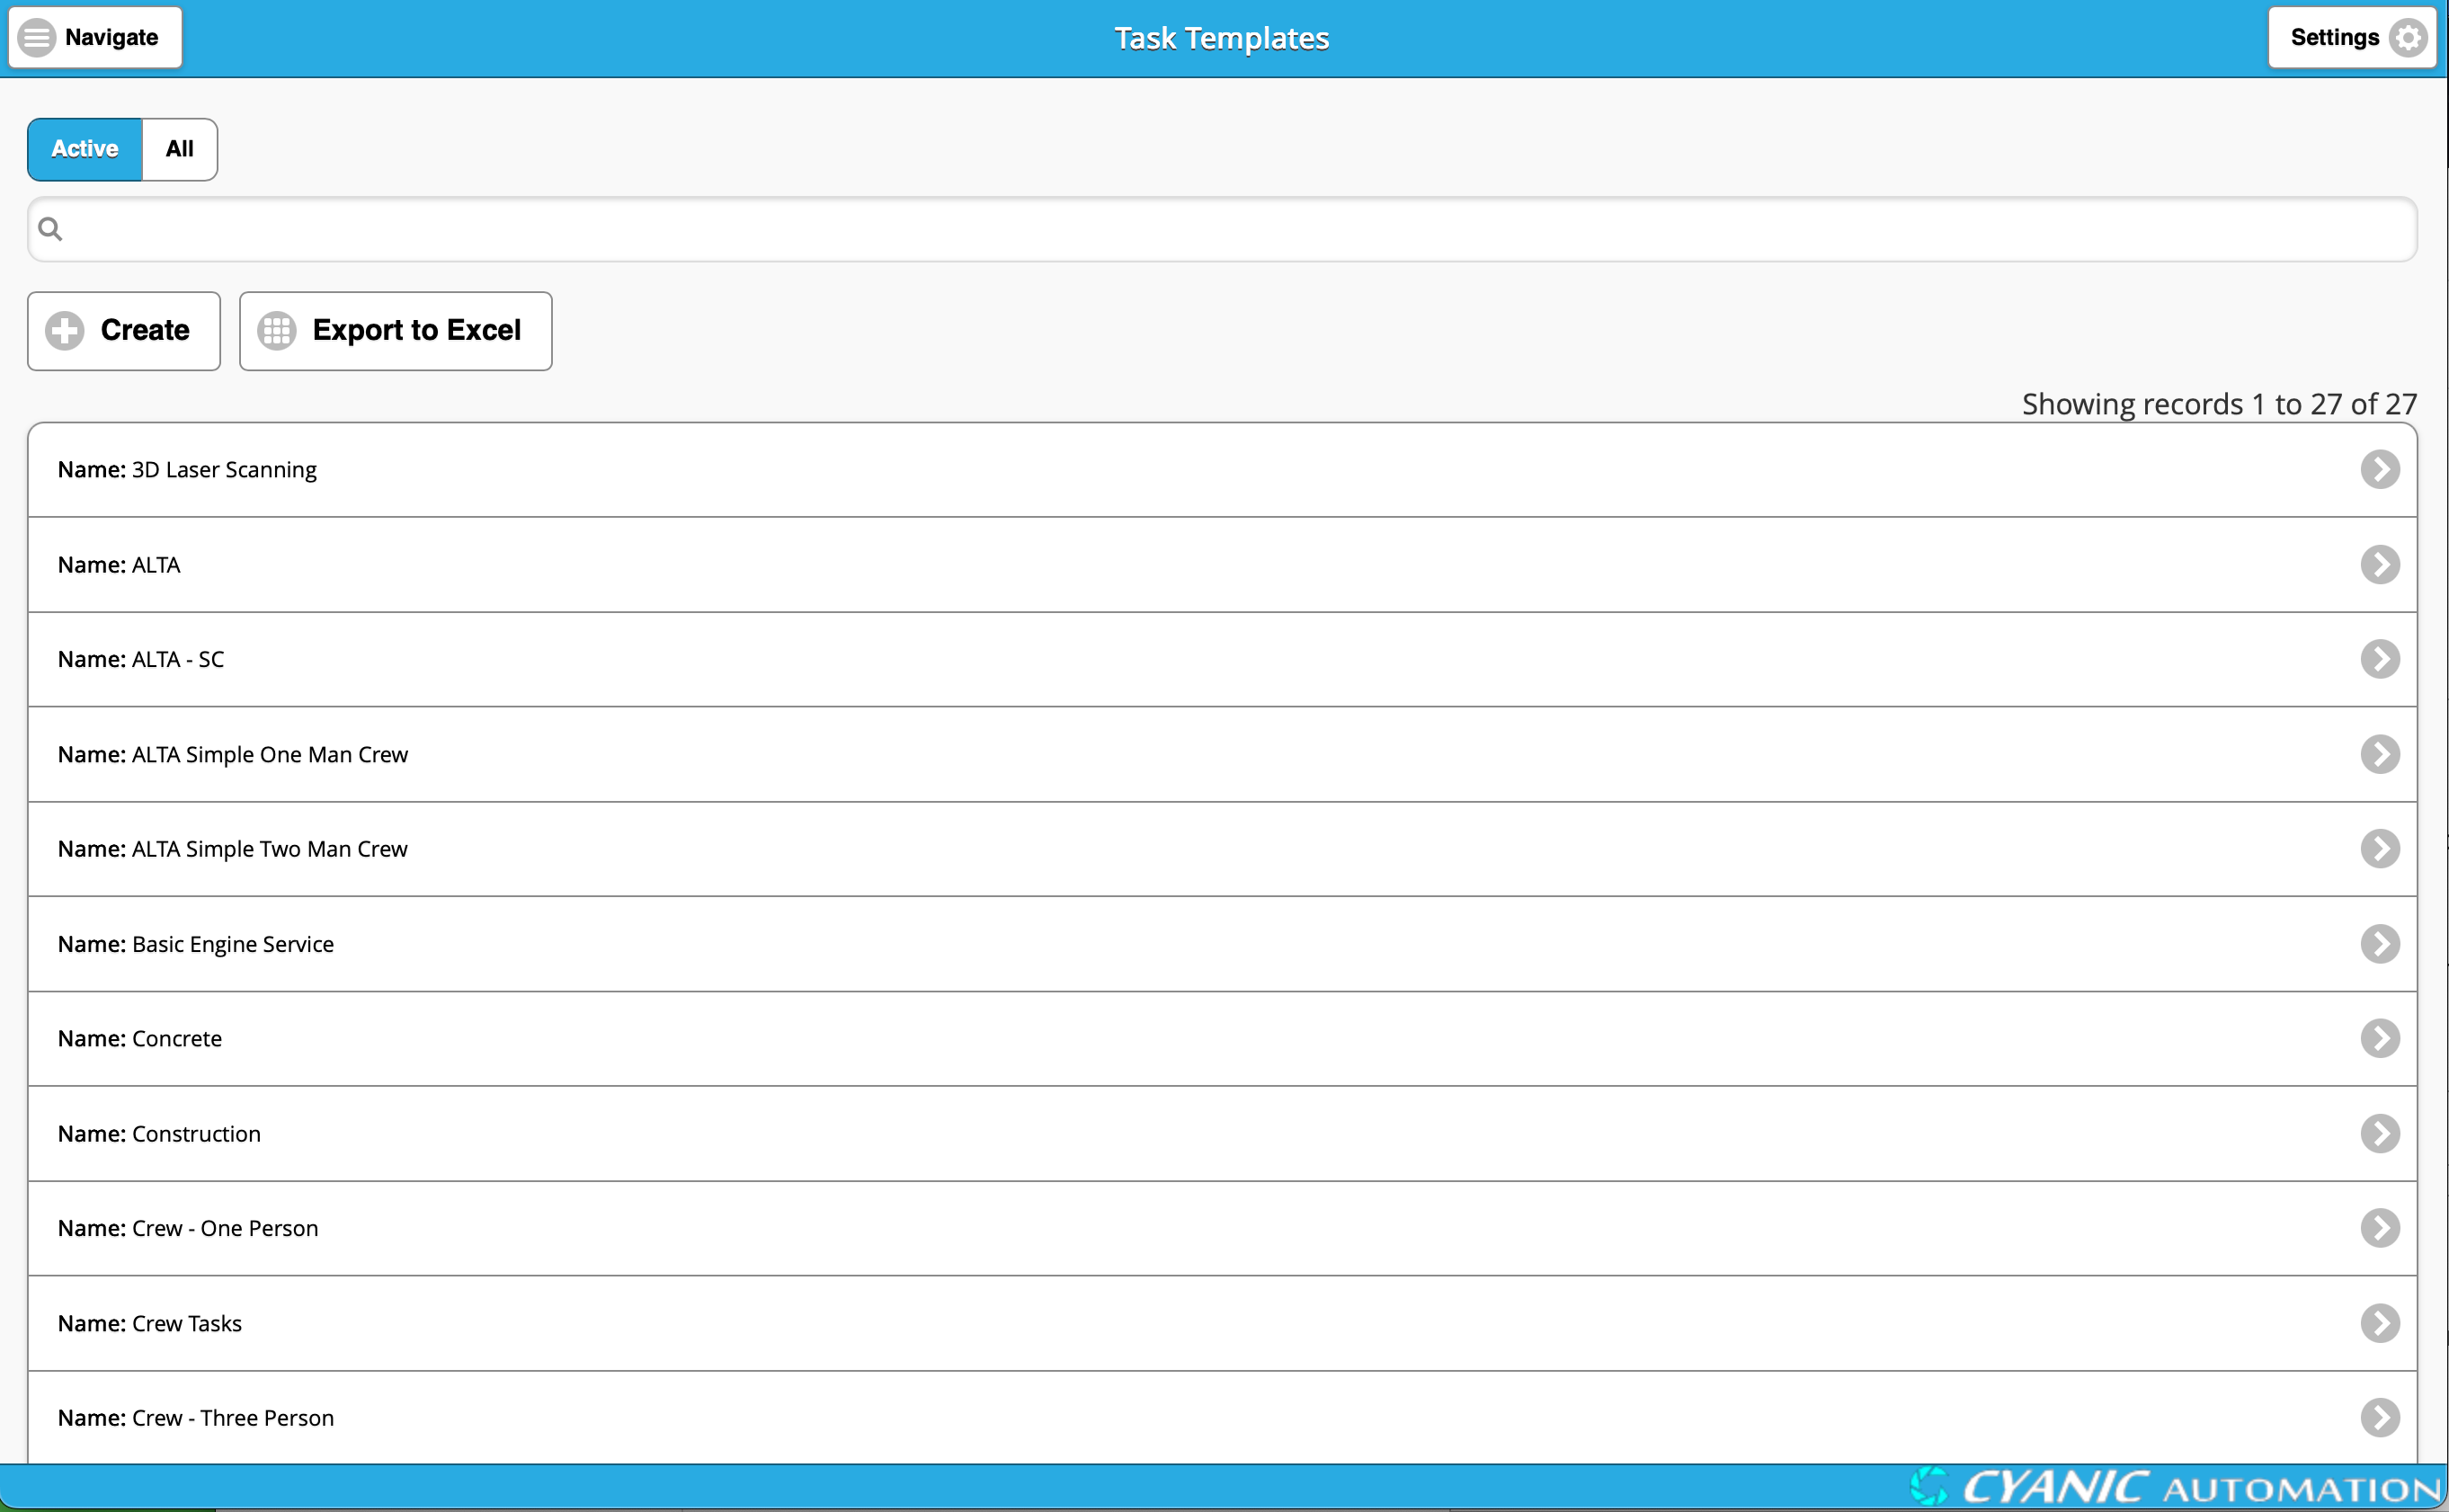
This will take you to the Explore Task Templates page, where you can see a list of all available templates. From here, you can create a new template from scratch or click on an existing template to view its details.
Viewing a Task Template
After clicking on a template from the Explore page, you will see the Task Template Display screen. This view is read-only, allowing you to safely review the template’s structure and tasks without making accidental changes.
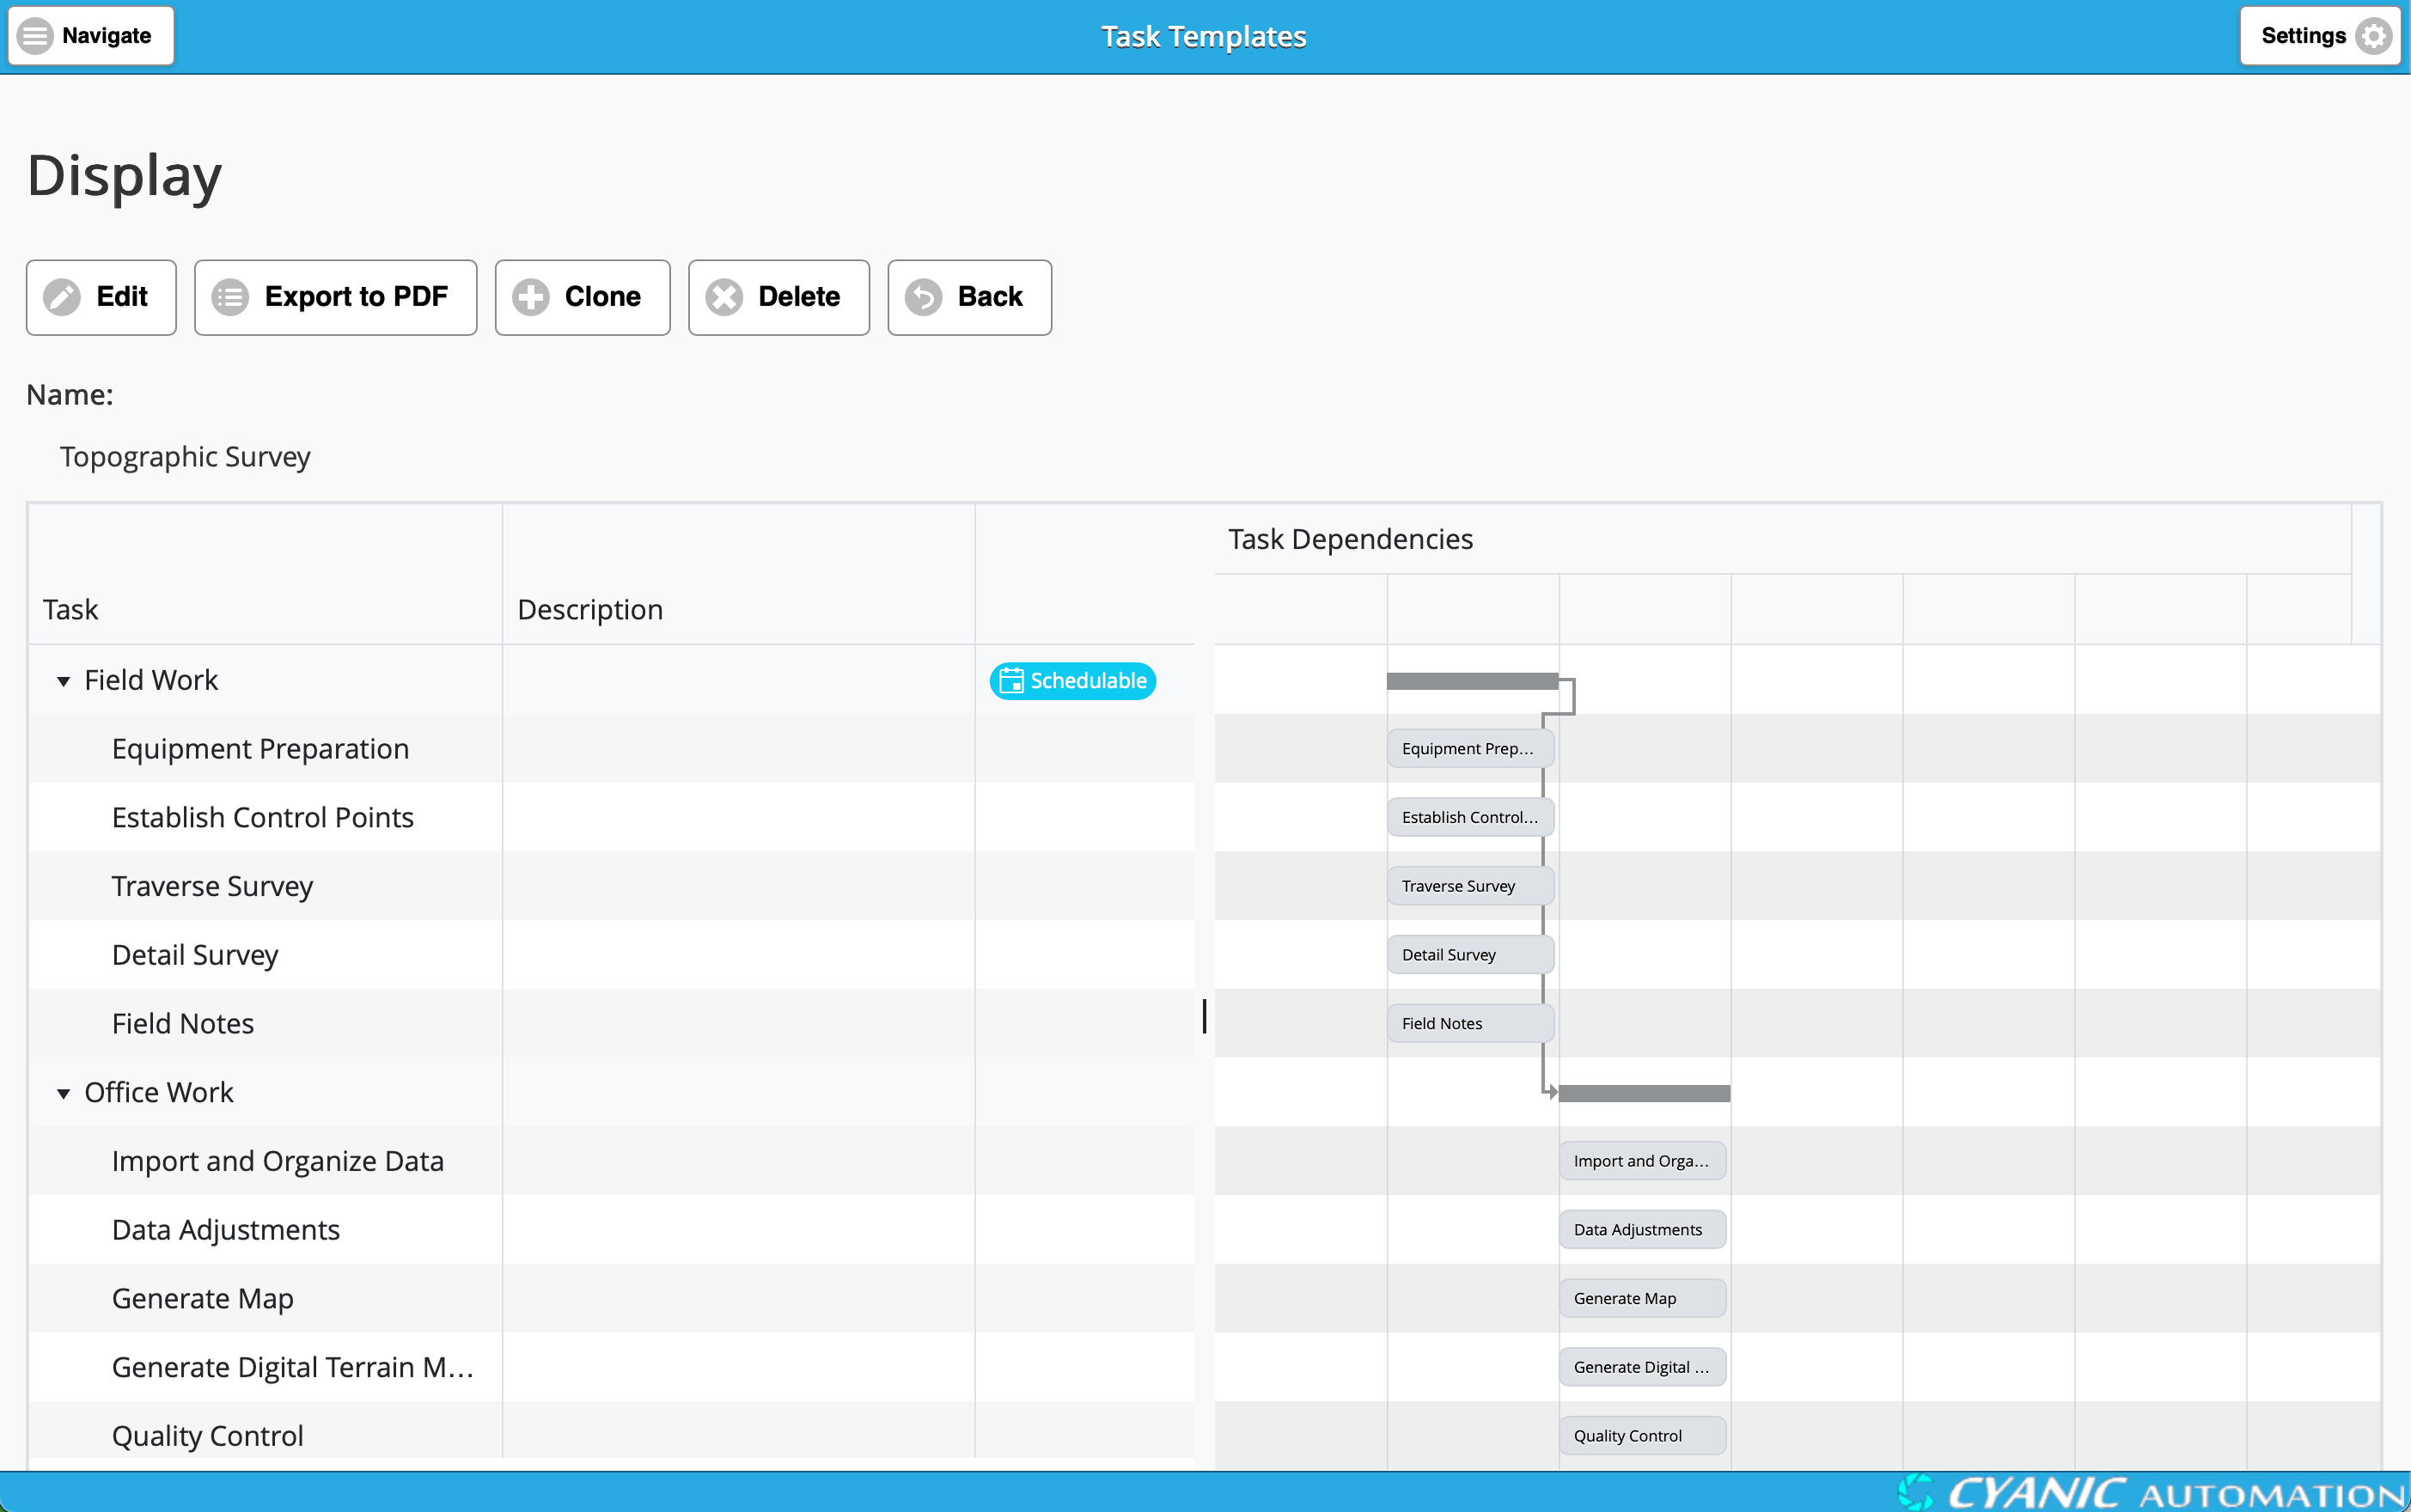
From this screen, you have two options:
- Clone: This creates a complete copy of the current template. You will be prompted to provide a new name for the cloned template, which you can then edit independently.
- Edit: This will take you to the Task Template Editor, where you can modify the template’s name, tasks, and dependencies.
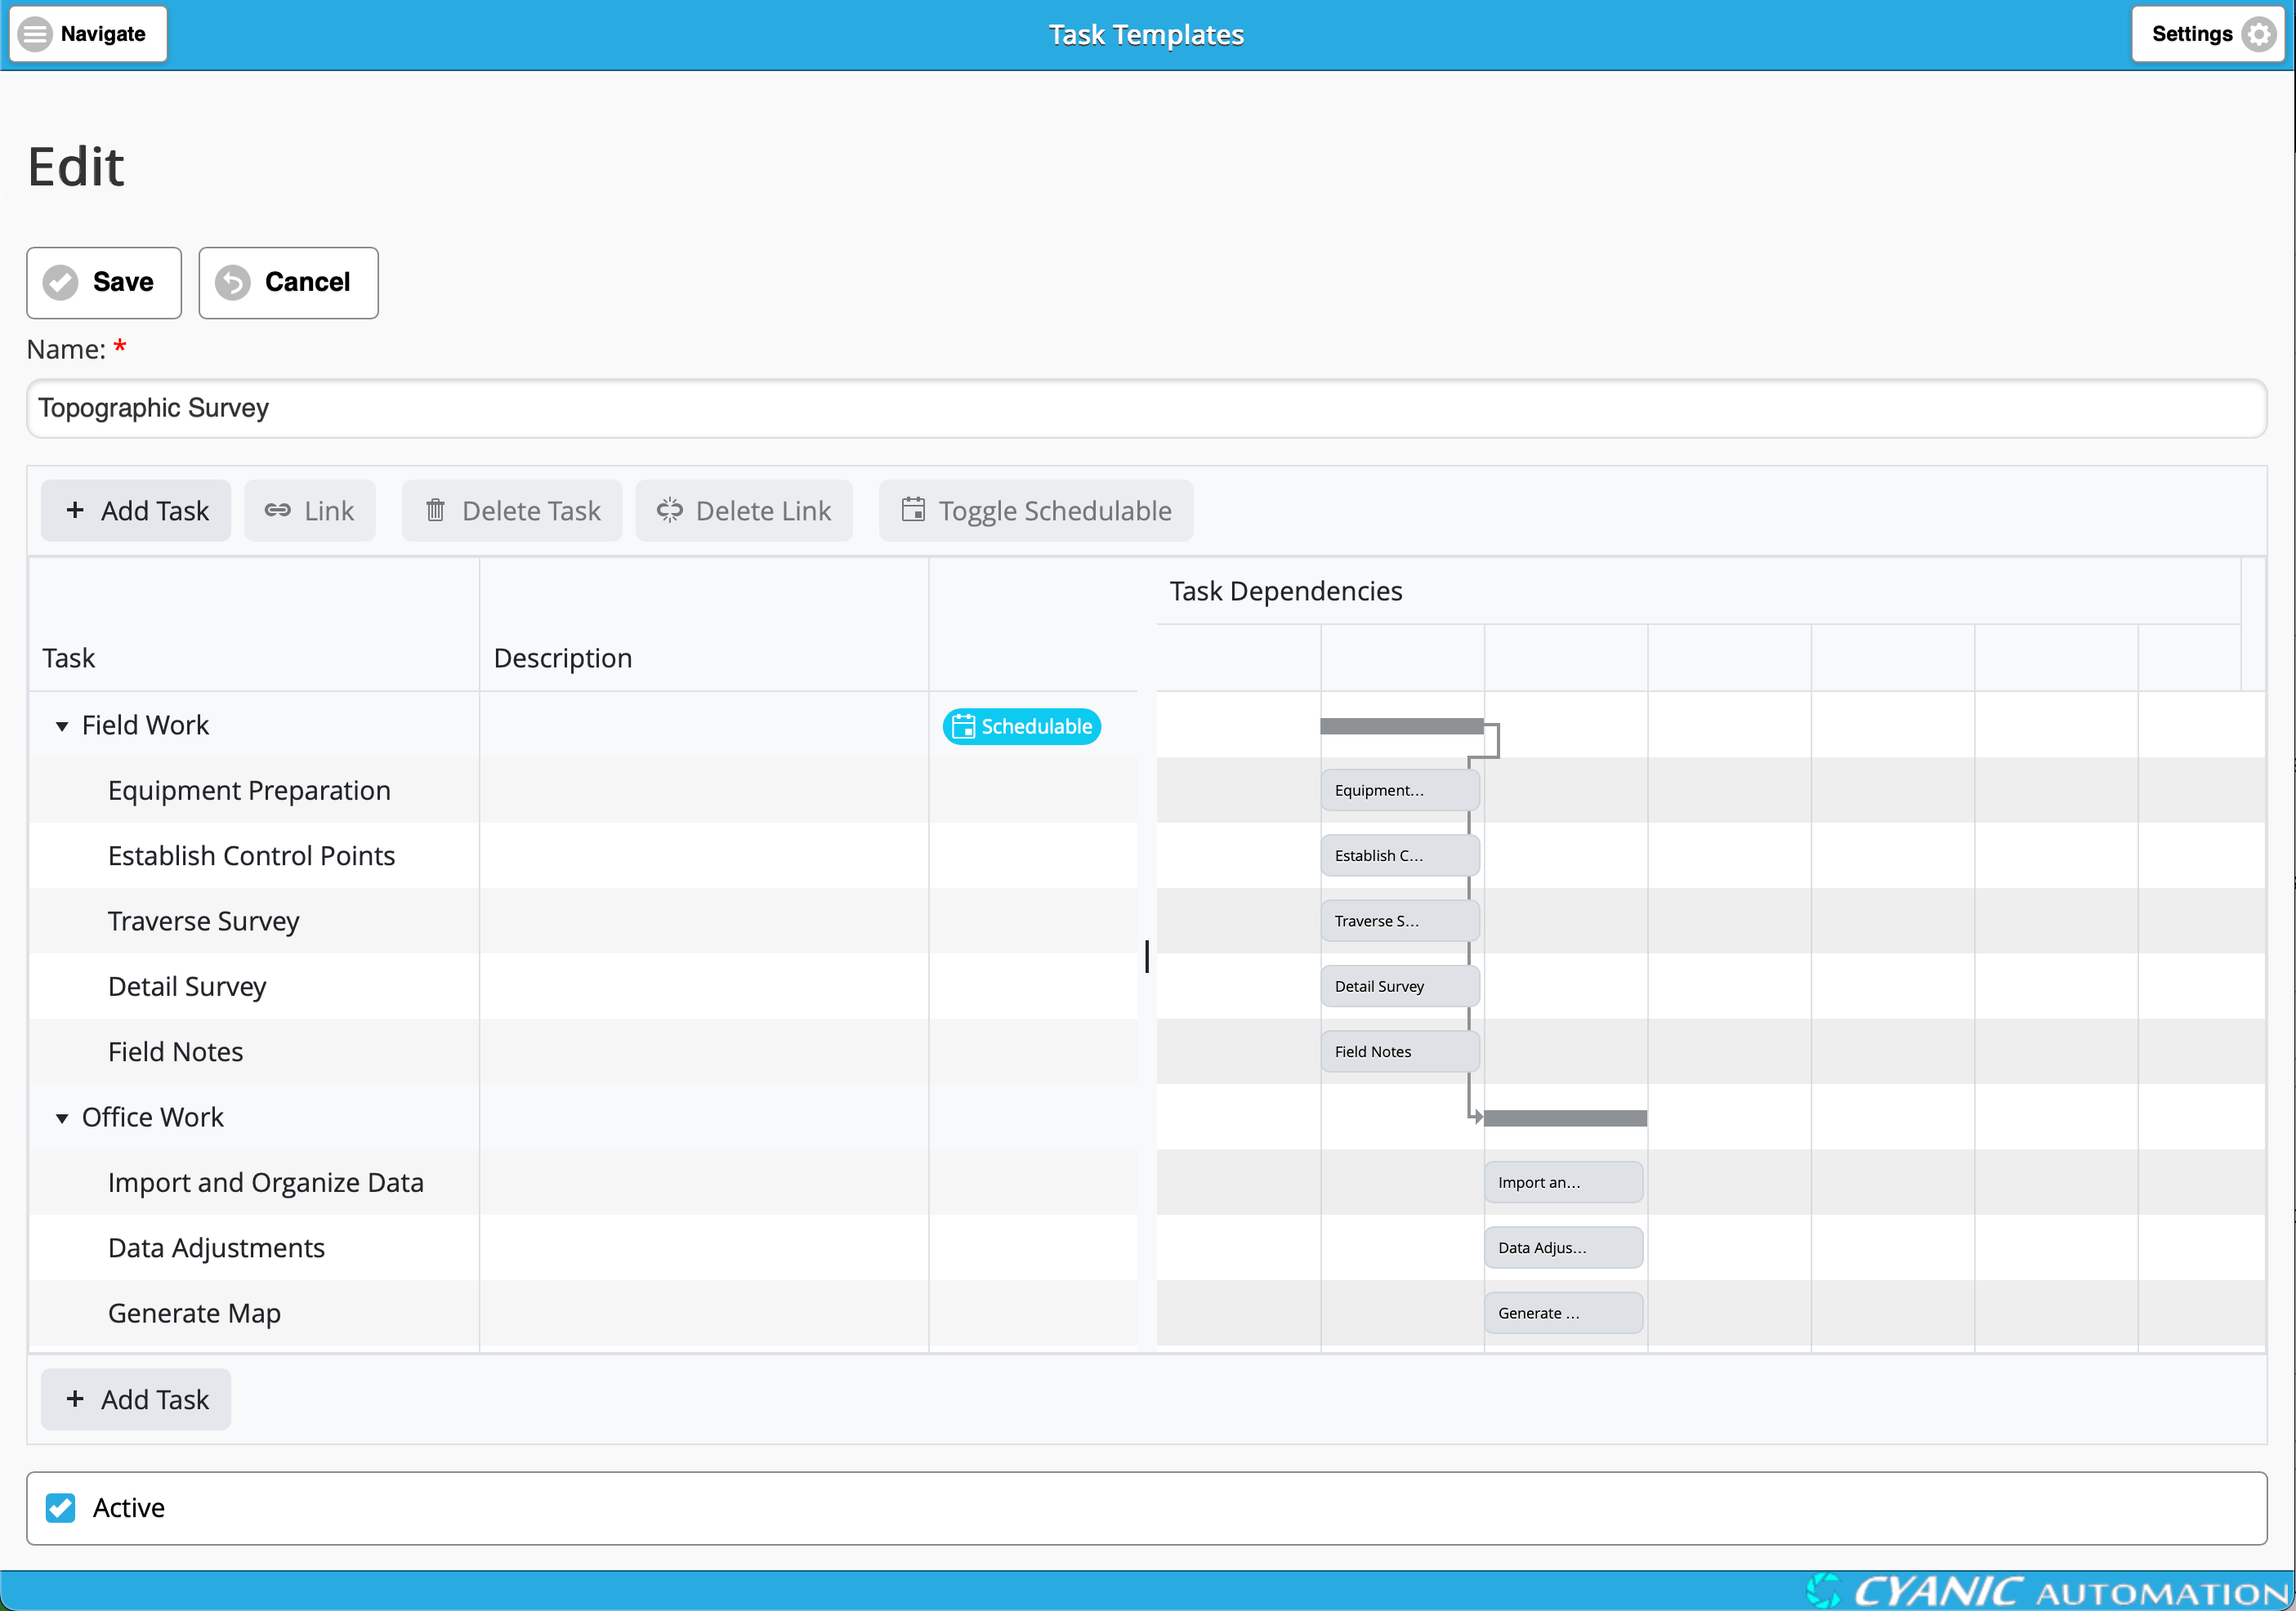
Editing a Task Template
To modify a template, click the Edit button on the Task Template Display screen. This will take you to the Task Template Editor, where you can make changes to a template. This powerful tool allows you to build complex task hierarchies with dependencies.
Adding and Organizing Tasks
- Add a task:
- To add the first task to a new template, simply click the + Add Task button.
- If you have an existing task selected, clicking the + Add Task button will open a menu:
- Add Above: Adds a new task on the same level, directly above the selected task.
- Add Below: Adds a new task on the same level, directly below the selected task.
- Create a sub-task:
- Select a task to be the parent task.
- Click the + Add Task button.
- Select ‘Add Child’ from the menu. Alternatively, you can drag and drop an existing task onto another to make it a sub-task.
- Create dependencies between tasks:
- First, select the tasks you want to link. You can select multiple tasks in a few ways:
- Drag-select: Click and drag your mouse to draw a selection box around the tasks.
- Ctrl-click: Hold the
Ctrlkey and click on each individual task you want to select. - Shift-click: Click the first task in a sequence, then hold the
Shiftkey and click the last task to select all tasks in between.
- Click the Link button.
- If you selected two tasks, a dependency is created between them.
- If you selected more than two tasks, they are linked in sequence (Task 1 -> Task 2 -> Task 3).
- First, select the tasks you want to link. You can select multiple tasks in a few ways:
- Remove a dependency:
- Select the link between two tasks.
- Click the Delete Link button.
- Make a task schedulable:
- Select the task.
- Click the Toggle Schedulable button.
- Delete a task:
- Select the task.
- Click the Delete Task button.