Task Scheduling
Key Concepts
The Task Scheduler is your central hub for assigning and managing your team’s workload. It provides a visual overview of all schedulable tasks and your team’s availability, allowing you to plan and allocate work efficiently.
You can move tasks from the Unscheduled Tasks grid onto the calendar to schedule them, and then adjust dates and assignments by dragging and dropping tasks directly on the calendar.
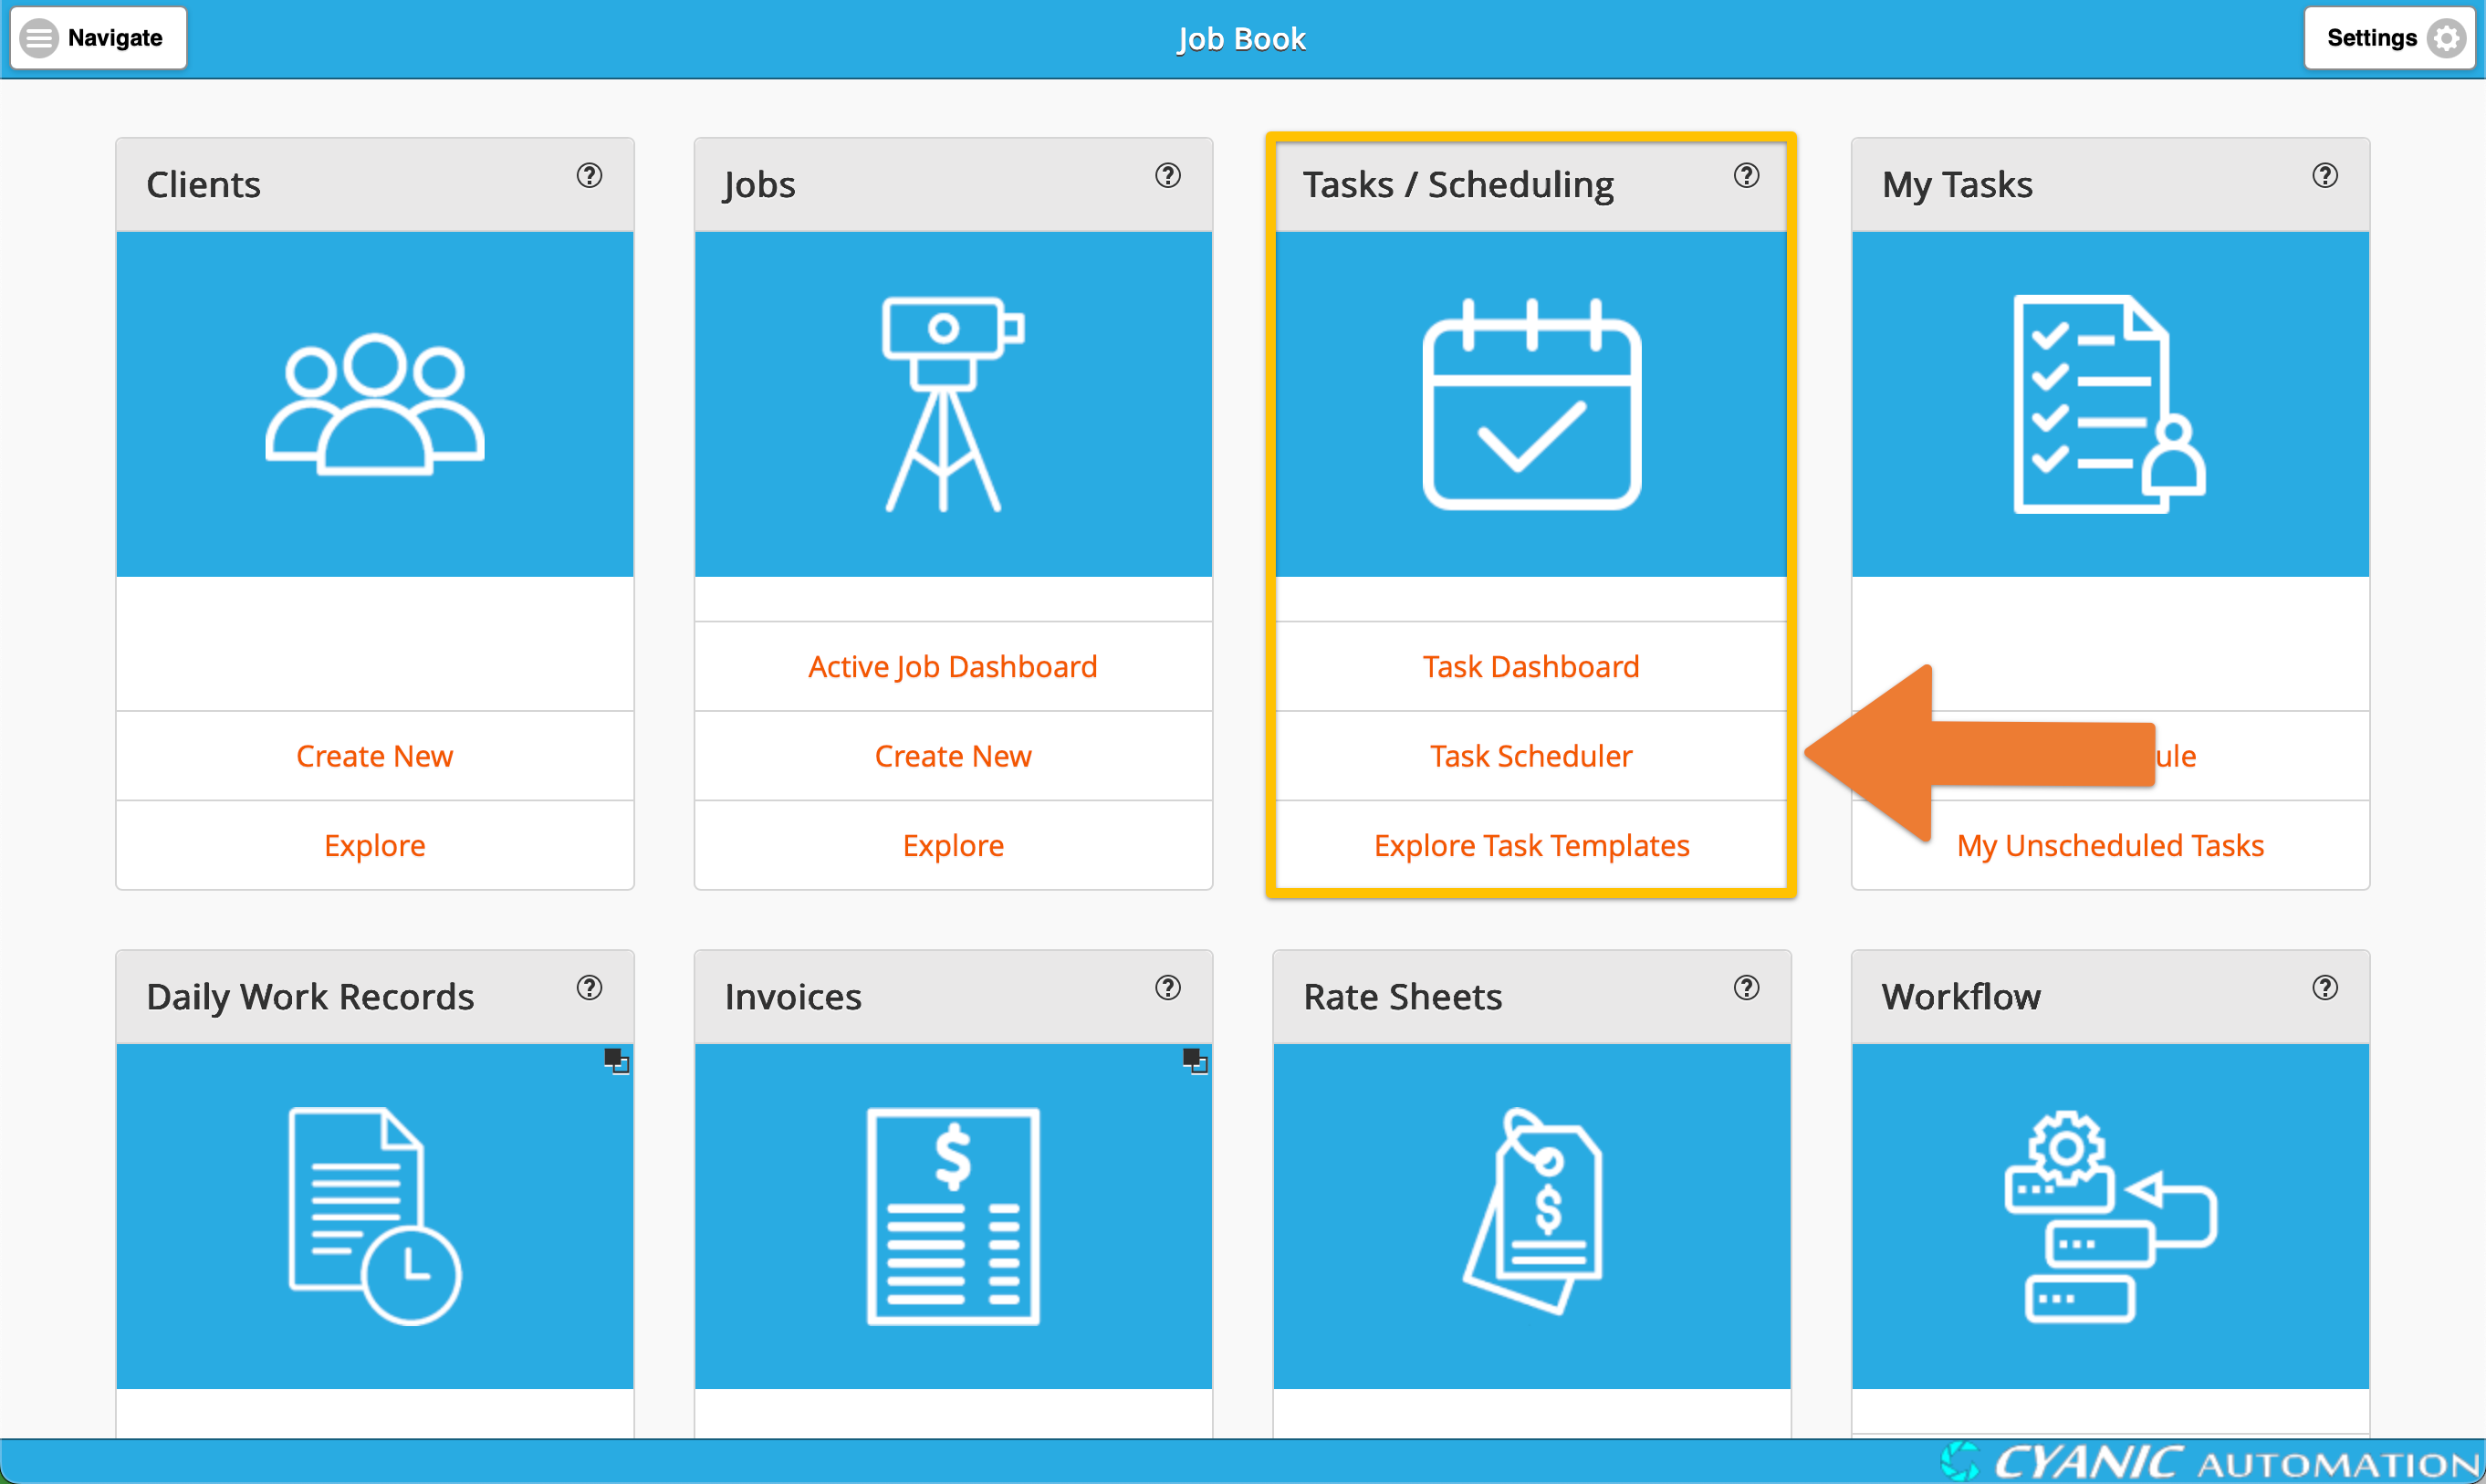
Navigating to the Task Scheduler
You can access the scheduler directly from your main dashboard.
- From the dashboard, find the Tasks / Scheduling card.
- Click the Task Scheduler link to open the scheduling view.
Understanding the Layout
The Task Scheduler is composed of two primary components: the Unscheduled Tasks grid at the top and the Schedule Calendar below it.
- Unscheduled Tasks Grid: A list of all tasks that are ready to be scheduled but have not yet been assigned a date or team member.
- Schedule Calendar: A calendar view that displays scheduled tasks for each employee, giving you a clear picture of who is working on what and when.
The Unscheduled Tasks Grid
This grid lists all tasks from your projects that have been marked as “schedulable” but haven’t been placed on the calendar yet.
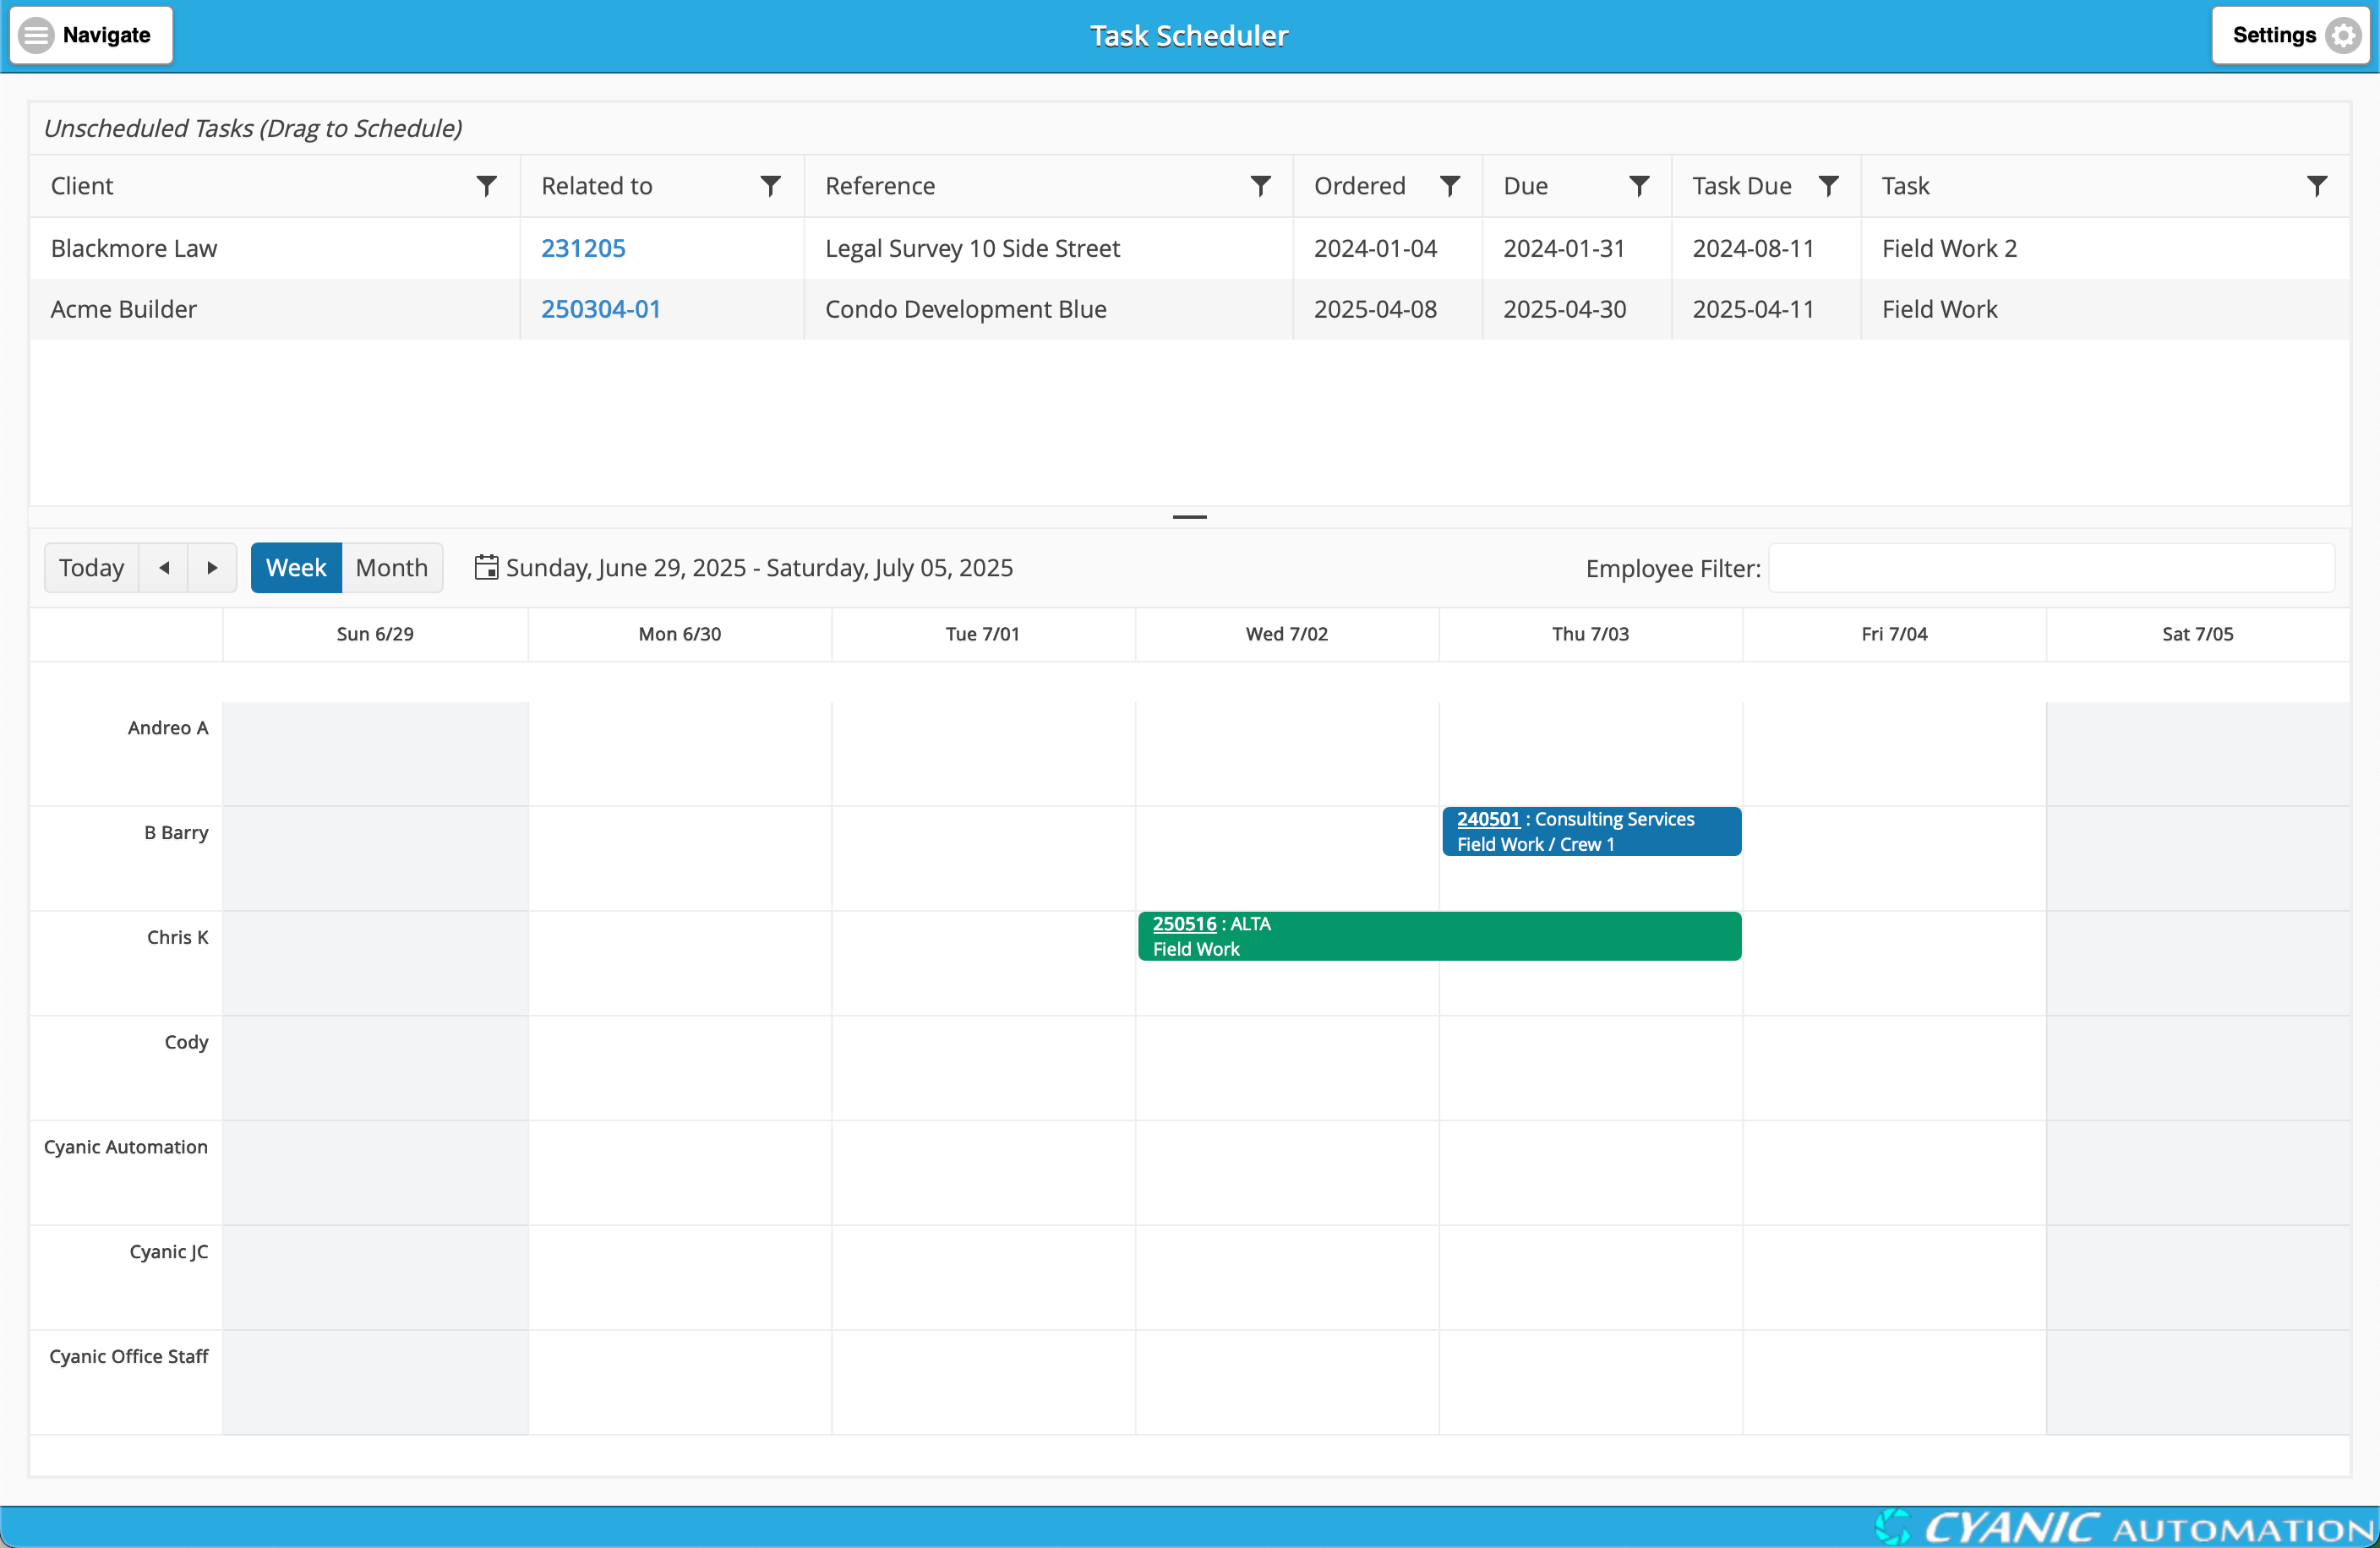
The grid provides the following information:
- Client: The client associated with the task’s project.
- Related to: A clickable link to the project, identified by its Job Number.
- Reference: The Project Name for quick identification.
- Ordered: The date the project was ordered.
- Due: The project’s overall due date.
- Task Due: The specific due date for the task, if one was set in the Task Plan.
You can sort the list by clicking on any column header or filter it by clicking the filter icon in the header.
When you click the filter icon, a menu will appear with options to help you narrow down the list. You can type in a value to search for, and the grid will show only the tasks that match. The filter menu also provides a list of operators to help you refine your search, such as “Contains,” “Starts with,” and “Is equal to.”
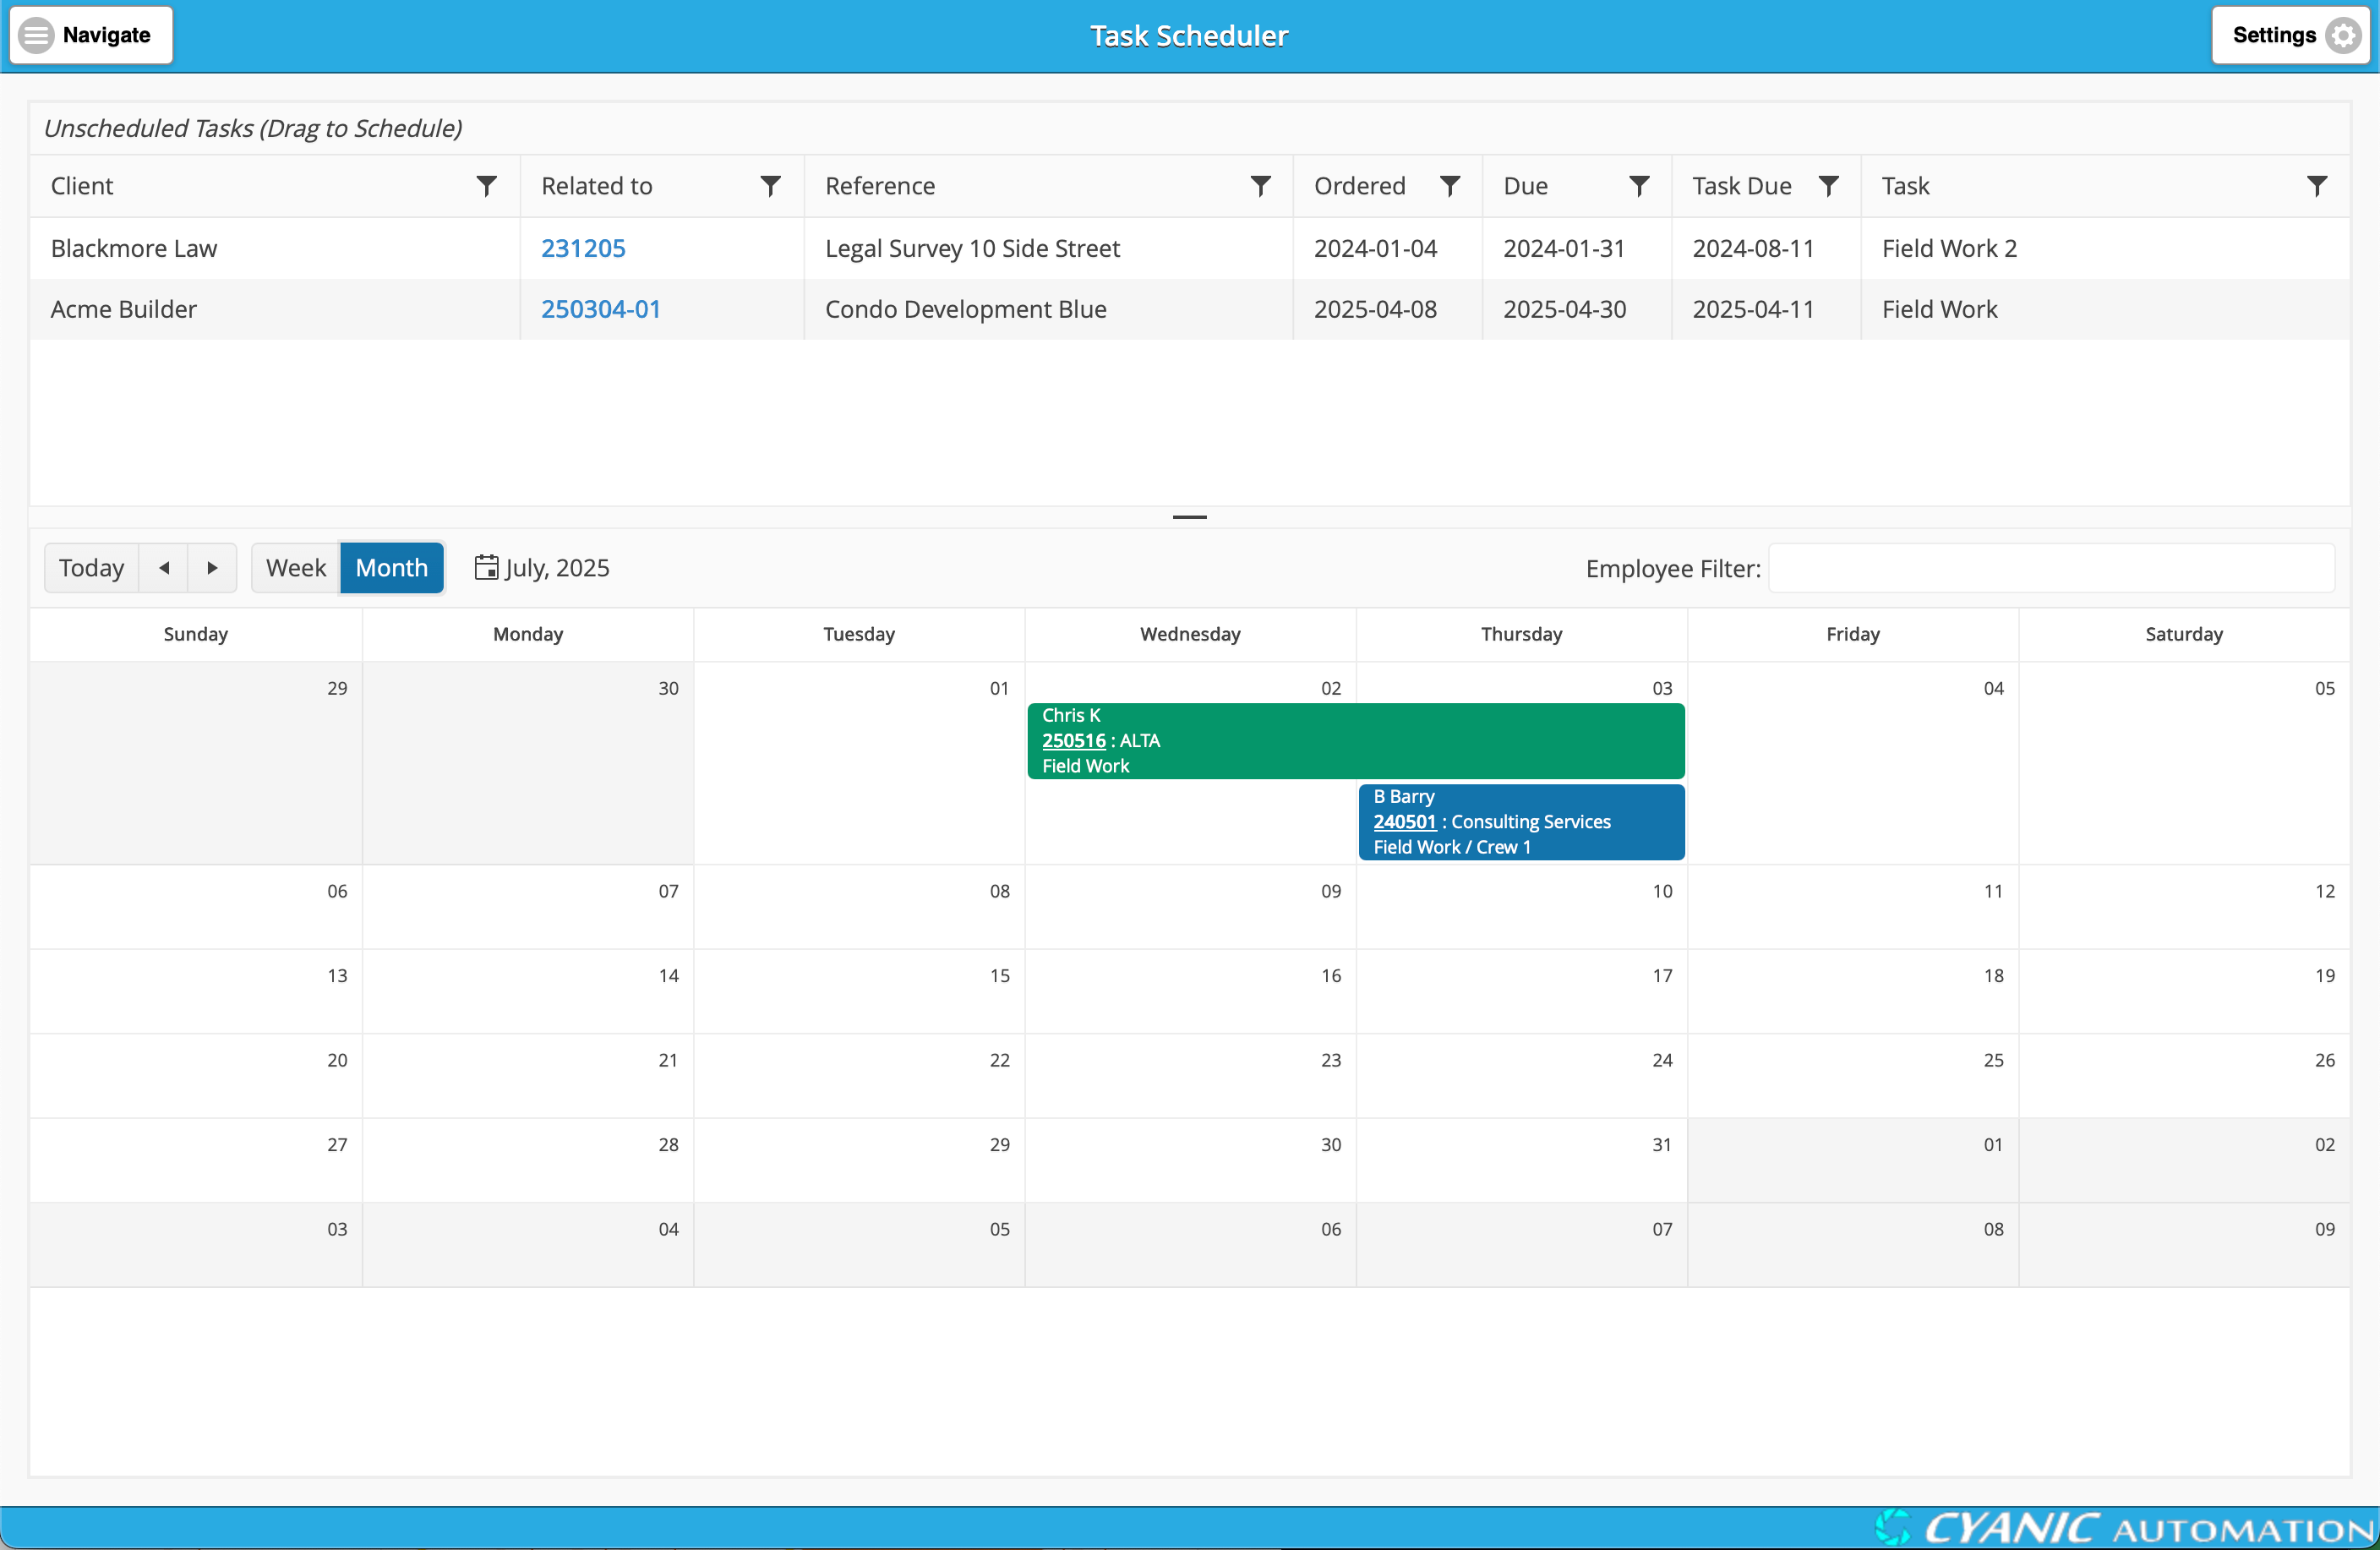
The Schedule Calendar
The calendar displays all the tasks that have been scheduled for your team. By default, it opens in a weekly view, with each team member having their own row showing their assigned tasks for the week.
You can navigate the calendar using the following controls:
- Forward/Backward: Use the < and > buttons to move one week or month at a time.
- Change View: Switch between Week and Month views by clicking the corresponding button.
- Go to Today: Click the Today button to jump back to the current date.
- Select a Date: Click the calendar icon to open a date picker and select a specific date to view.
Tasks on the calendar are color-coded to indicate their status:
- Not Started: Blue
- In Progress: Orange
- Completed: Green
Scheduling a Task
To schedule a task, you simply drag it from the Unscheduled Tasks grid and drop it onto the calendar.
- Find the task you want to schedule in the Unscheduled Tasks grid.
- Click and hold the task’s row.
- Drag the task down to the Schedule Calendar.
- Drop the task on the desired date in the row of the employee you want to assign it to.
- Note: Scheduling by dragging and dropping only works when the calendar is in the Week view.
Modifying a Scheduled Task
Once a task is on the calendar, you can easily adjust its schedule or assignment.
Reschedule or Reassign: In the Week view, drag and drop the task to a new date or a different employee’s row.
Reschedule in Month View: In the Month view, you can drag and drop a task to a different day.
Adjust Task Duration: To change the length of a task, hover over its start or end edge until the cursor changes, then click and drag to extend or shorten it.
Note: In the week view, it is not possible to extend a task beyond the current week. To do this, use the Scheduled Task Details panel.
Unschedule a Task: Hover over the task to reveal an x button in the corner. Click the x and confirm to remove the task from the calendar and return it to the Unscheduled Tasks grid.
Editing Task Details
For more detailed changes, you can open the task details panel.
- Double-click any scheduled task on the calendar.
- The Scheduled Task Details panel will appear.
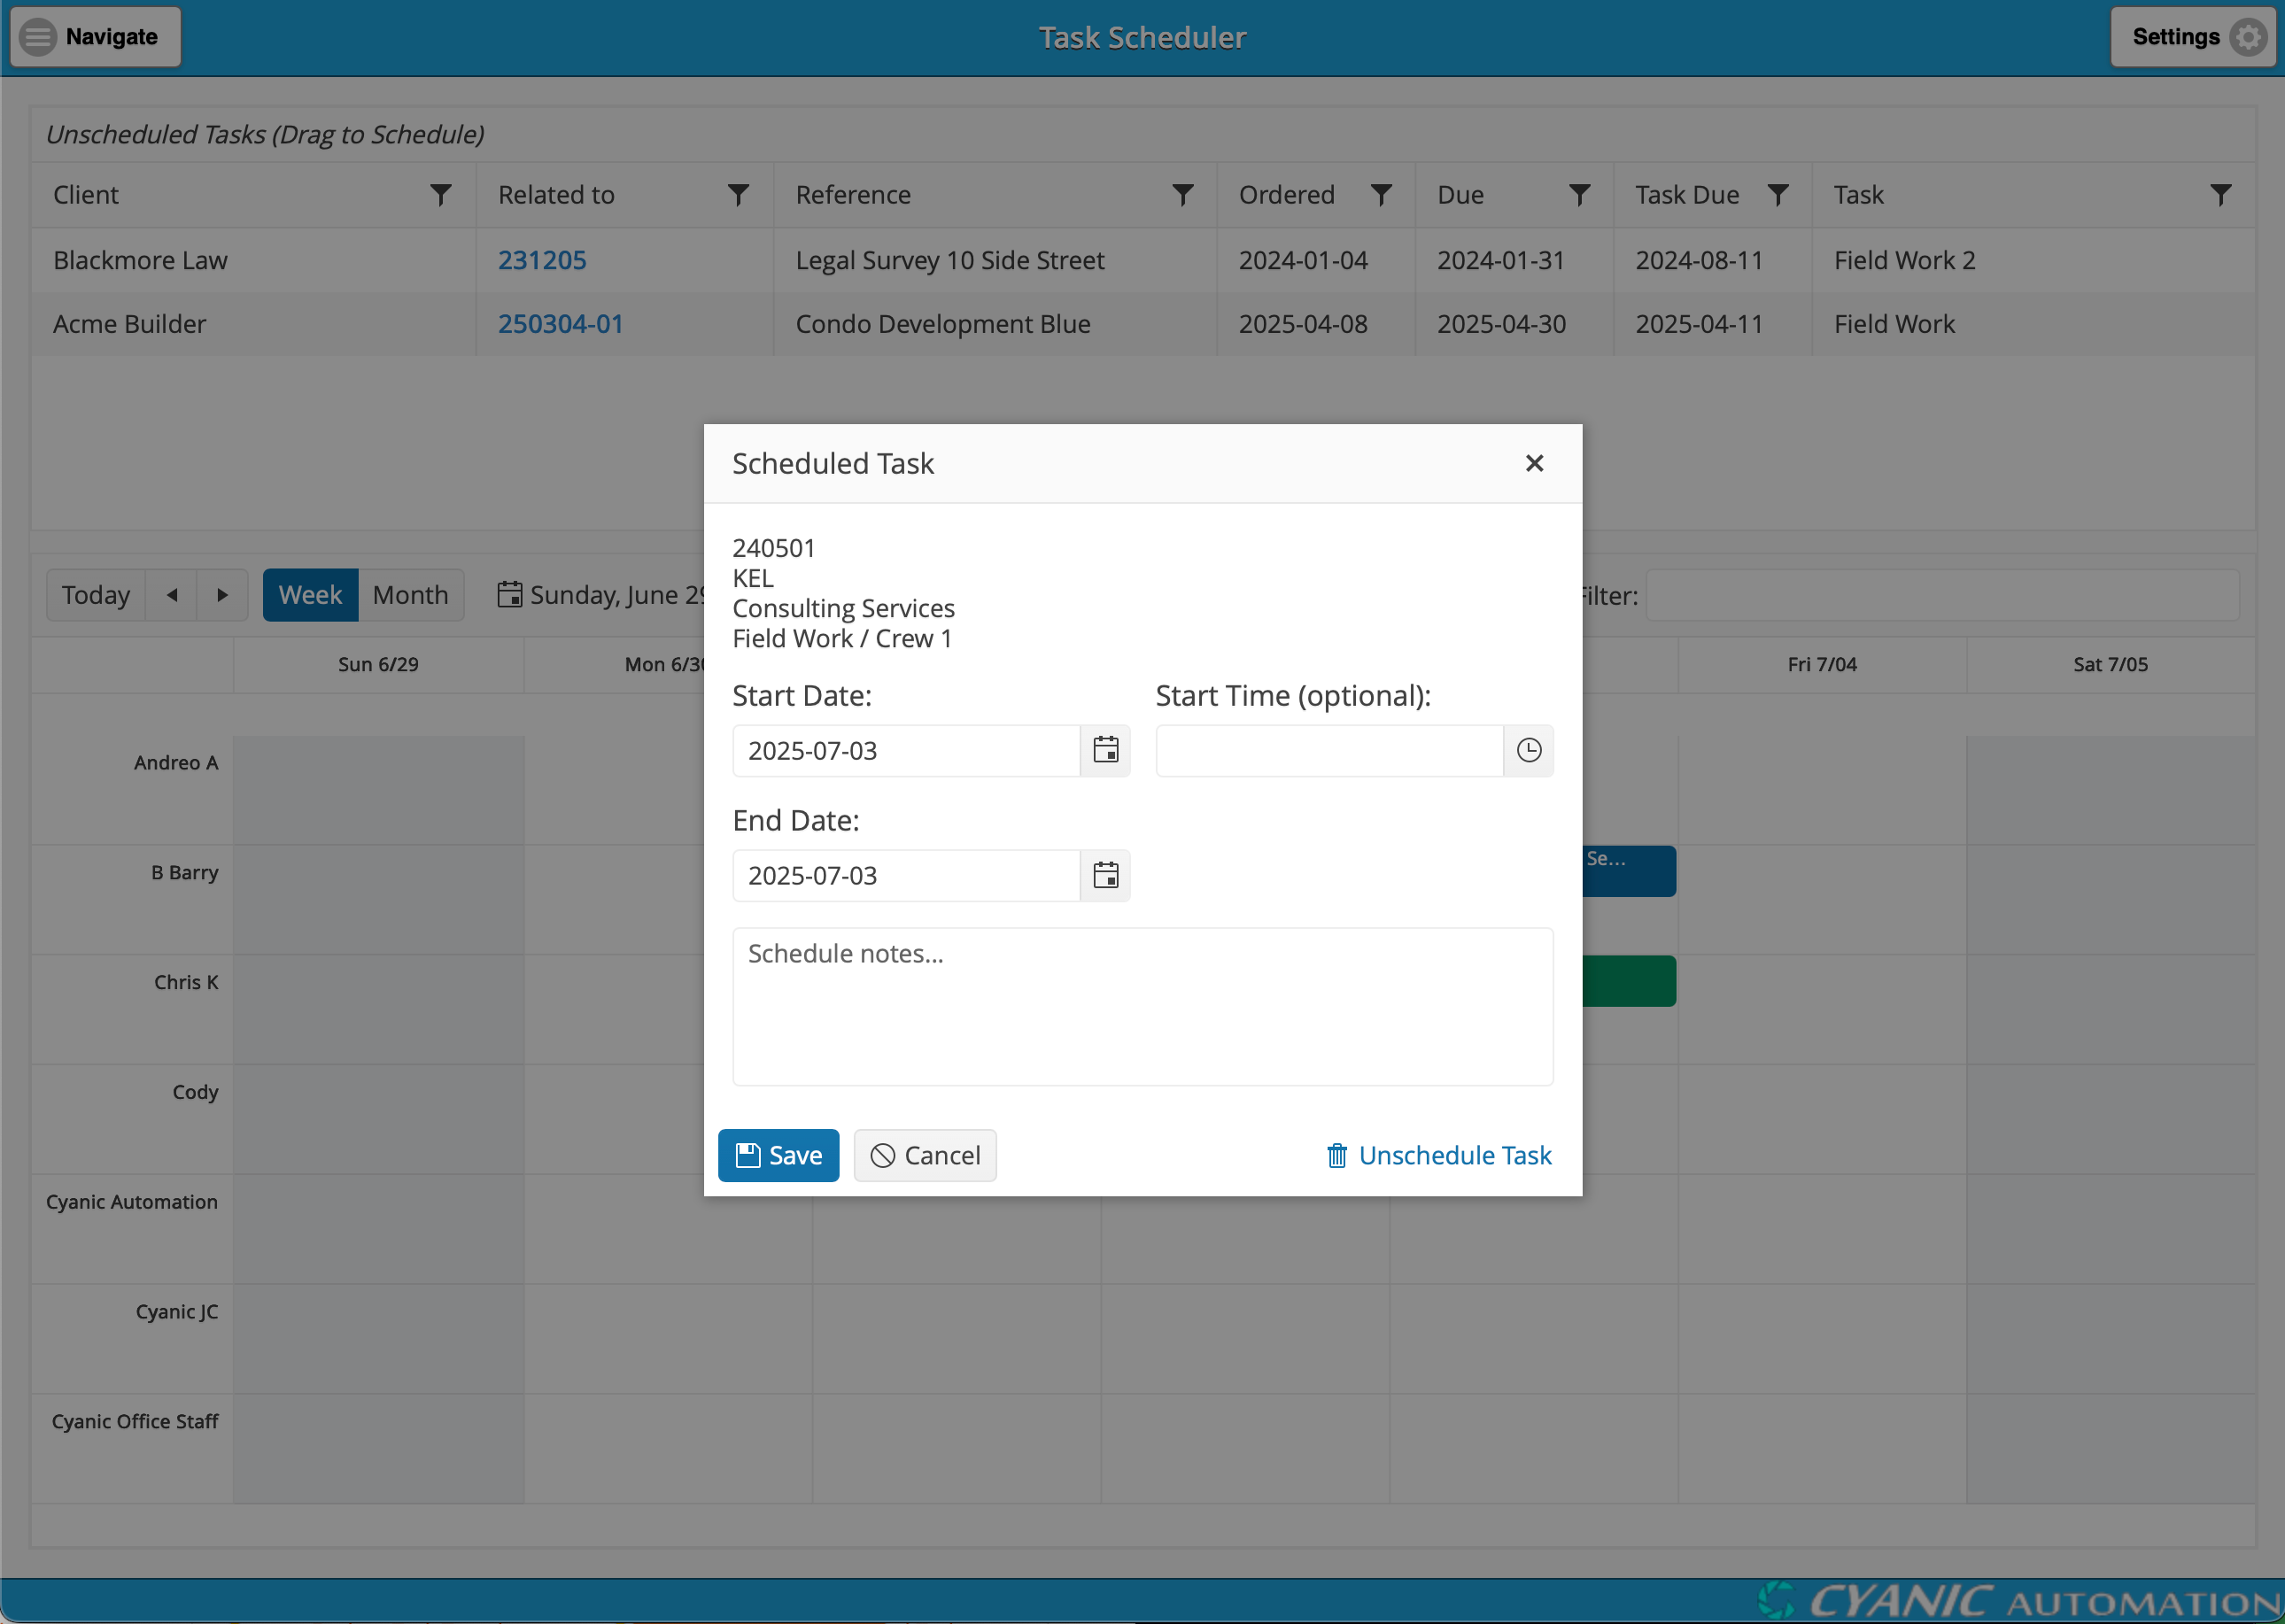
From this panel, you can:
- View a summary of the task, including the project number, client, and task name.
- Adjust the Start Date and End Date.
- Set a specific Start Time to control the order of tasks on a given day.
- Add Schedule Notes that will be visible to the assigned employee on their personal schedule.
- Unschedule the task by clicking the “Unschedule Task” button.
Click Save to apply your changes or Cancel to discard them.
Leave Tracking Integration
To help you avoid scheduling conflicts, the calendar is fully integrated with the Leave Tracking module. When an employee’s time off is approved, it automatically appears as a blocked-out period on the schedule.
This gives you a complete picture of your team’s availability, ensuring you don’t accidentally assign work to someone who is on vacation.
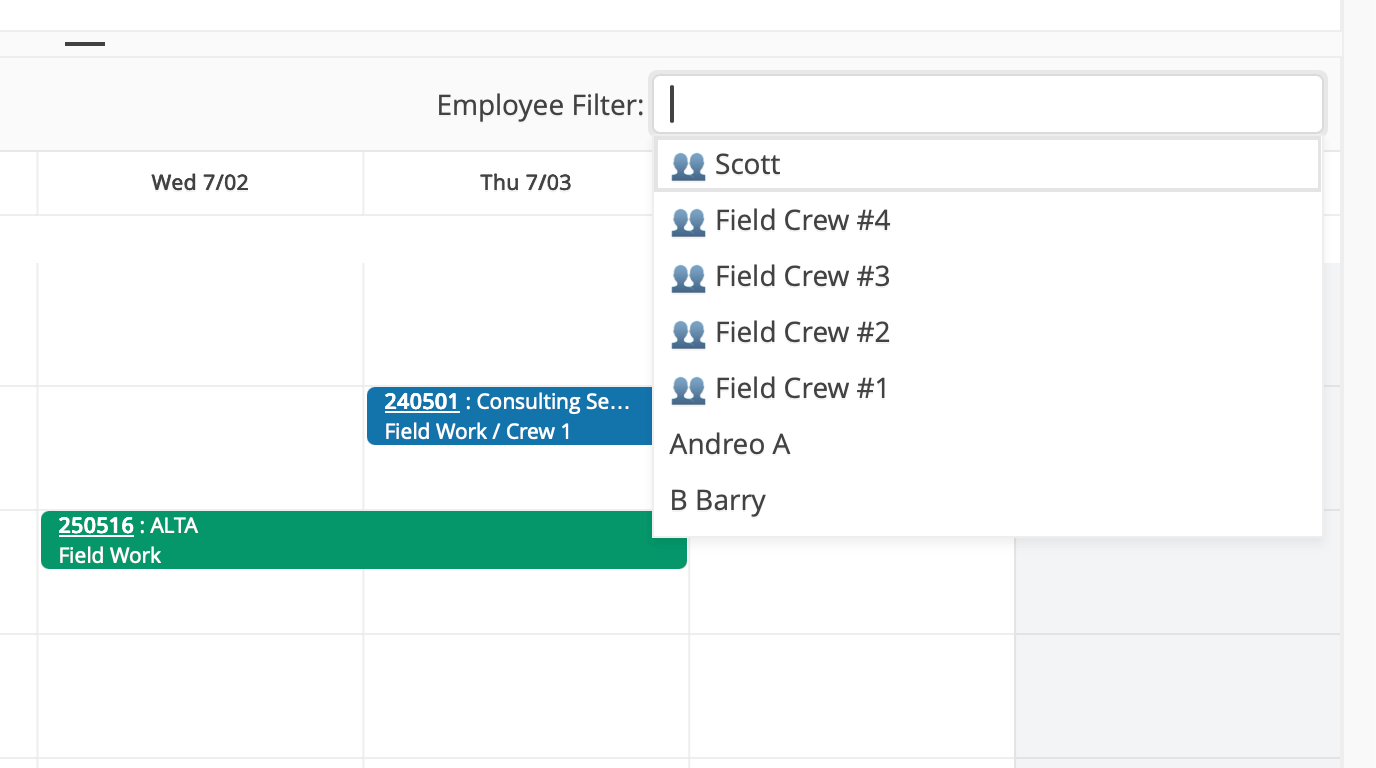
Filtering the Calendar
To help you focus on specific team members, both the week and month views can be filtered by clicking the ‘Employee Filter’ multi-select field. This allows you to narrow down the calendar view in several ways:
- By Employee: Select one or more individual employees to see only their schedules.
- By Office: Offices are listed at the top of the filter and are identified by an ‘office’ icon. Selecting an office will show schedules for all employees assigned to that location.
- By Employee Group: Below the offices, you can select predefined Employee Groups, which are marked with a ‘group’ icon. This is useful for viewing the combined schedule for a specific crew or team.
Employee groups allow you to quickly select multiple employees at once. For example, you might create groups for “Crew 1” or “Office Staff.” To manage your employee groups, go to the Settings panel (found in the top-right of the screen), select Groups, and then you can create new groups or modify existing ones by adding or removing employees.